Note: This feature is only available for the Enterprise plan databases using the on-premises version and the cloud version.
You may refer to our pricing page to know more about the differences between different Ragic plans.
If you are not on the Enterprise Plan, you can use the LDAP protocol for AD integration. However, this is only supported on on-premise databases using the Professional plan or higher. For more information, you may refer to this document.
Your users may log on to Ragic using the Single Sign-on function integrated from Active Directory after finishing the following settings.
If you would like to Add Ragic as a Non-Gallery App in Azure Active Directory and Configure SAML SSO Login, please refer to this page.
Step 1. Fill in the ADFS server location In the field “ADFS Server Location” under company settings in Ragic.

Step 2. While creating new users in AD, make sure that every user has an E-mail. This E-mail will be used as the value to verify and distinguish users on your Ragic database (Name ID).
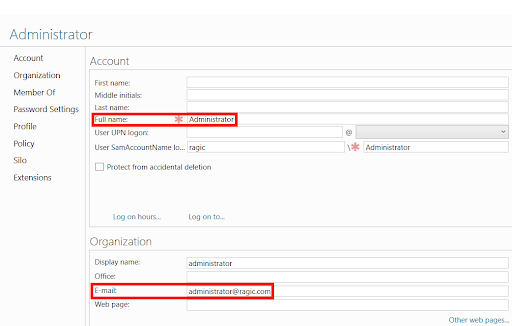
Note: The E-mails must not be an existing Ragic account in other Ragic databases.
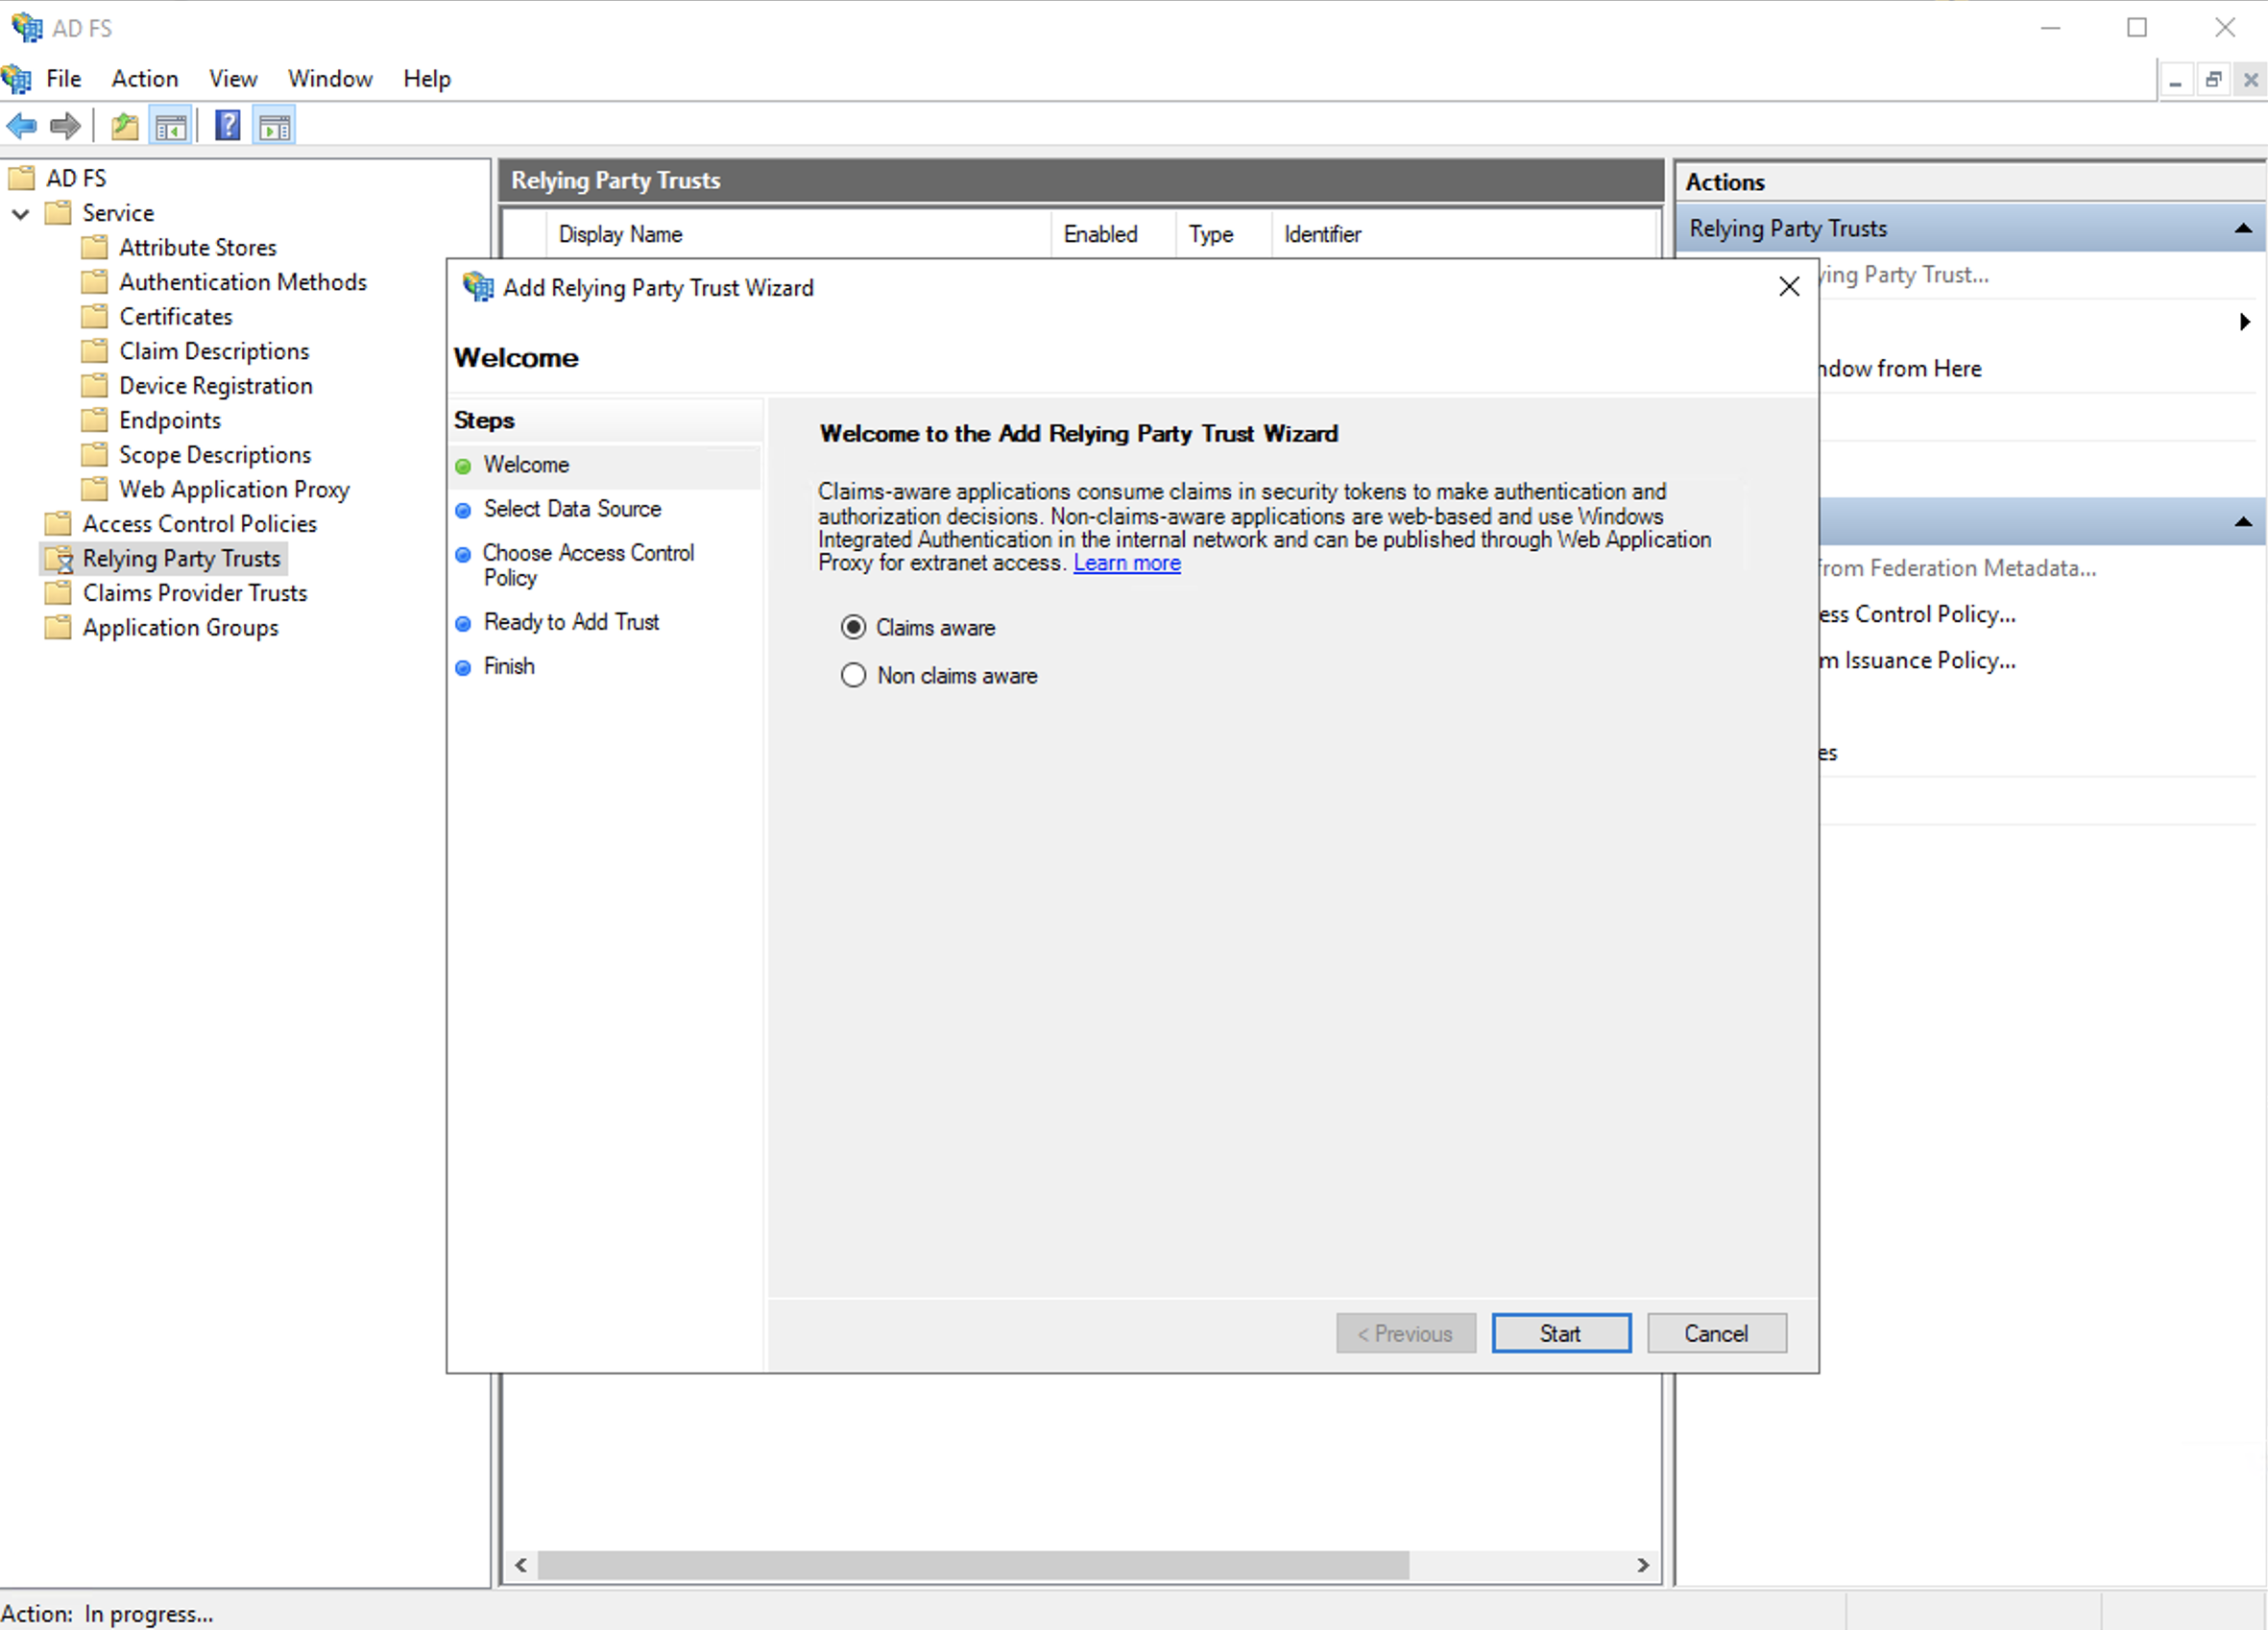
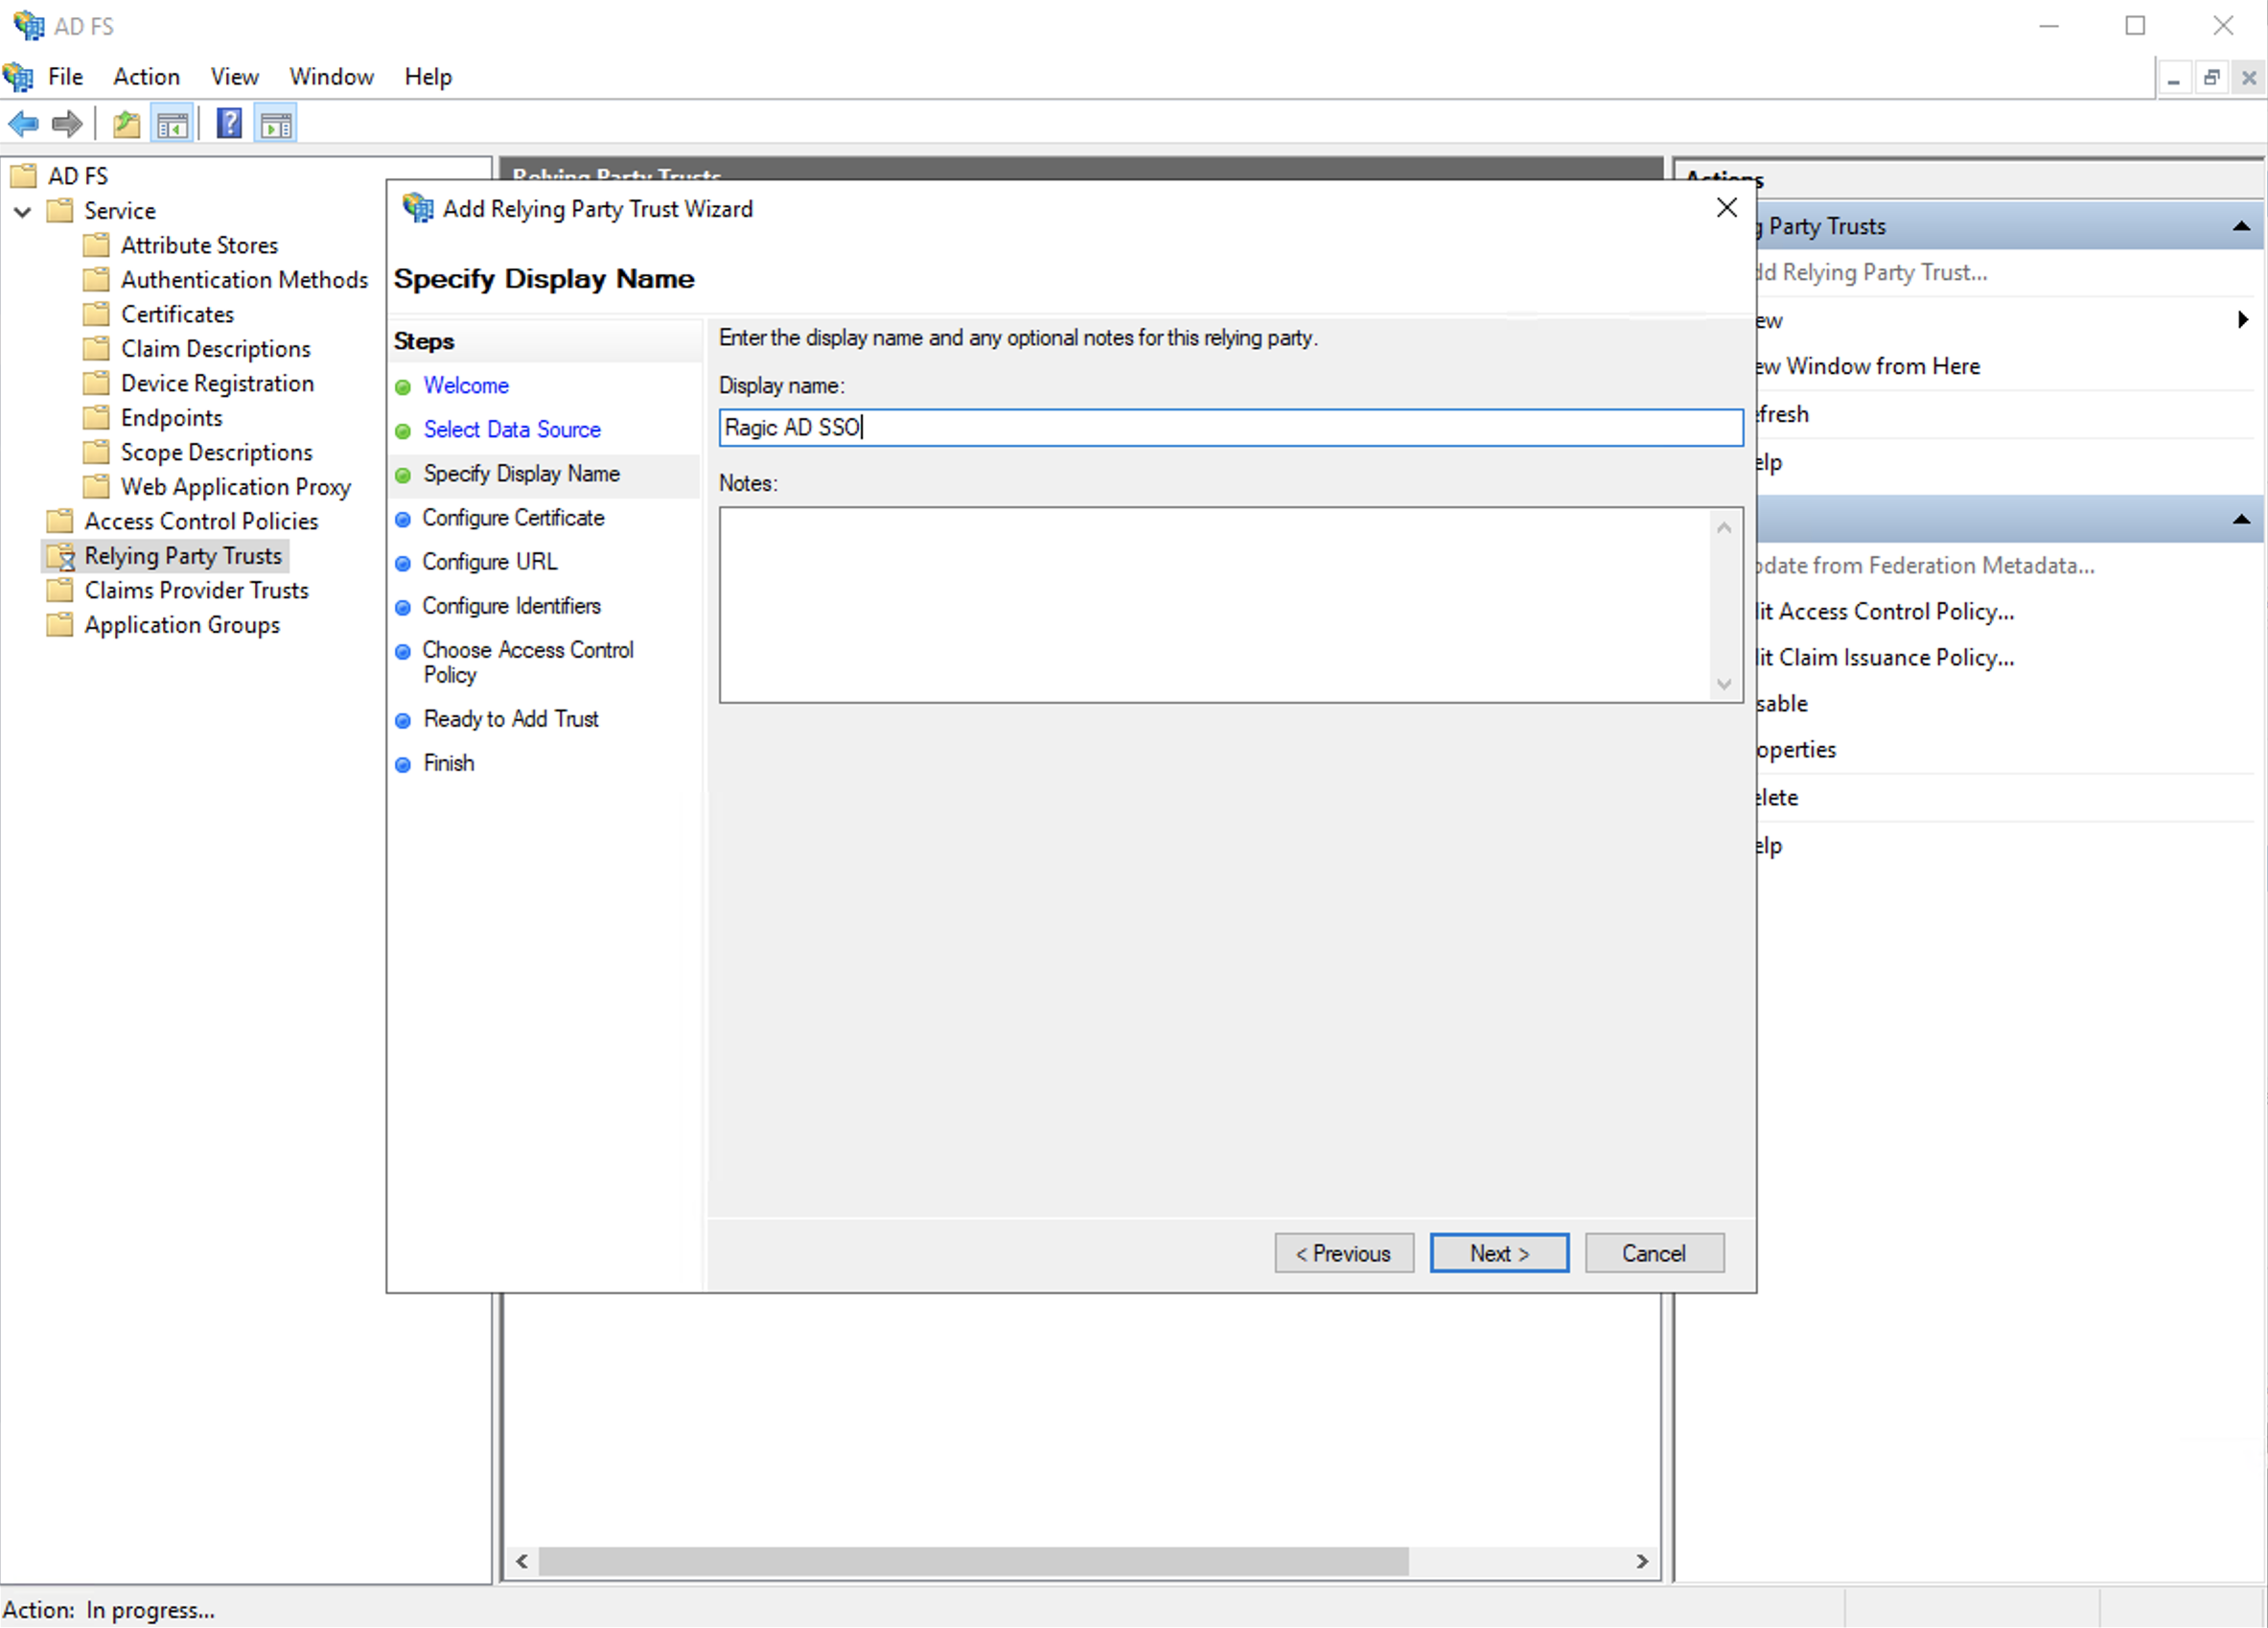
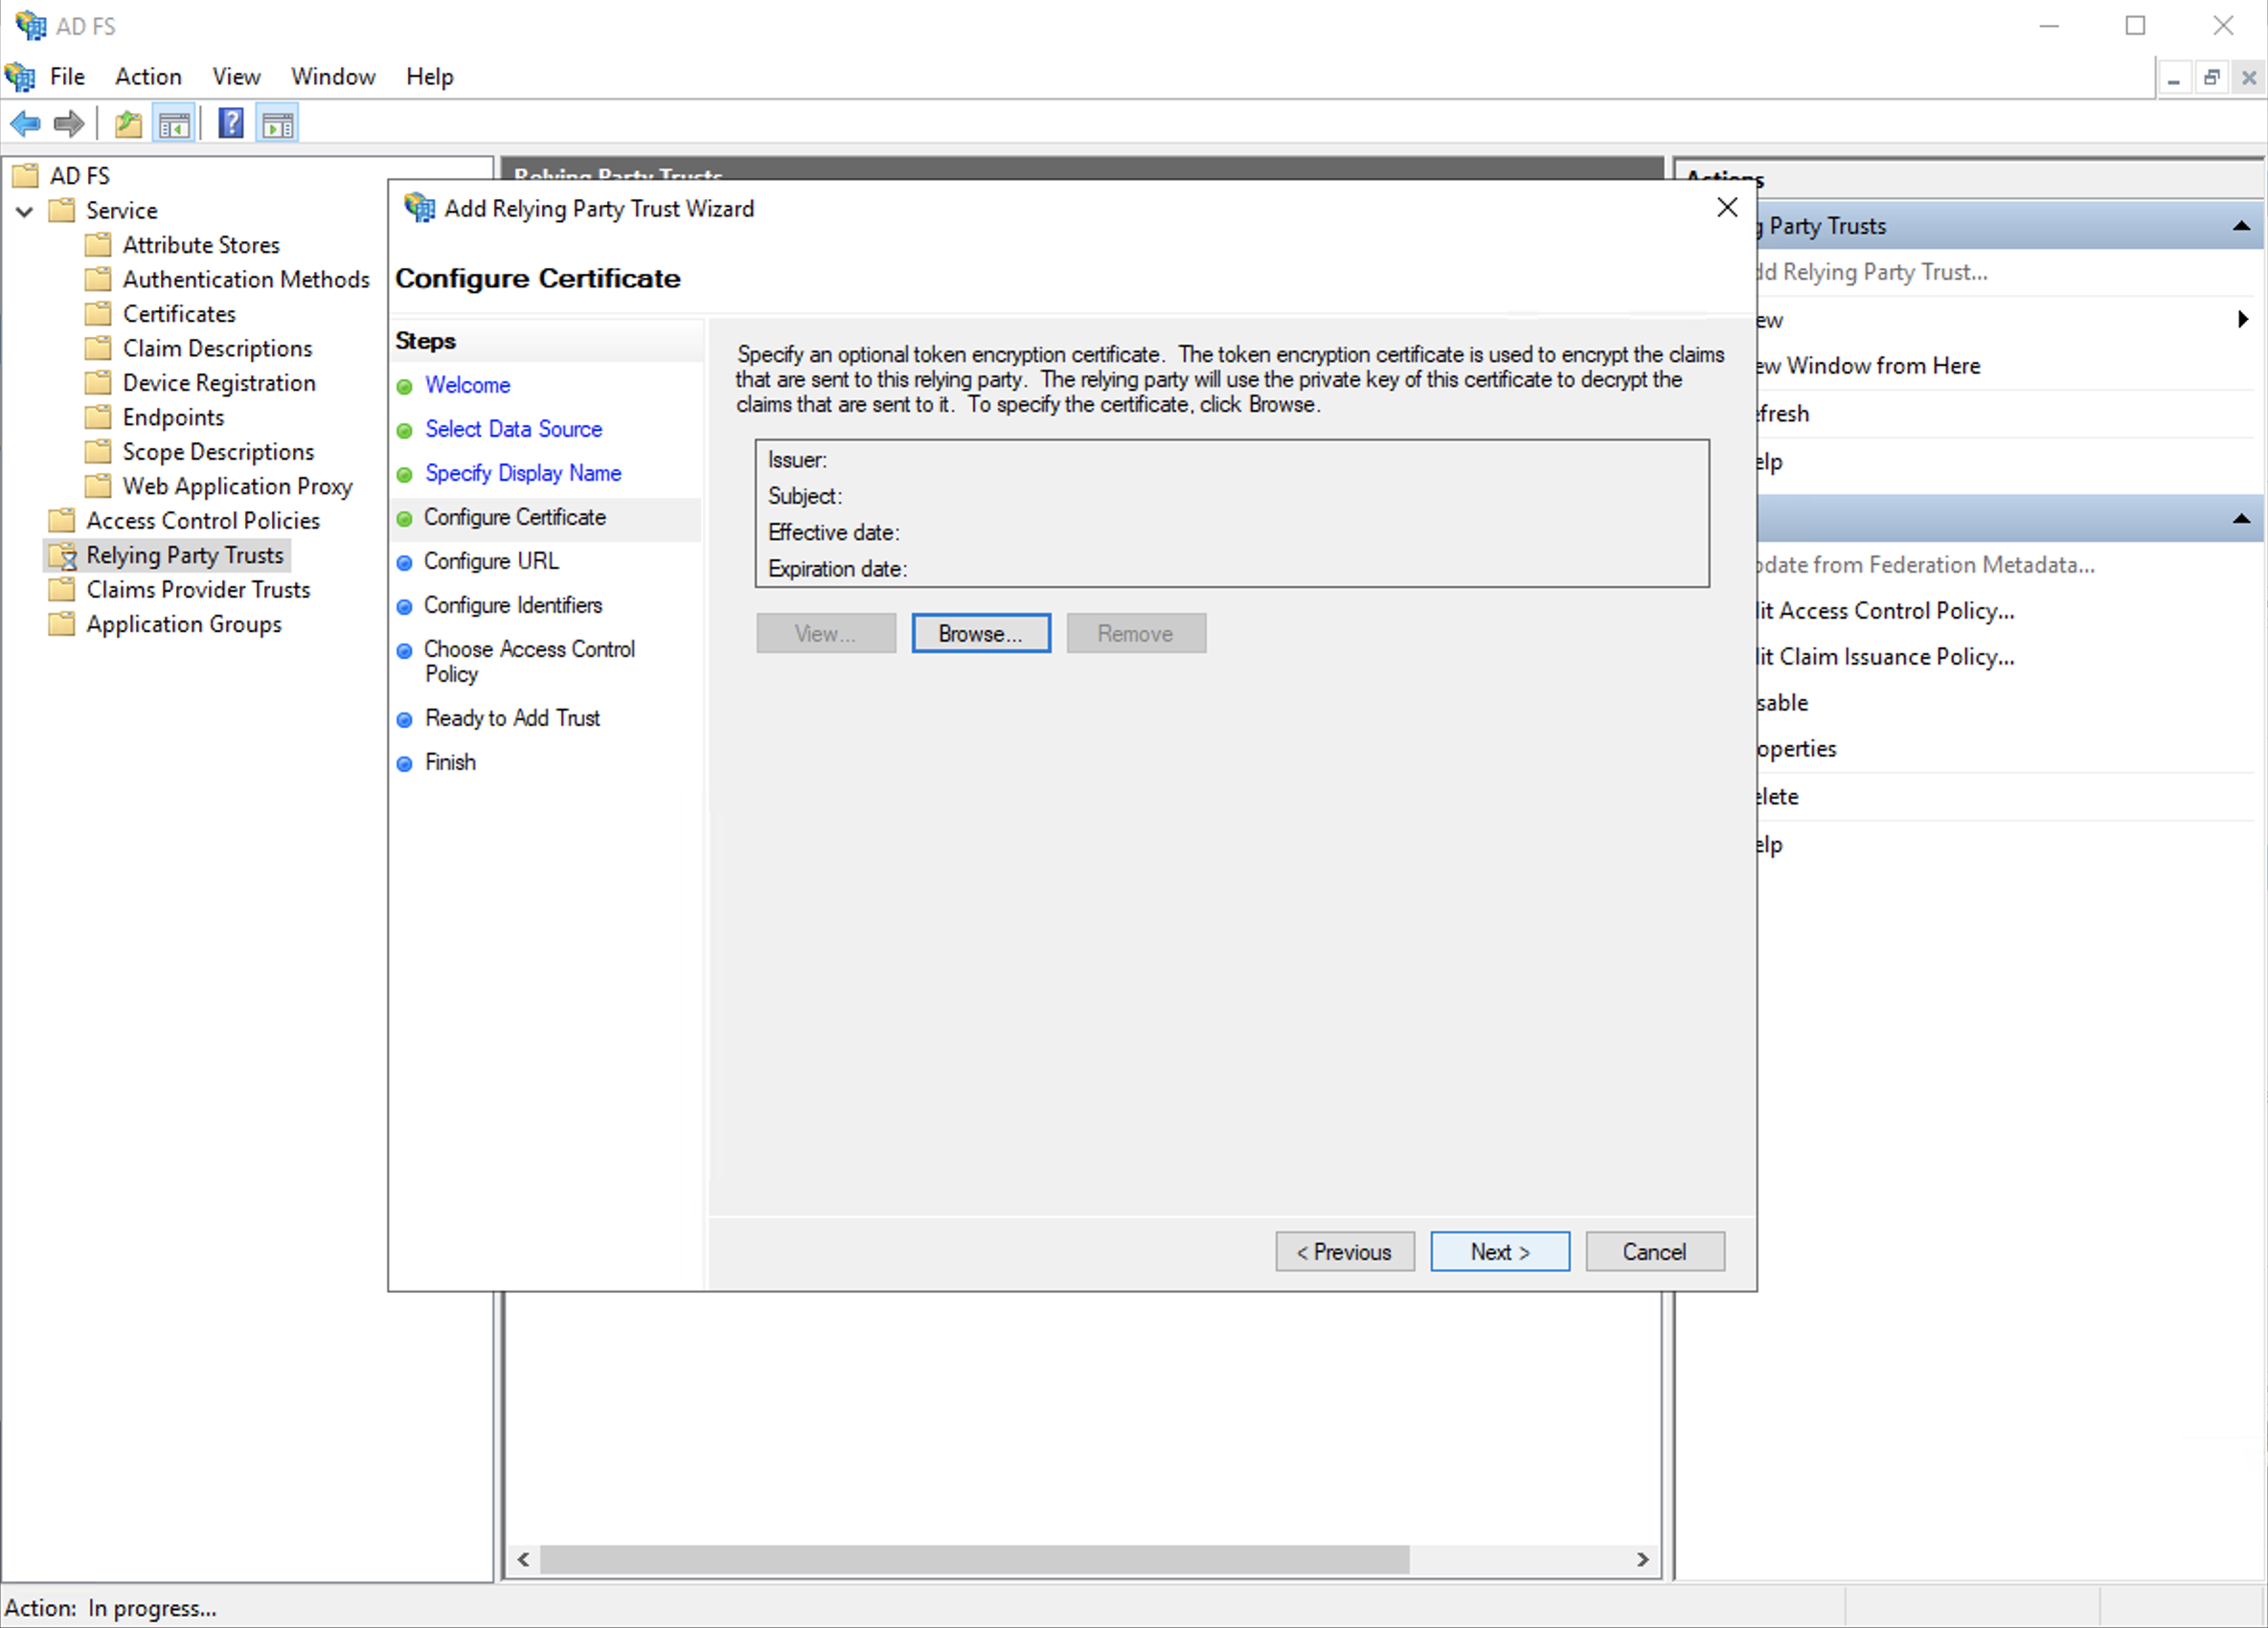
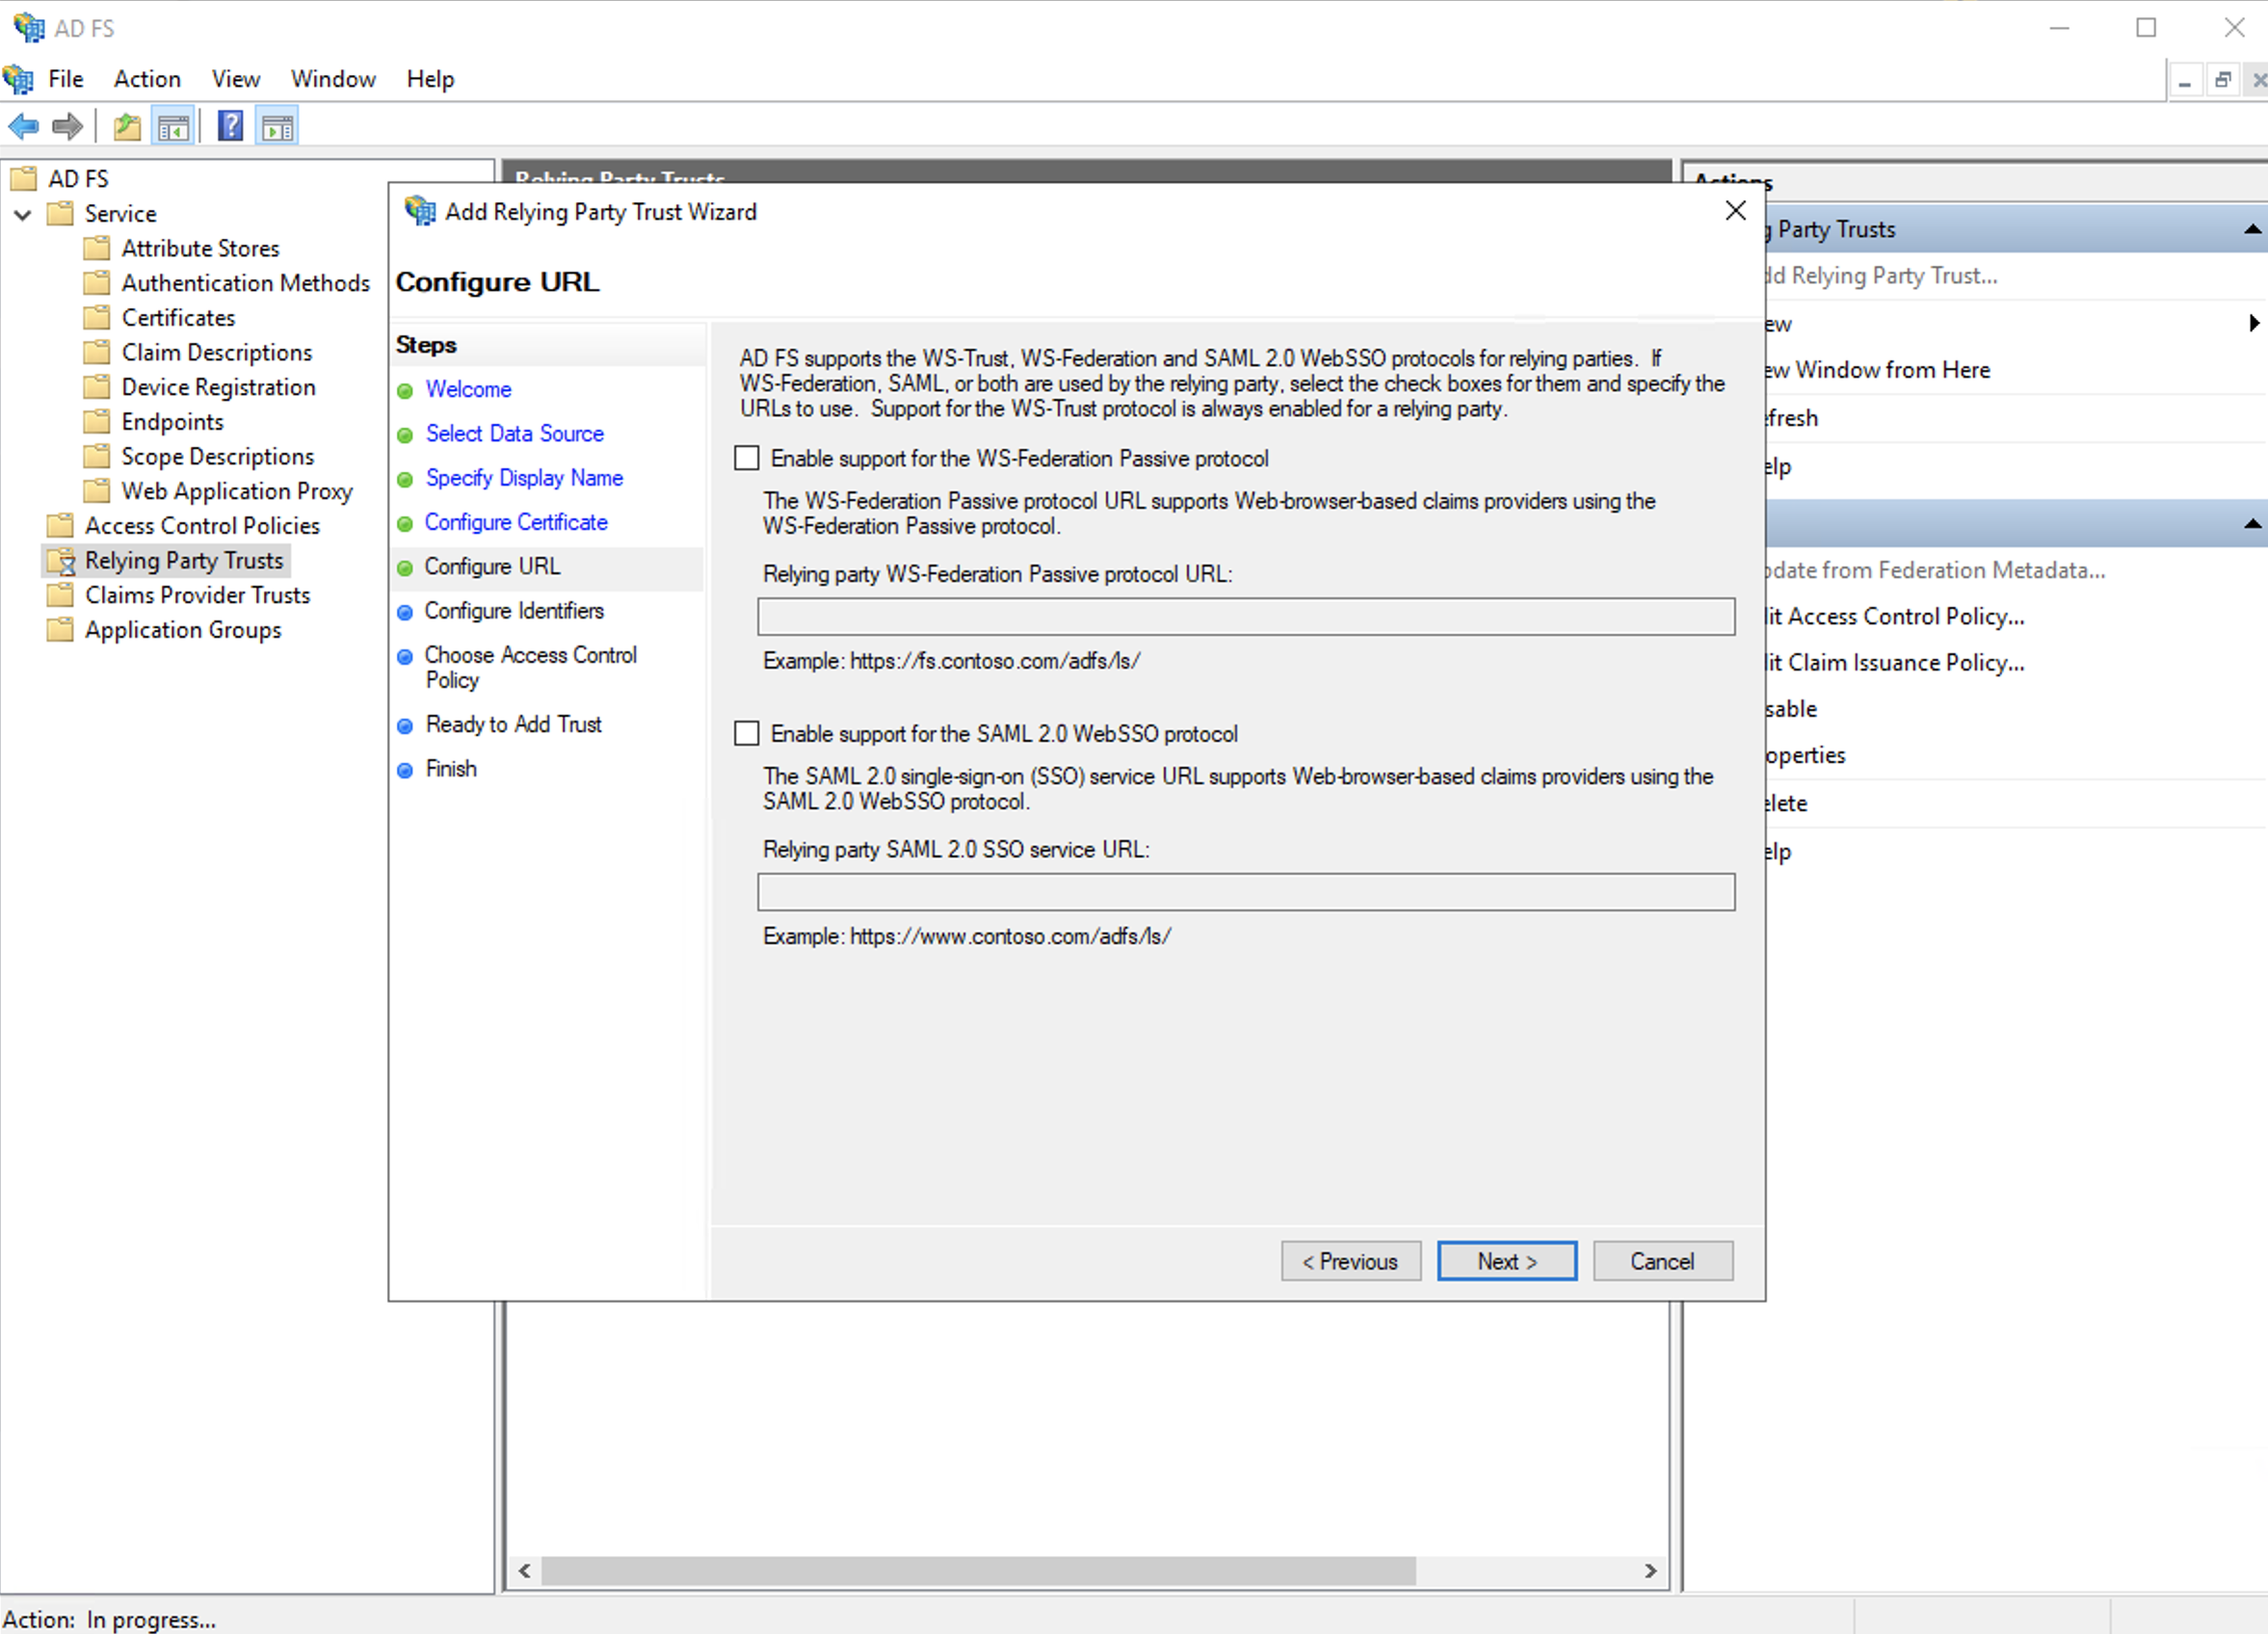
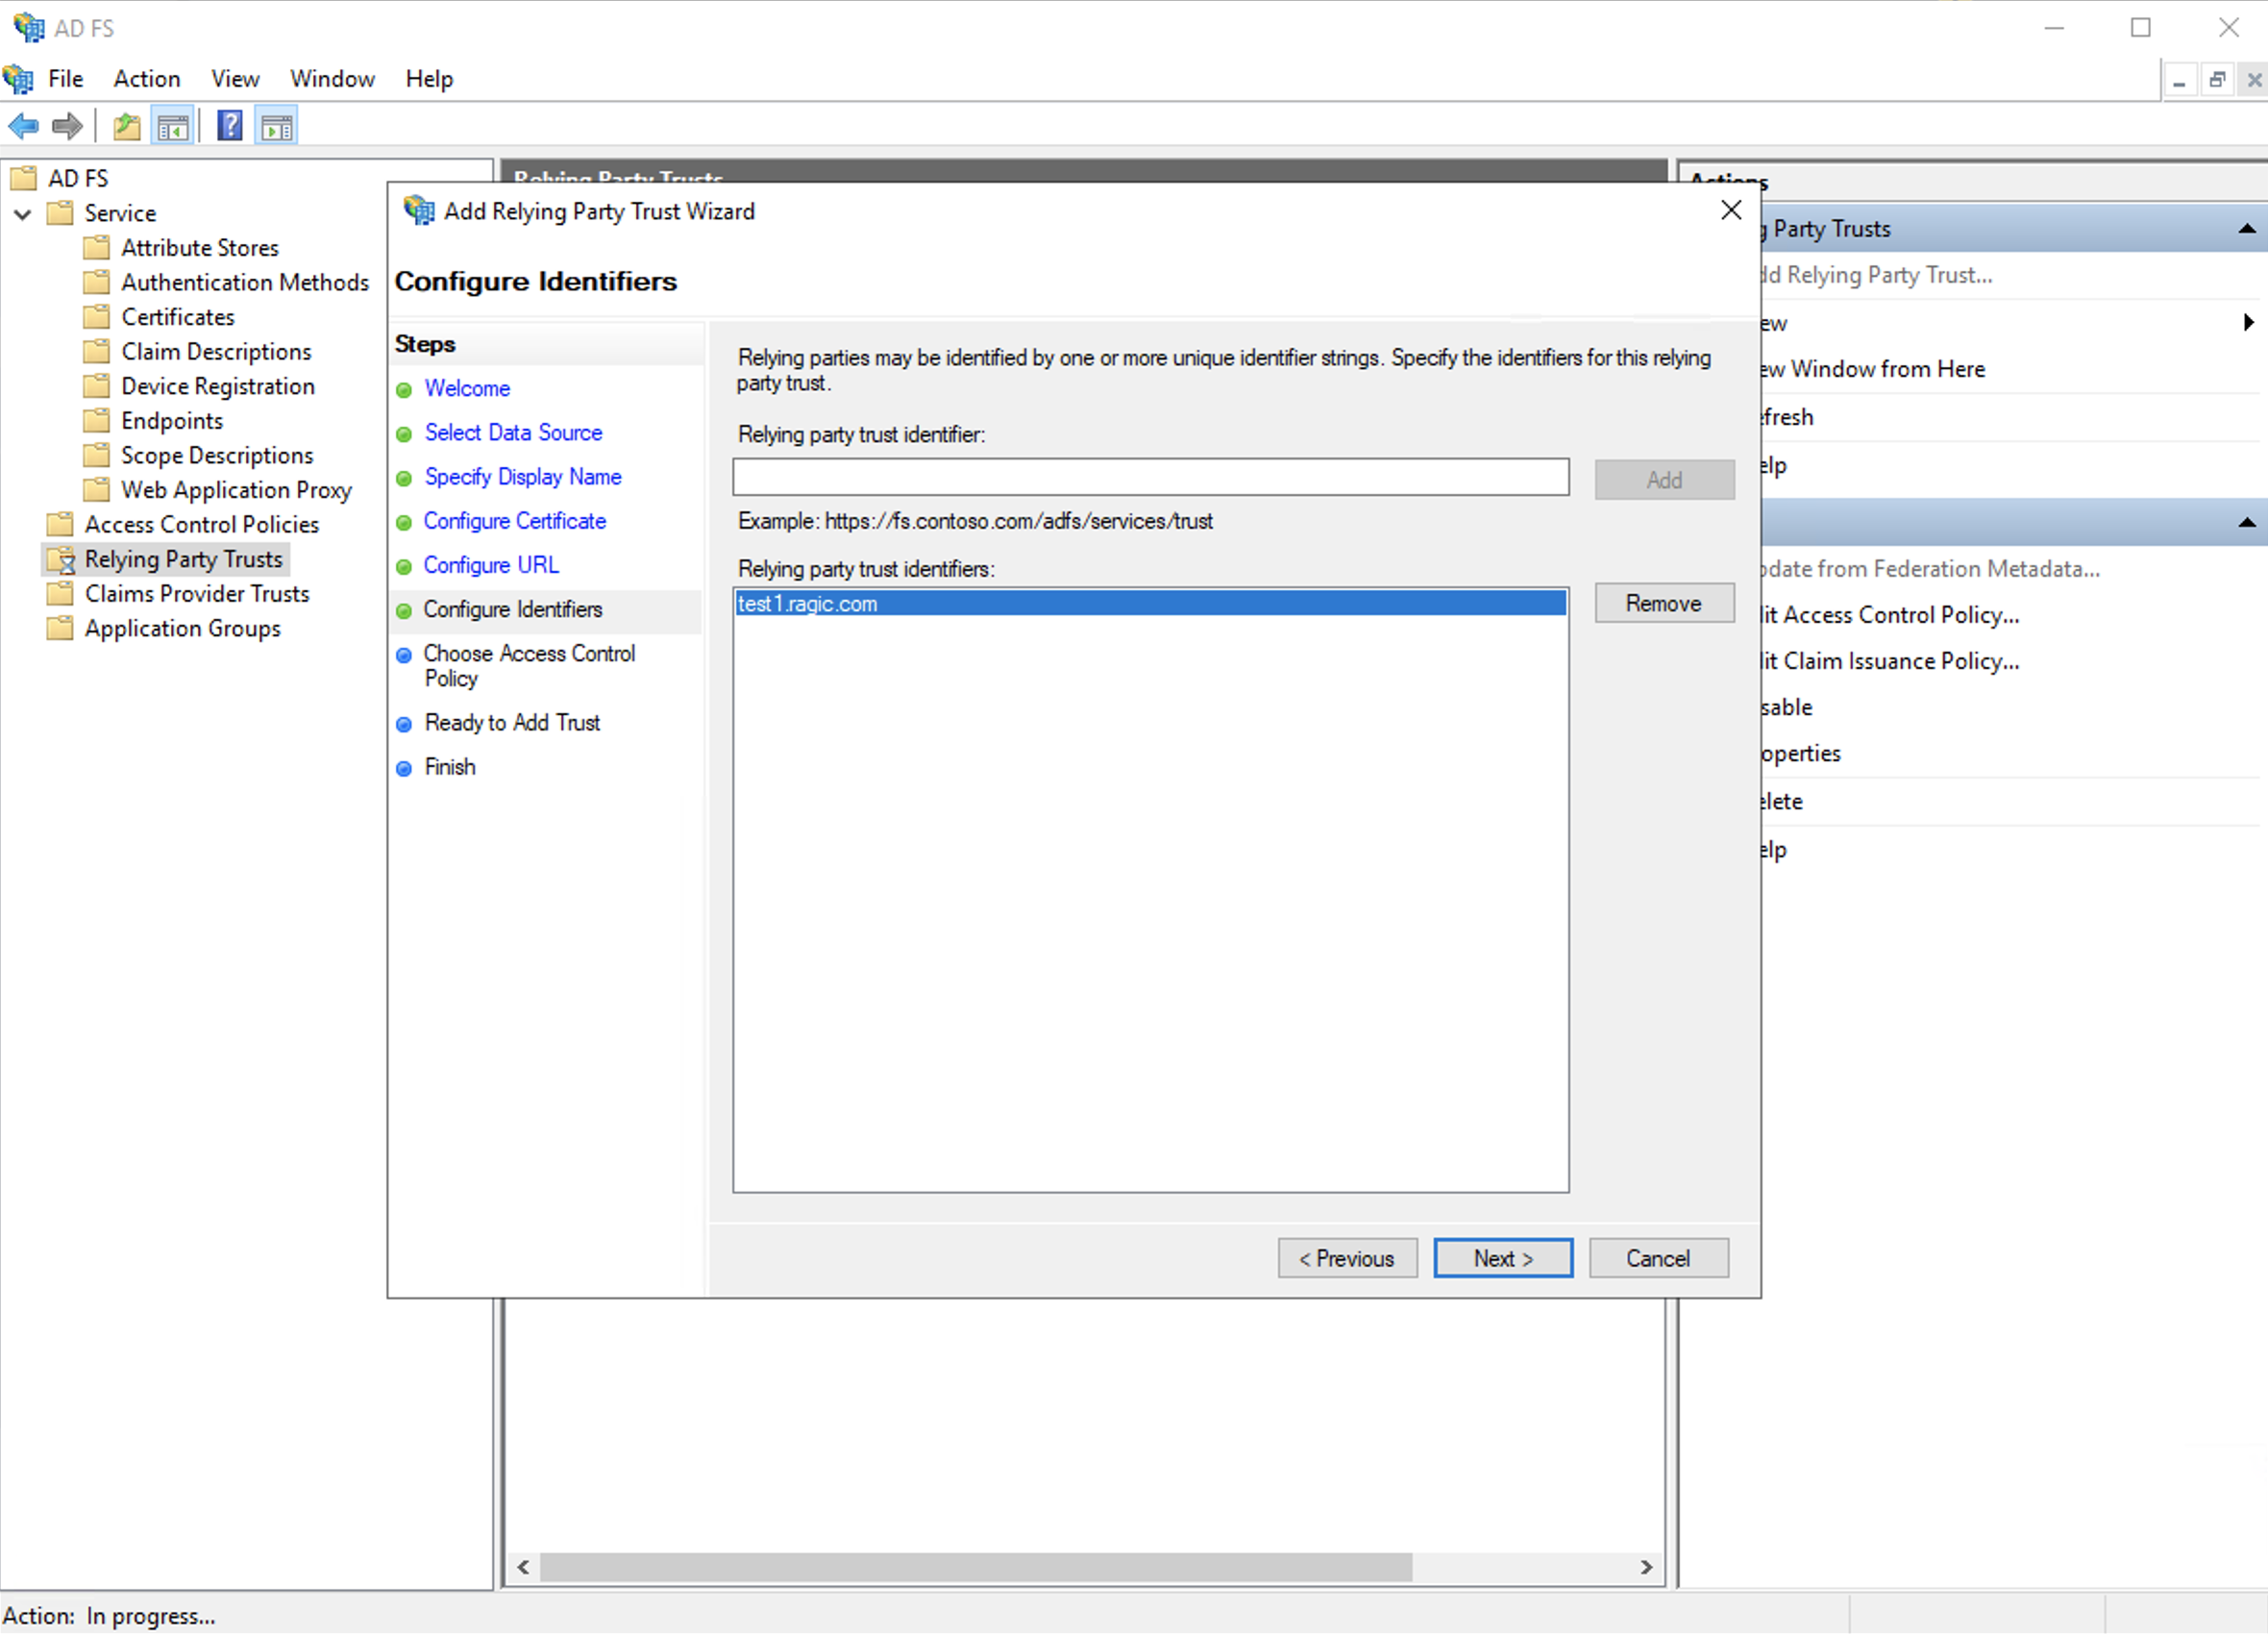
Step 3. Add relying party trust on ADFS. Please follow the following instructions correctly to add successfully.
a. Select the default option "Claim Aware".
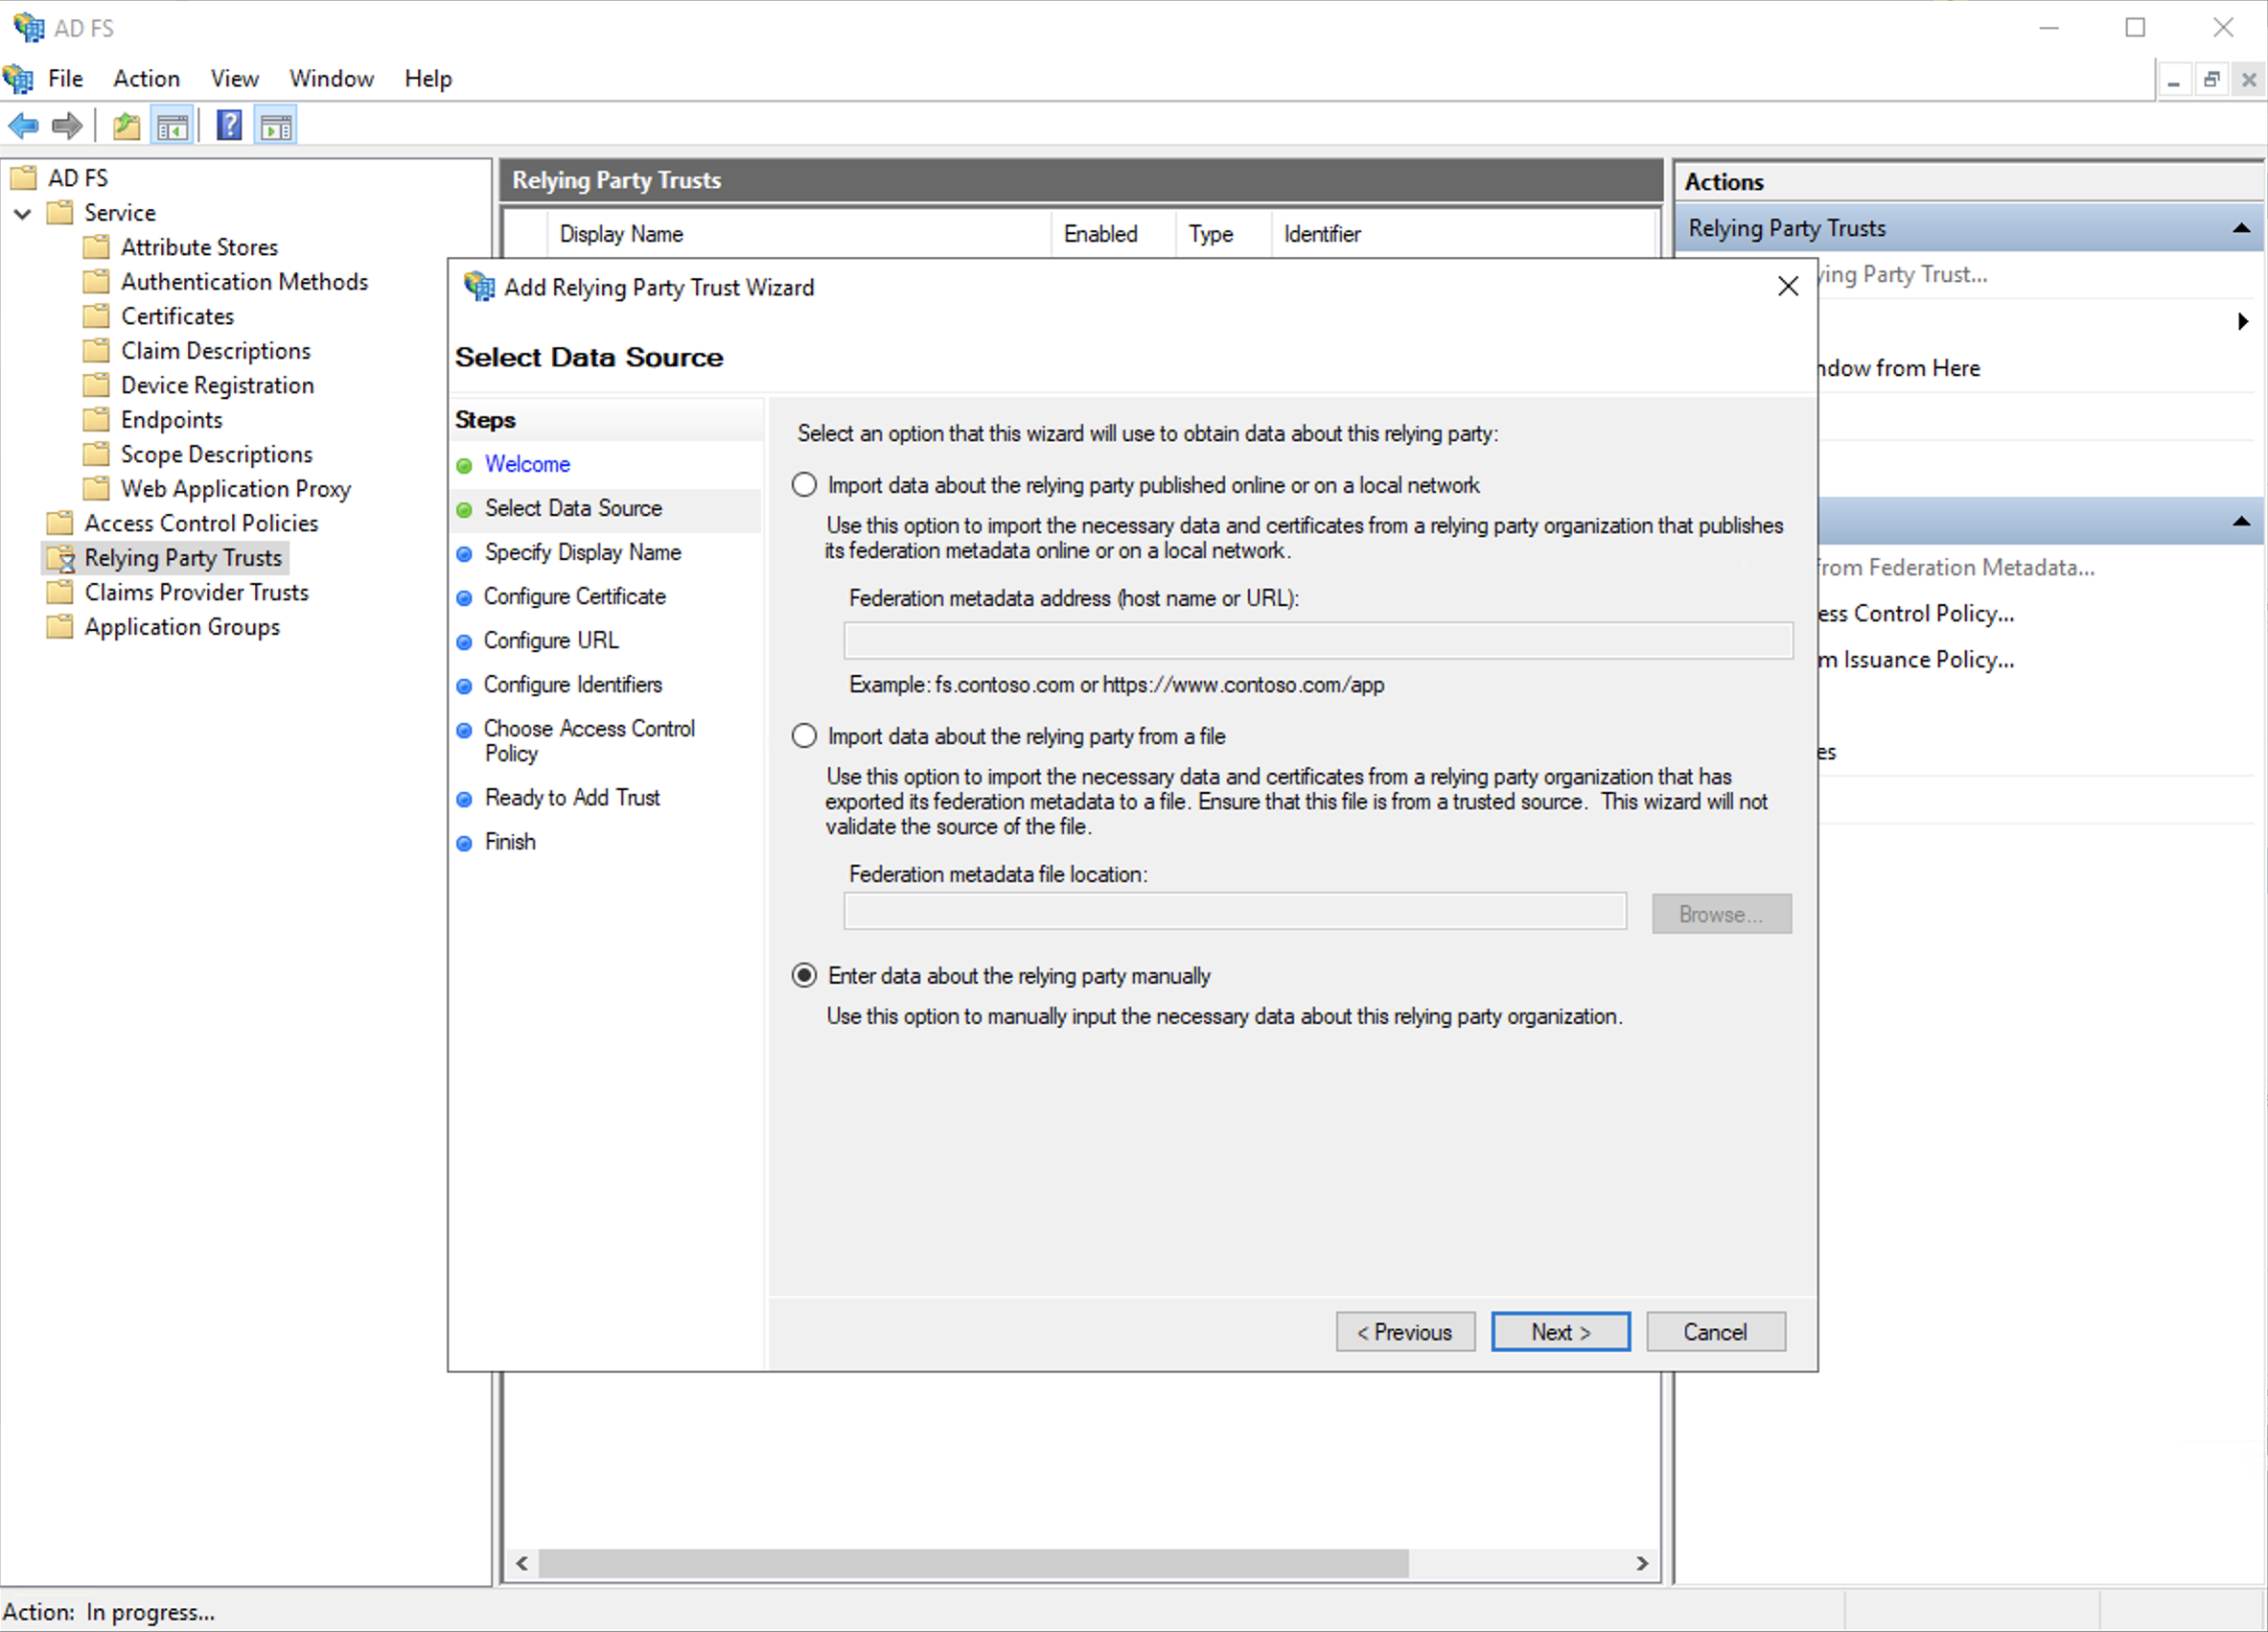
b. Select the third option "enter data about the relying party manually".
c. Enter the display name you wish to use.
d. Skip the encryption configurations, just click next.
e. Skip the URL configurations, just click next as well.
f. In the "Relying Party Trust Identifier", you will be setting the server’s URL right here, such as ap2.ragic.com or na3.ragic.com.
g. Skip the access policy control settings, click next.

h. Click next to finish adding the relying party trust.

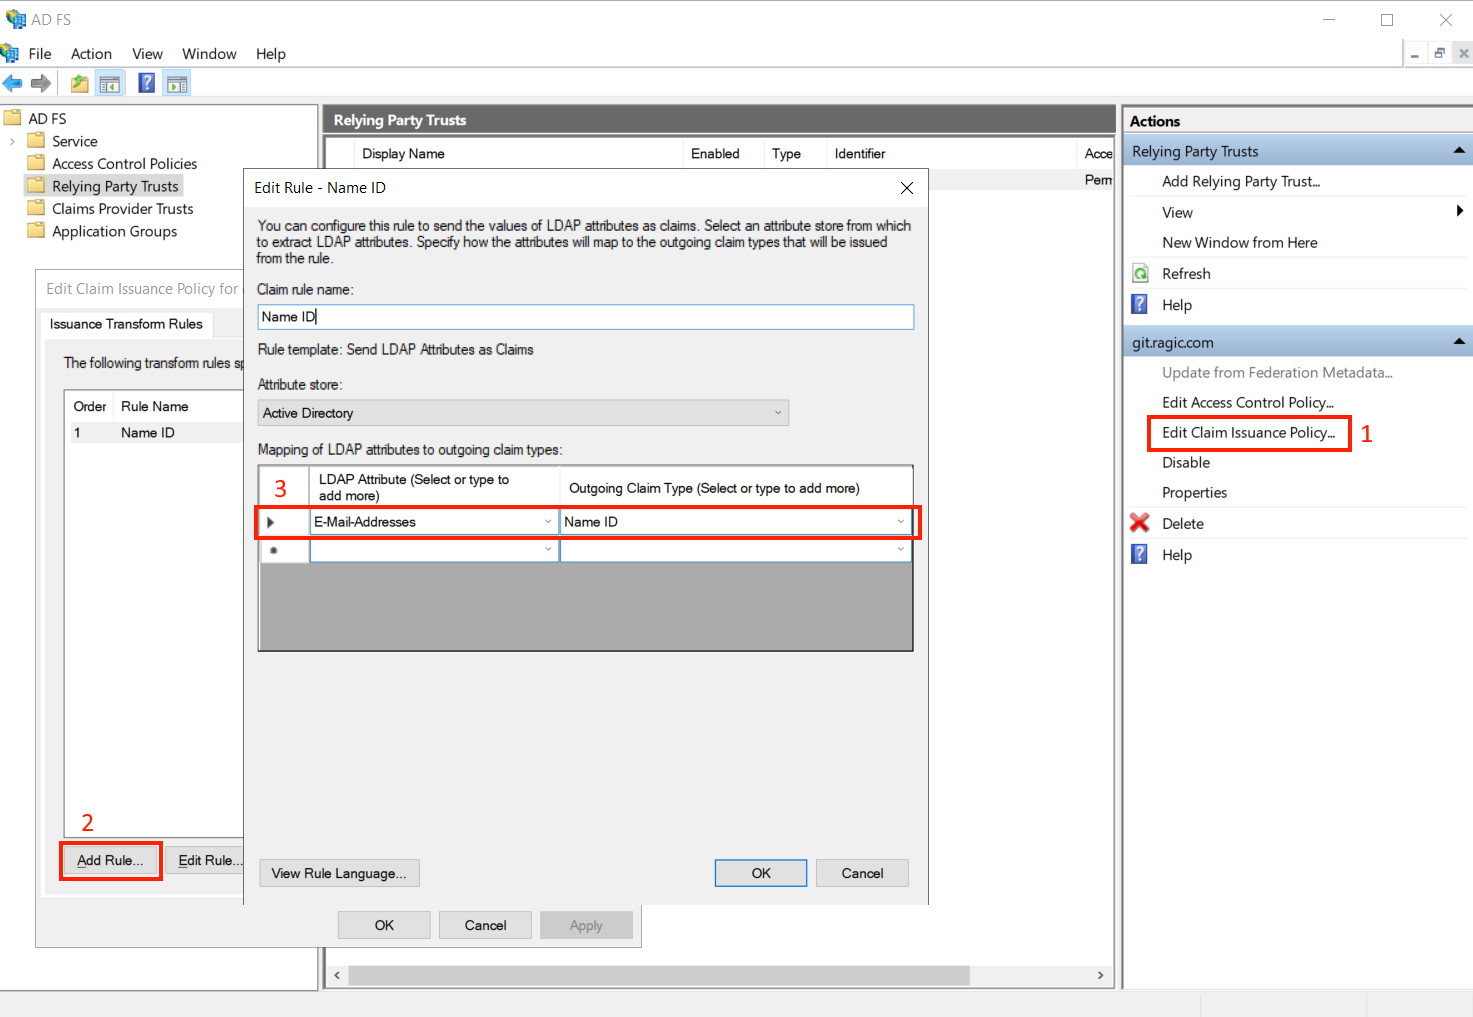
Step 4. Select to edit claim issuance policy, and add a rule to make the LDAP Attribute E-mail Addresses’ outgoing claim type as the Name ID.
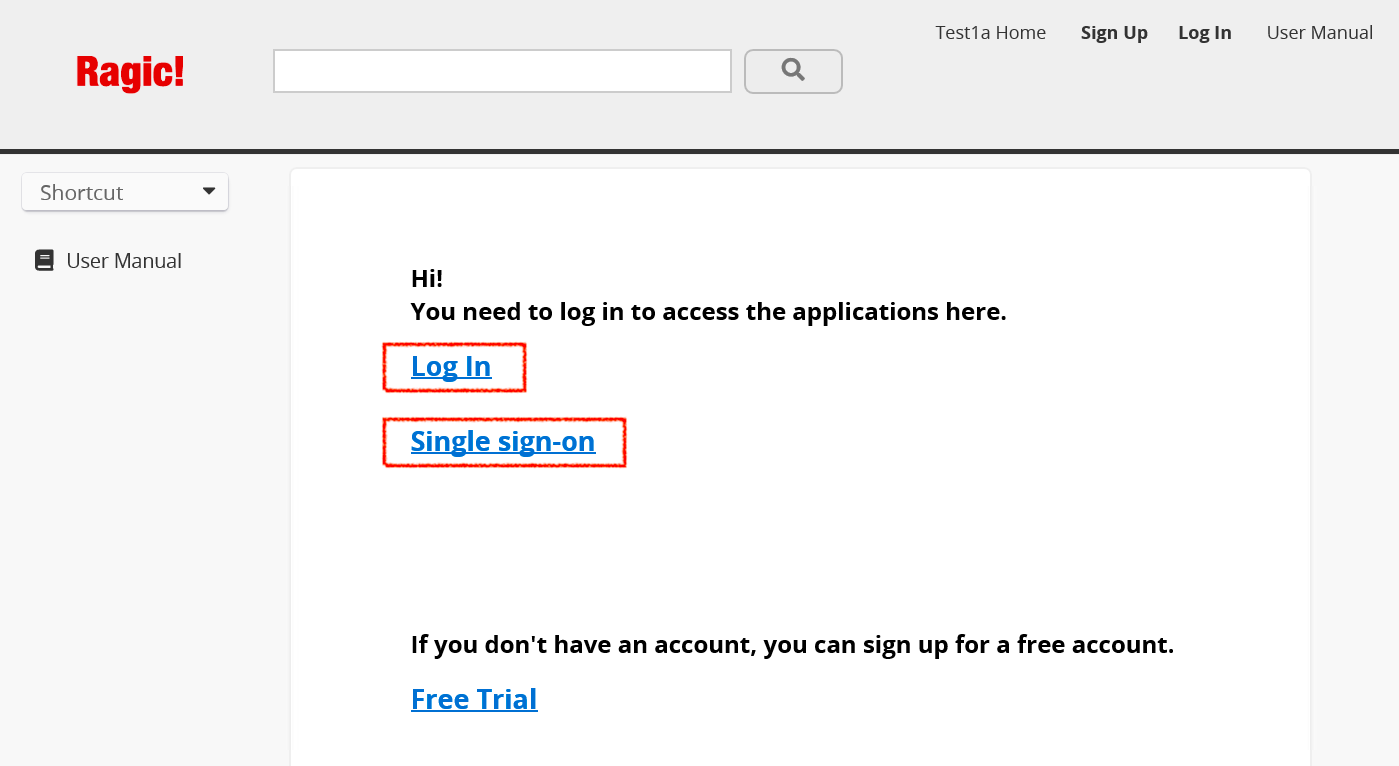
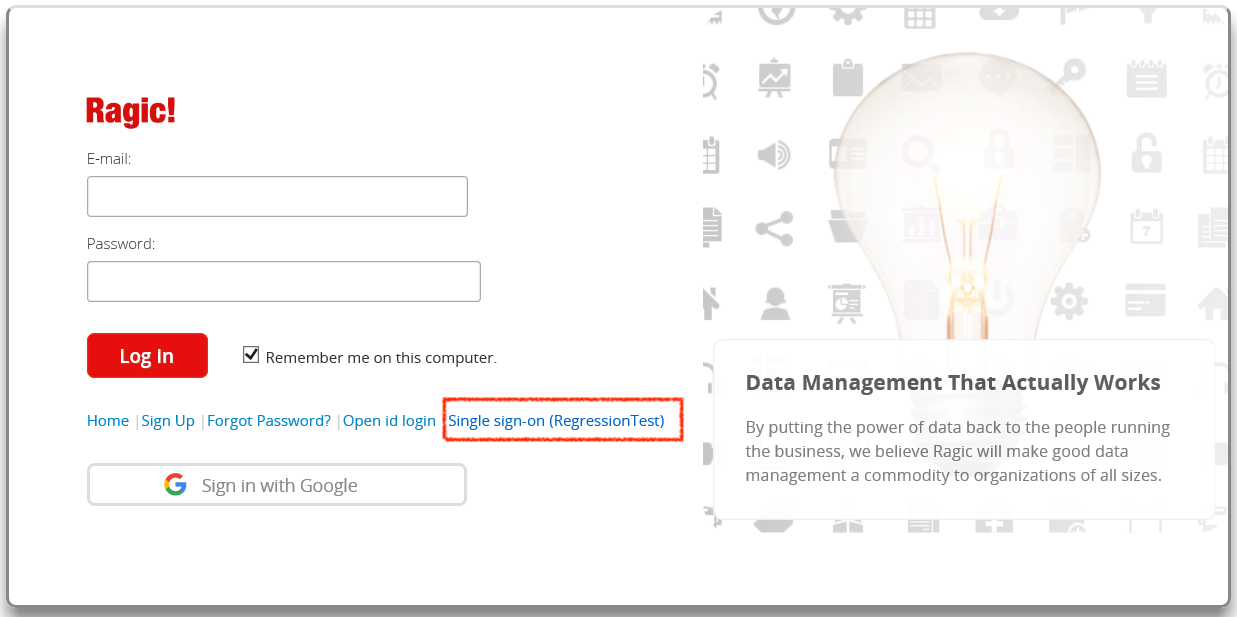
After all of the previous steps are completed, your users may log in to Ragic using the single sign-on feature with the following process.
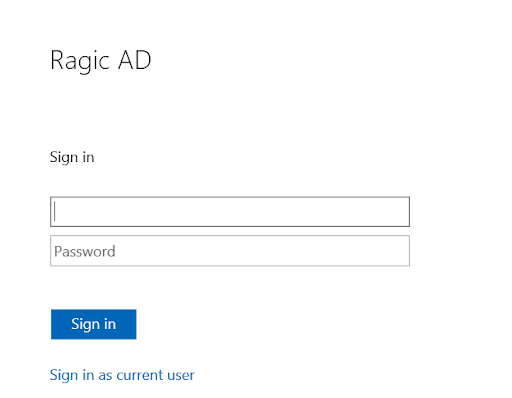
Step 1. Enter your database with its link to then log in.
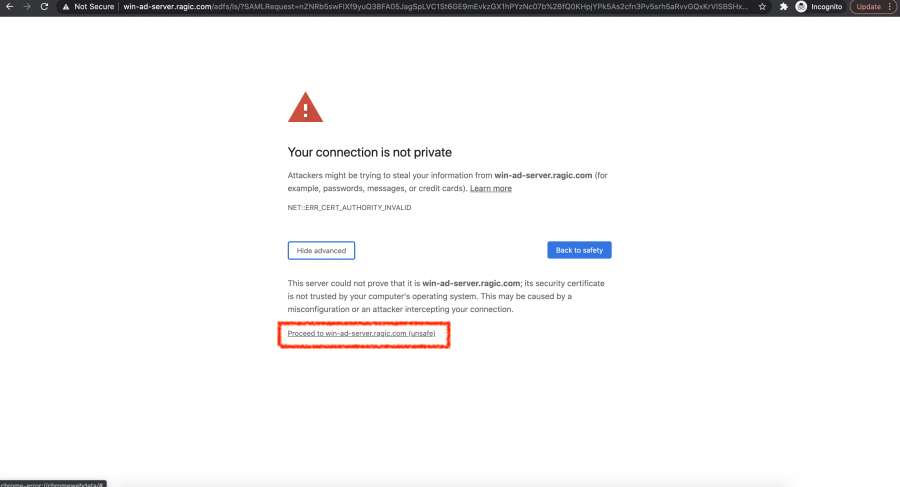
If you see this screen below, it means that there is not a public SSL certificate bought for your Active Directory account. You can simply click to proceed and continue with your login process.
Step 2. Enter your username and password of your Active Directory server to log in, and then you can access the database.