Step 1. Enter IAM Identity Center

Step 2. Create a new application (Add application)

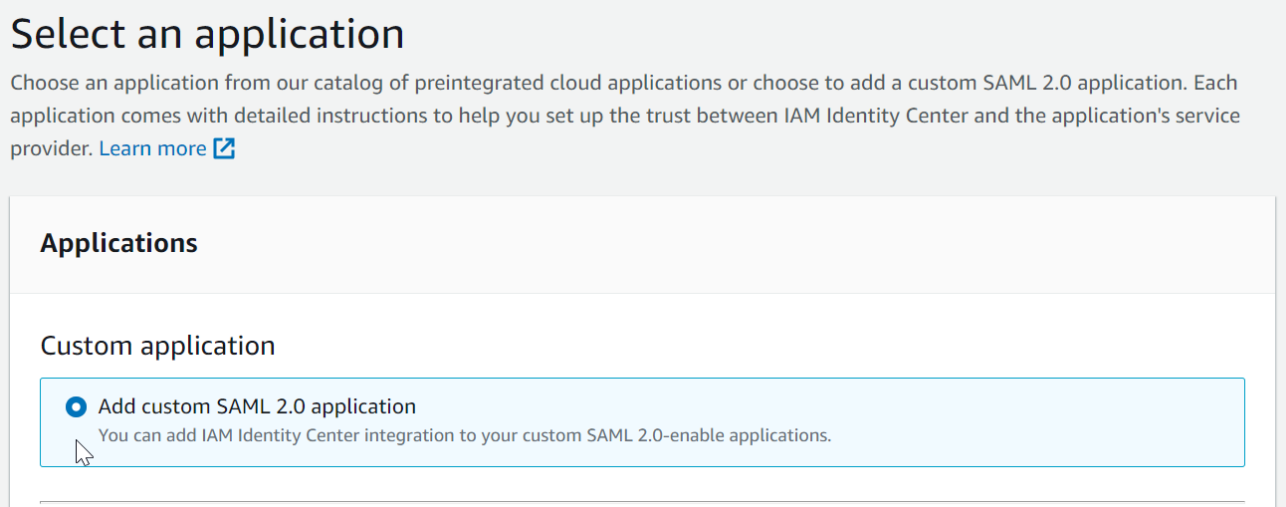
Step 3. Choose Add custom SAML 2.O application
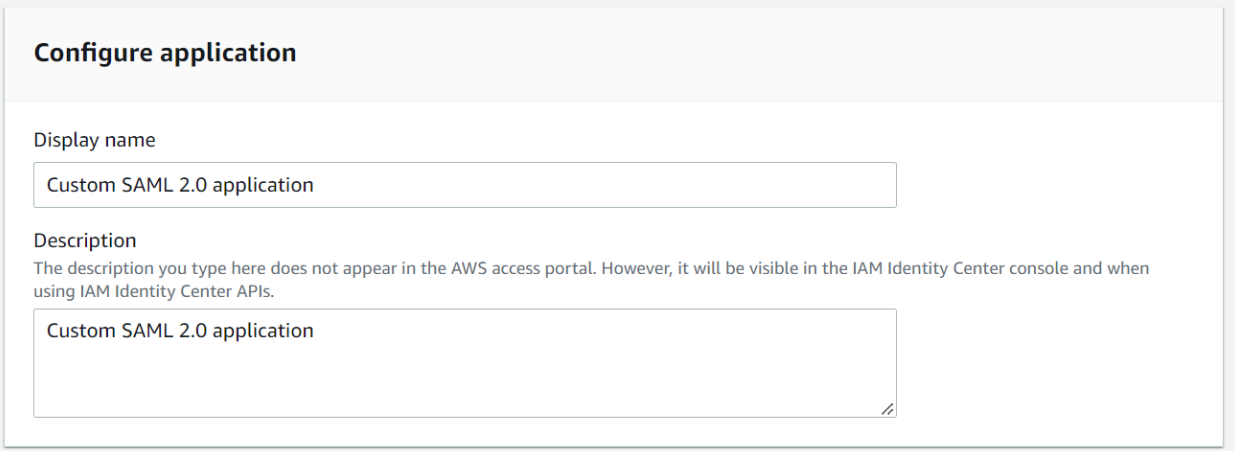
Step 4. Set application parameters
1. Display name and "description" can be customized by the user.
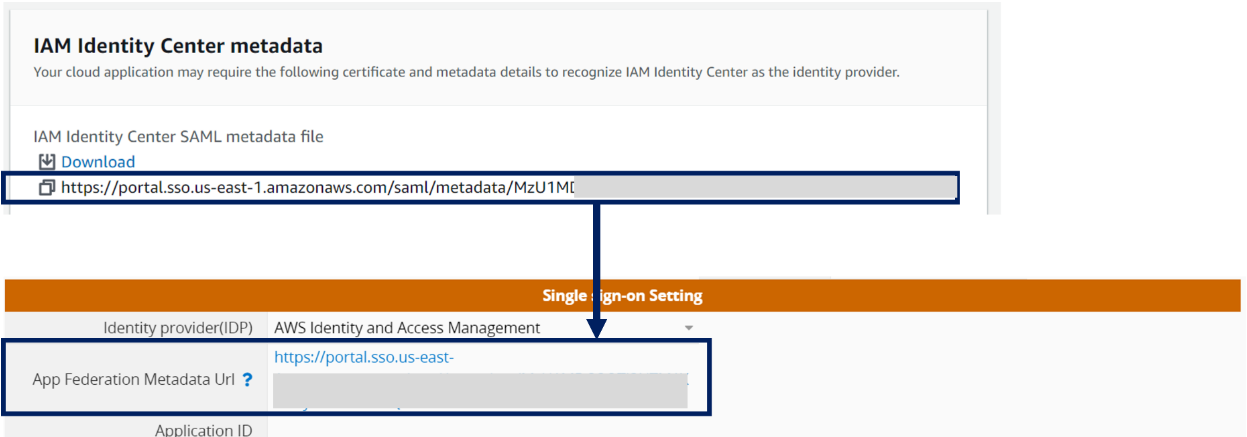
2. Please fill "App Alliance Metadata URL" field in the Ragic Company Settings with the link of the IAM Identity Center SAML metadata file.
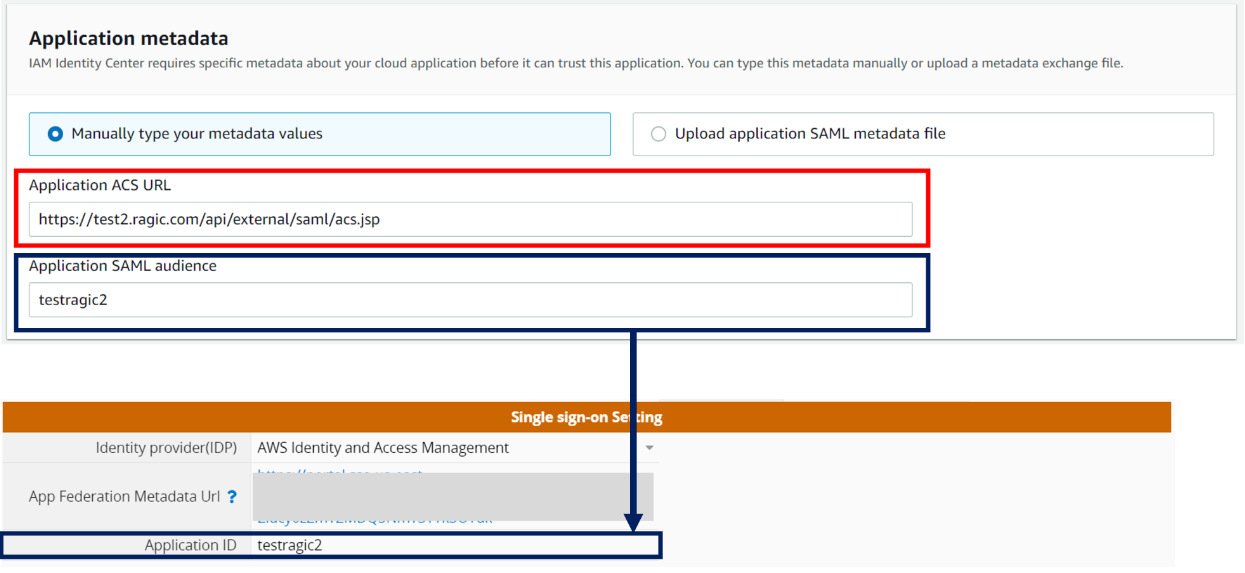
3. Please fill "Application ACS URL" with the URL of the server where your Ragic is located and add "/api/external/saml/acs.jsp" to the end (For example, your Ragic URL is https://test2.ragic.com, please fill in "https://test2.ragic.com/api/external/saml/acs.jsp"). The "Application SAML audience" attribute can be customized by the user, and its value is filled in the "Application ID" field in the Ragic Company Settings.
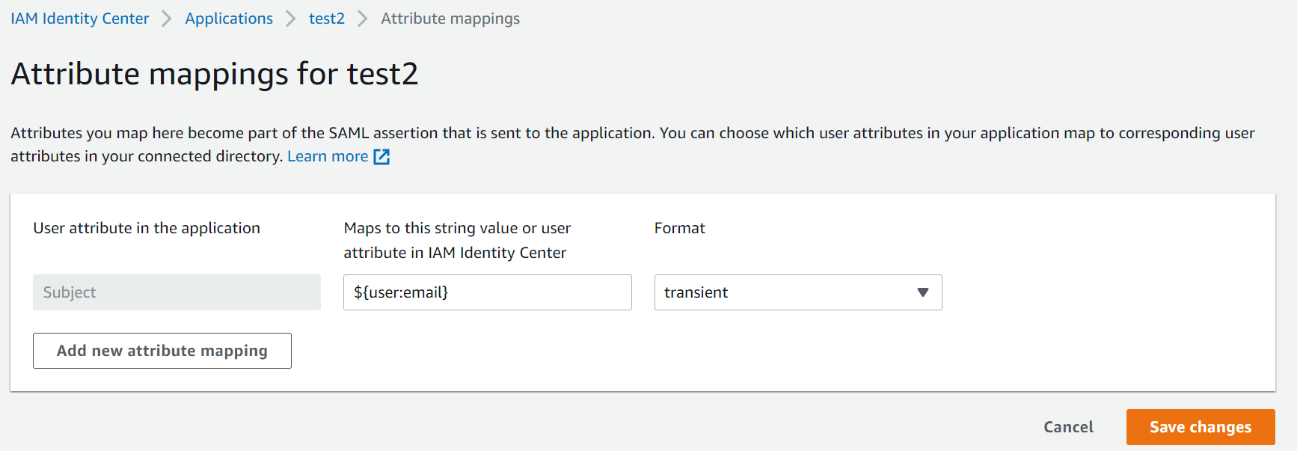
Step 5. In "Attribute mappings", set the attribute mapped by Subject to "${user:email}", format to "transient", refer to the following Figure:
Step 6. Add users to the application

 Thank you for your valuable feedback!
