If you want to share an Excel file of your records with others, you can use Publish to the Web. This will generate a link that allows others to download the Excel file directly. For example, you can enable customers to download their order data themselves.
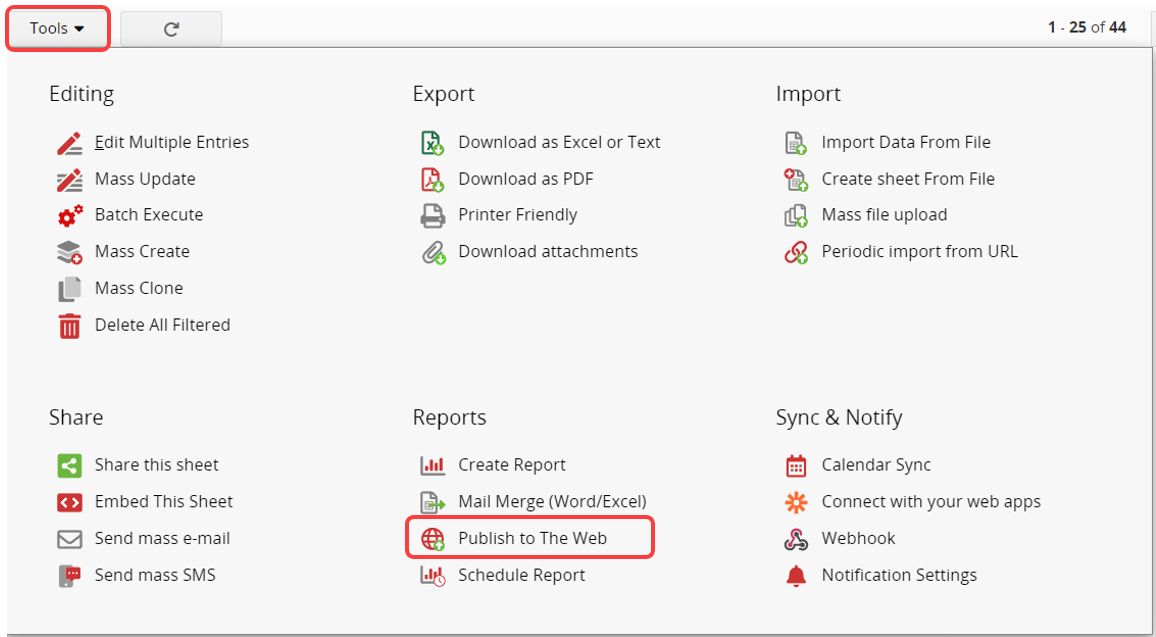
Navigate to Listing Page > Tools > Publish to The Web under the Report section.
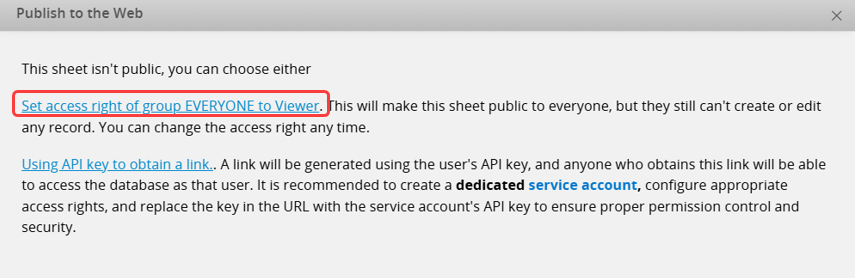
You need to configure the correct Access Rights for the EVERYONE group to allow others to download records via this link. Note that changing Access Rights for the EVERYONE group will also affect Access Rights for the entire sheet.
If you haven't made your sheet public through the Access Rights settings, you'll have two options:
This will make the sheet publicly viewable, but users will not be able to add or modify records. Also, ensure that EVERYONE group has the "Download Listing Page" feature access. You can change the Access Rights at any time.
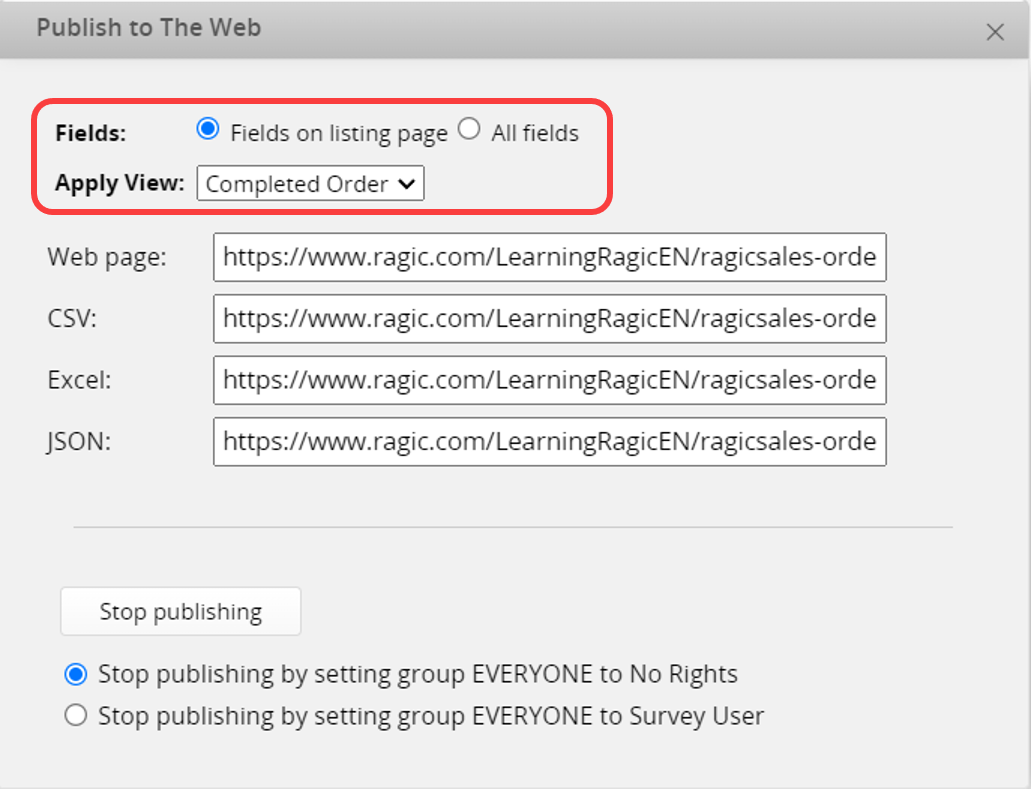
You can select fields from the Listing Page or all fields to publish and choose whether to apply a saved Shared View.
Note: If no Shared View is set, you can still publish filtered data by following this method to add filter parameters to the URL.
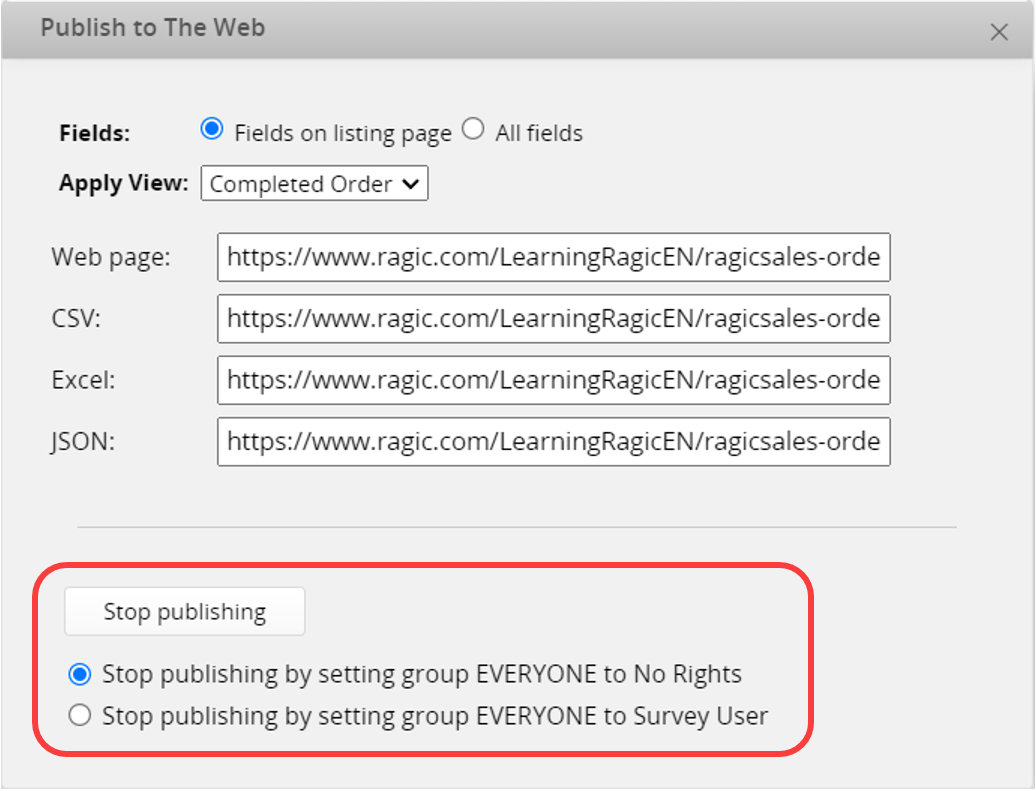
To stop publishing, set the EVERYONE group to No Rights or Survey User in this window. This way, you don’t need to navigate to Design Mode.
This will generate a link using the API key with the current user's Access Rights.
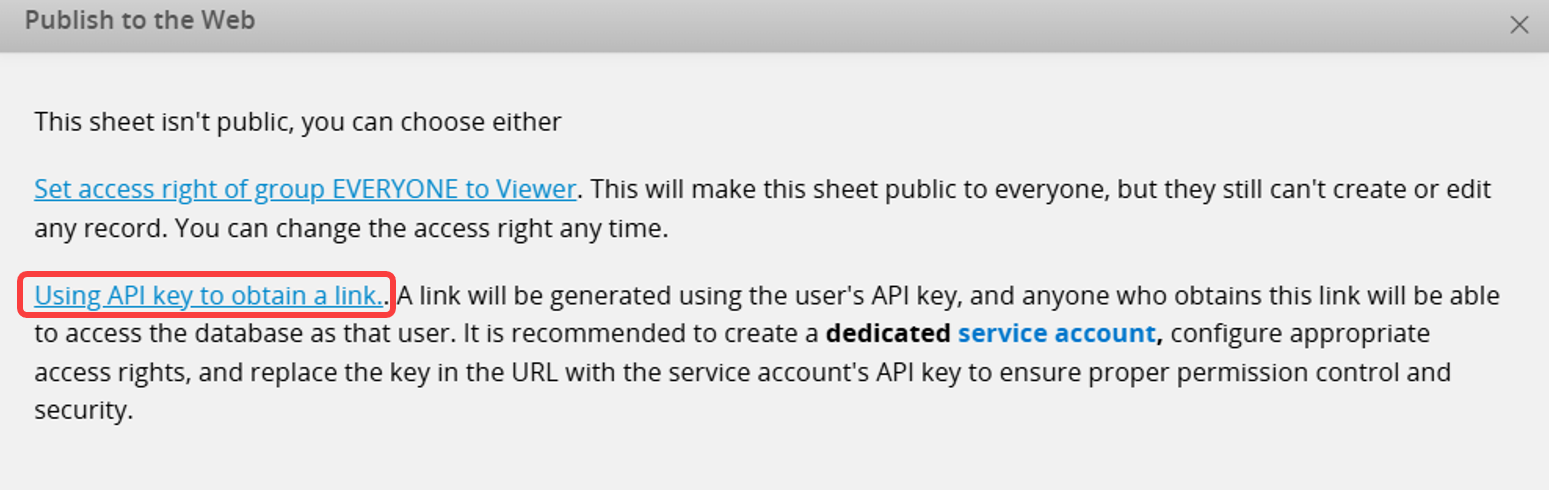
Anyone with the link can access the database with the same rights as the user who generated the API Key. Therefore, it is recommended to create a dedicated Service Account, configure appropriate Access Rights, and replace the key in the URL with the Service Account's API key to ensure proper permission control and security.
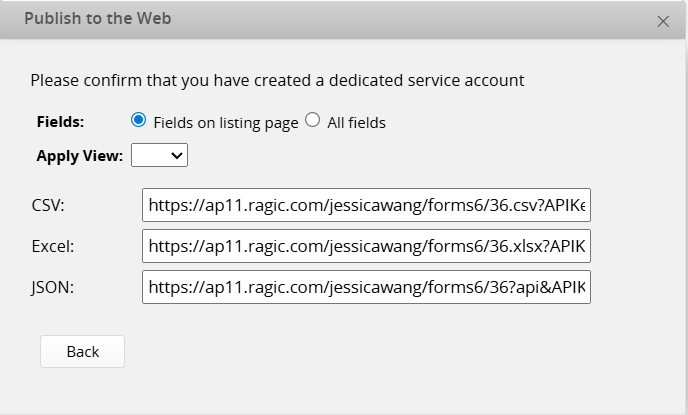
You can also select fields from the Listing Page or all fields to publish and choose whether to apply a saved Shared View.
Note: If no Shared View is set, you can still publish filtered data by following this method to add filter parameters to the URL.
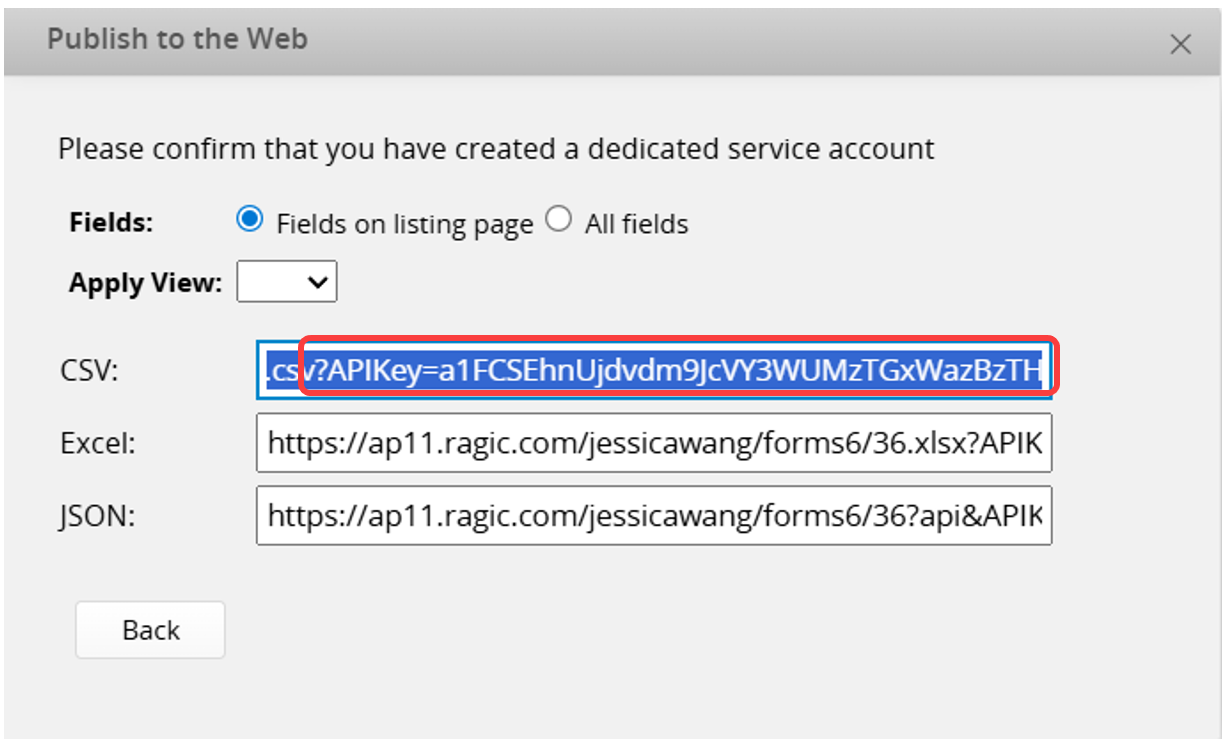
If you are not using a Service Account and need to use an API key from a different account, log in to that account first and follow the instructions in this section to obtain the API key. Once obtained, append it to the URL after APIKey=.
If you want to publish only specific fields online, you can add parameters to the URL generated for Publishing to the Web. Different URL types require different parameters. Note that Web page URLs do not support adding parameters to specify fields.
Example:
1. If the generated URL for downloading an Excel file is:
https://www.ragic.com/ExampleAccount/Tab1/18.xlsxAdd the parameter ?f=cust&s=1000&order=["field_id",...] to specify which fields to include. (To find the field_id, please refer to this documentation.)
https://www.ragic.com/ExampleAccount/Tab1/18.xlsx?f=cust&s=1000&order=["1000231","1000243"]
Example:
1. If the generated URL for retrieving JSON data is:
https://www.ragic.com/ExampleAccount/Tab1/18?api&listing
Add the parameter &fetchDomainIds={field_id} to include only the specified fields. Add the parameter repeatedly if you want to include multiple fields.
2. You want to include data only from fields with IDs "1000231" and "1000243".
3. Add the parameters to the URL as shown below:
https://www.ragic.com/ExampleAccount/Tab1/18?api&listing&fetchDomainIds=1000231&fetchDomainIds=1000243
 Thank you for your valuable feedback!
