The Convert Records button on the source sheet allows users to copy specified field values from a record to another sheet.
Converting records is different from using Multiple Versions. When you convert a record, the data from that record is copied to another sheet and saved as a new record, with no link between the two sets of data. Therefore, it is possible to overwrite the data in the converted record without affecting the source record.
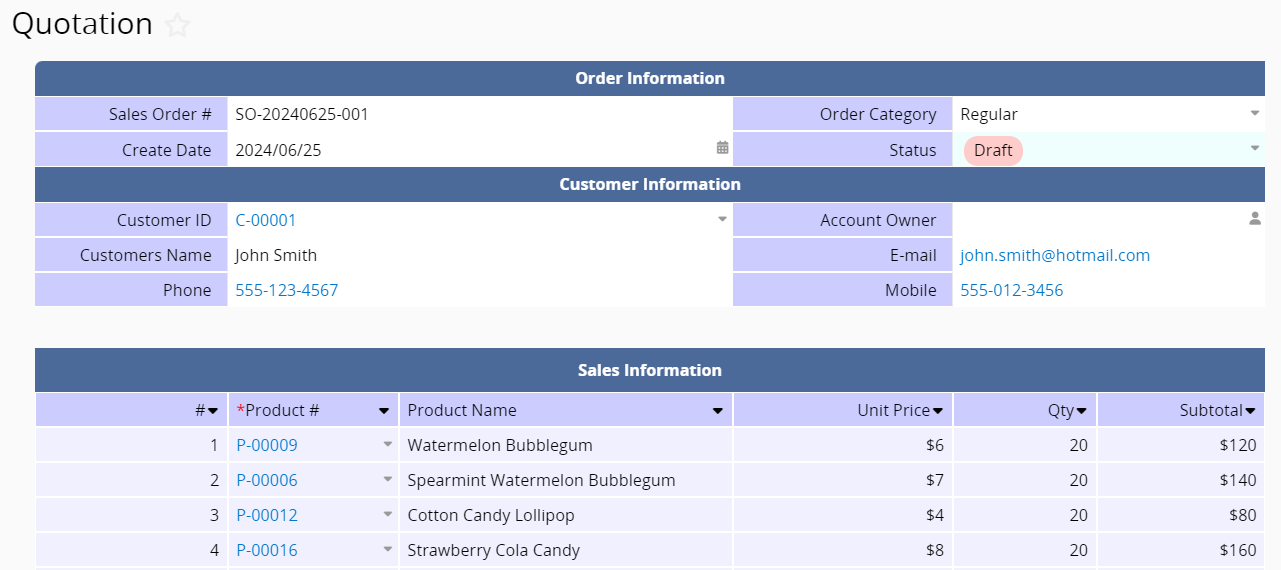
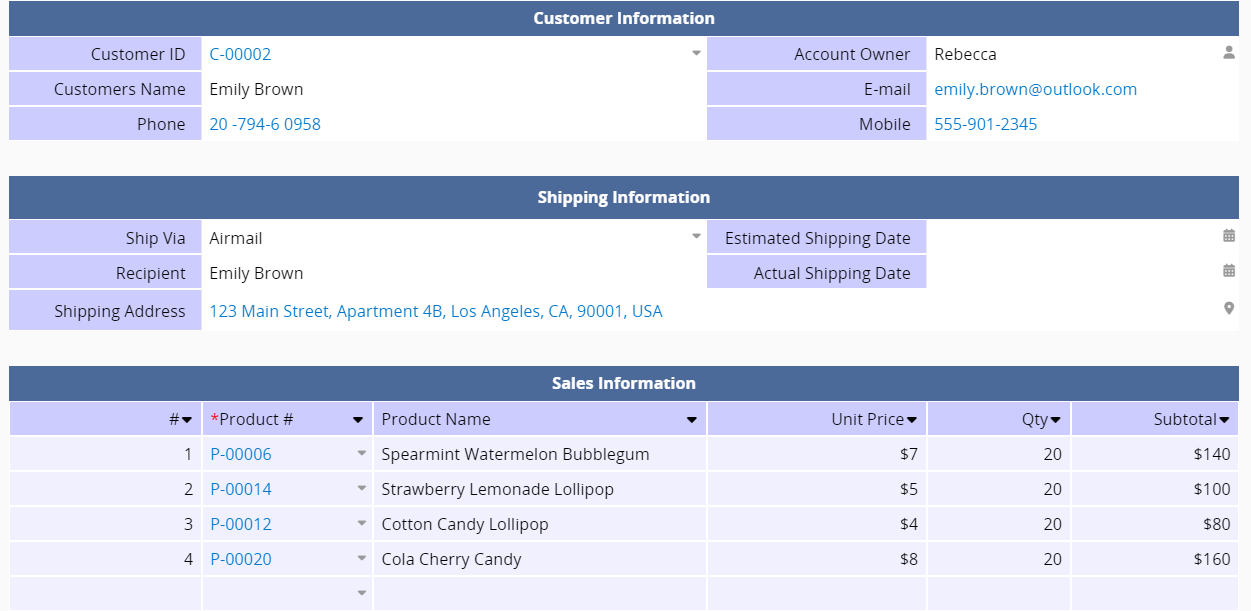
For example, there is a "Quotation" sheet and a "Sales Orders" sheet. The values in the "Quotation" sheet are similar to the values in the "Sales Orders" sheet, but whether to place an order is up to the customer. Therefore, the two sheets are not entirely the same. In this case, you can use the Convert Records to avoid re-entering some of the values.
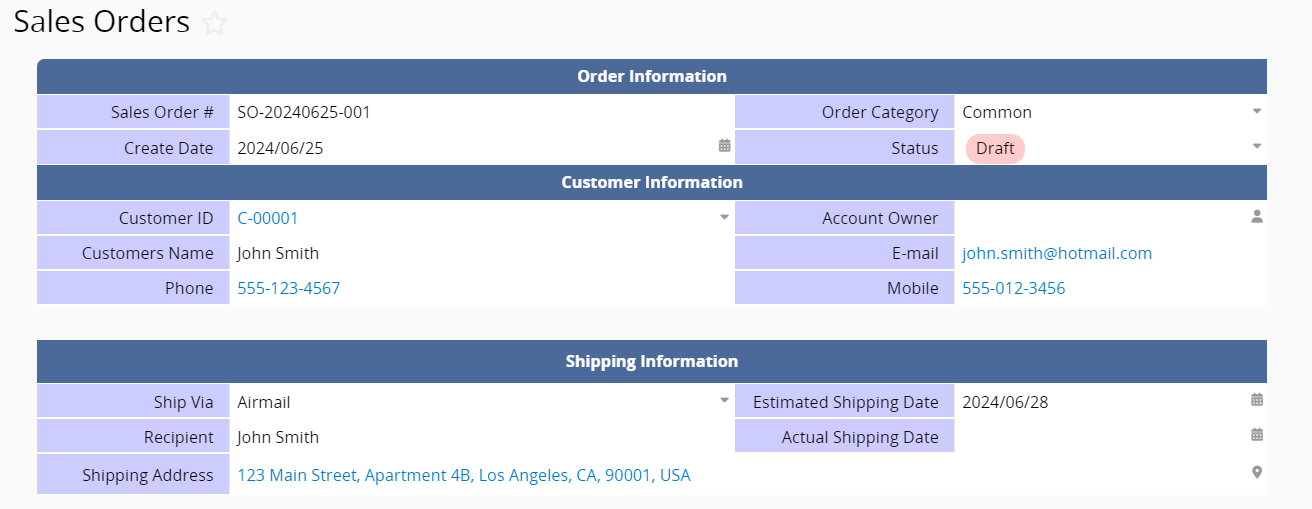
The structure of the "Sales Orders" sheet is similar to that of the "Quotation" sheet. Having a similar design or sharing many fields is not necessary for converting records, but a consistent design can be helpful for modifications and identification.
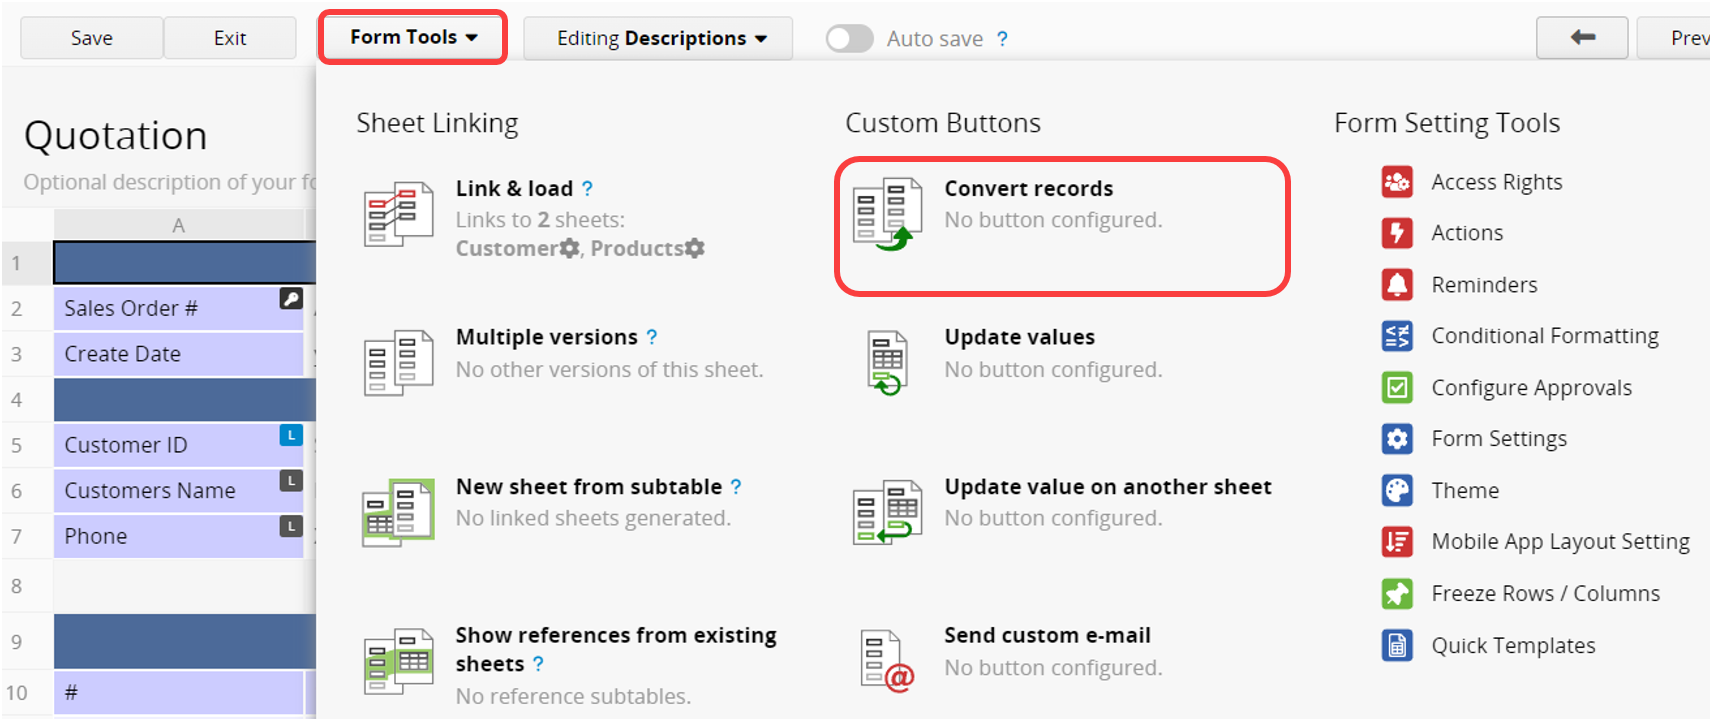
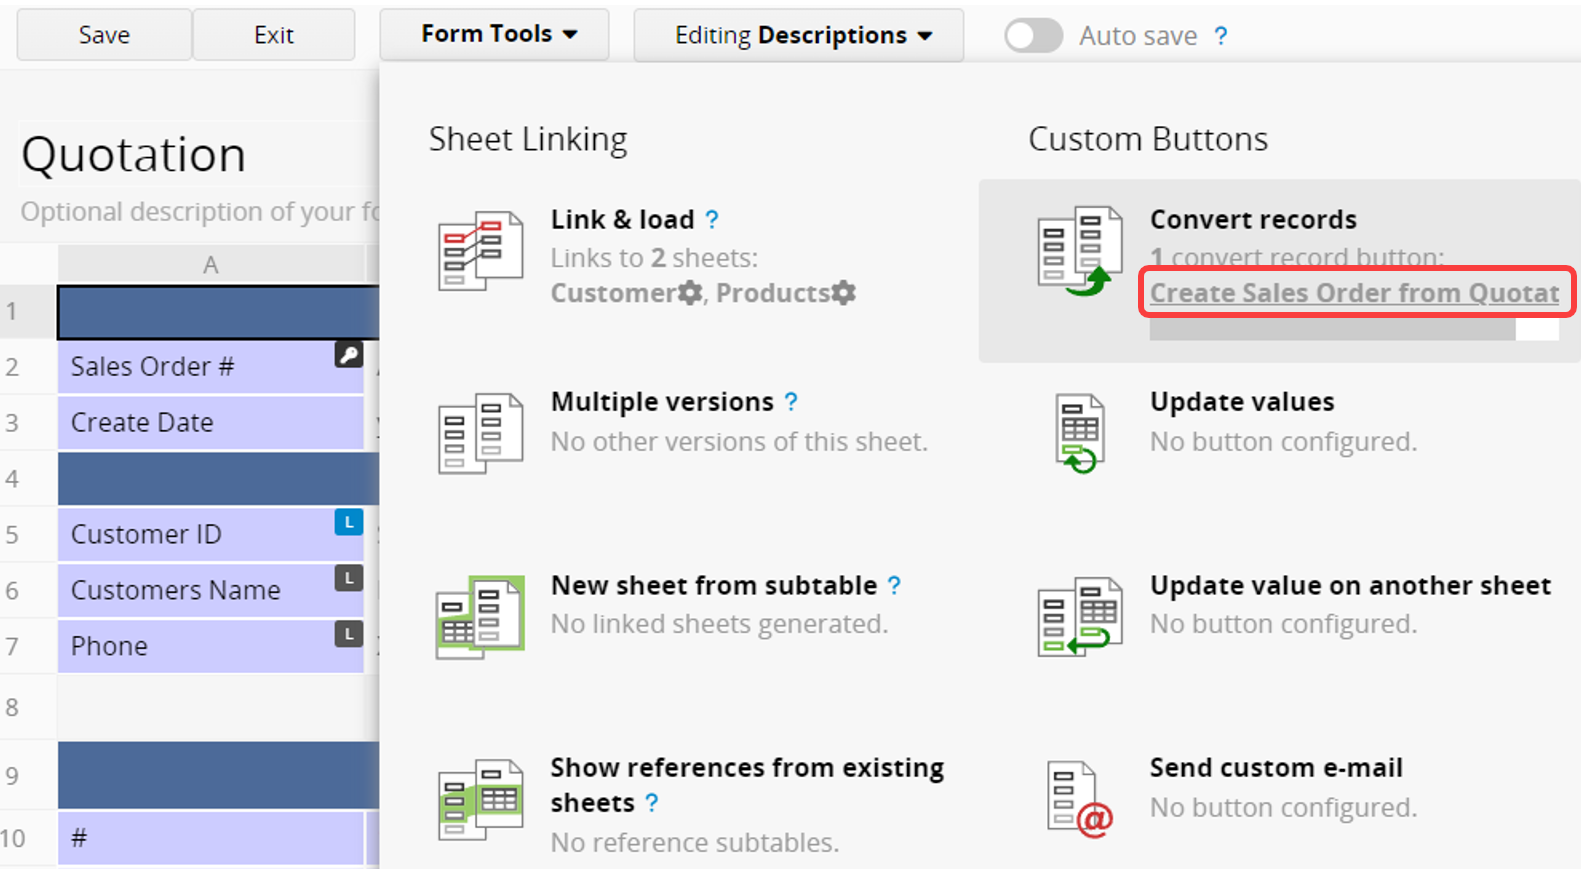
Navigate to the Design Mode of the source sheet for converting records, such as the "Quotation" sheet in the example. Click on Form Tools and select Convert Records under the Custom Buttons section.
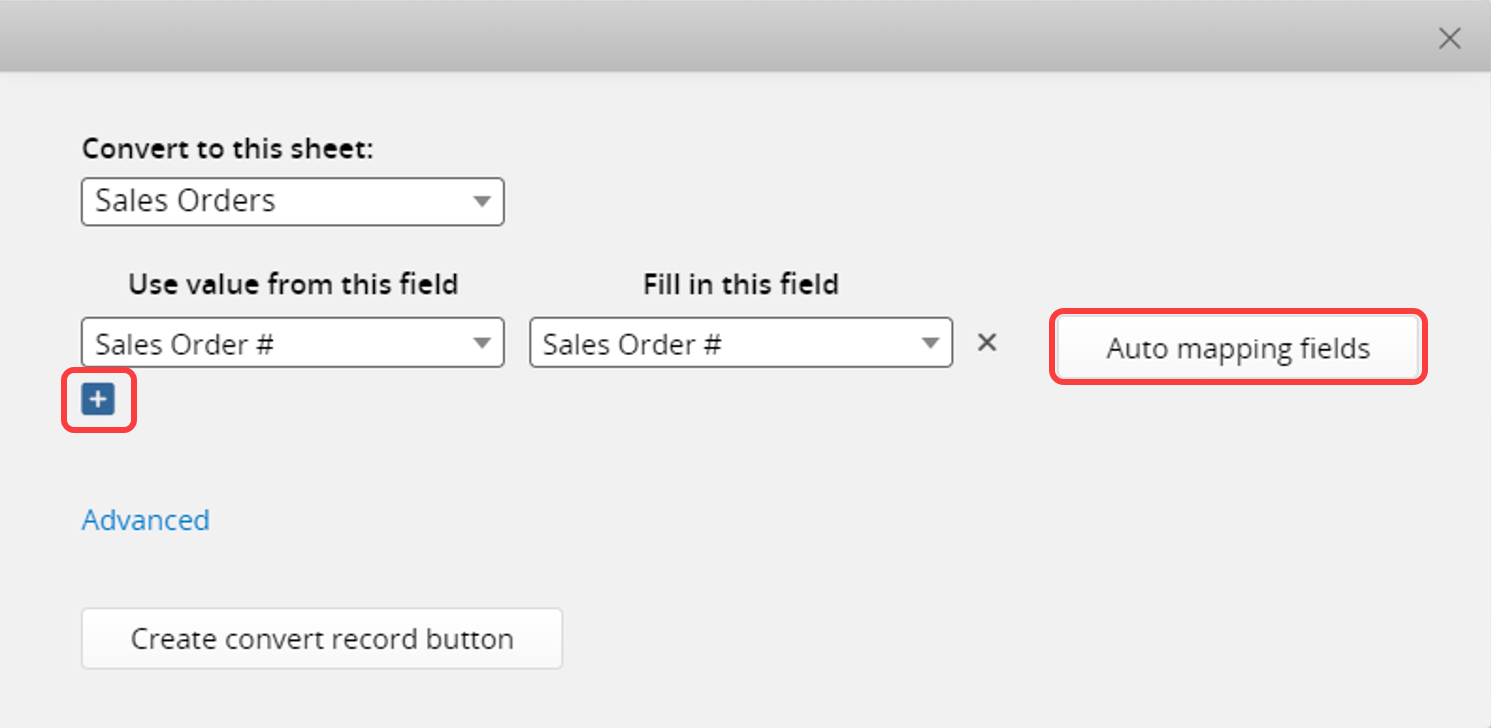
Select the sheet to which you want to convert the record from the dropdown menu. In our example, this is the "Sales Orders" sheet.

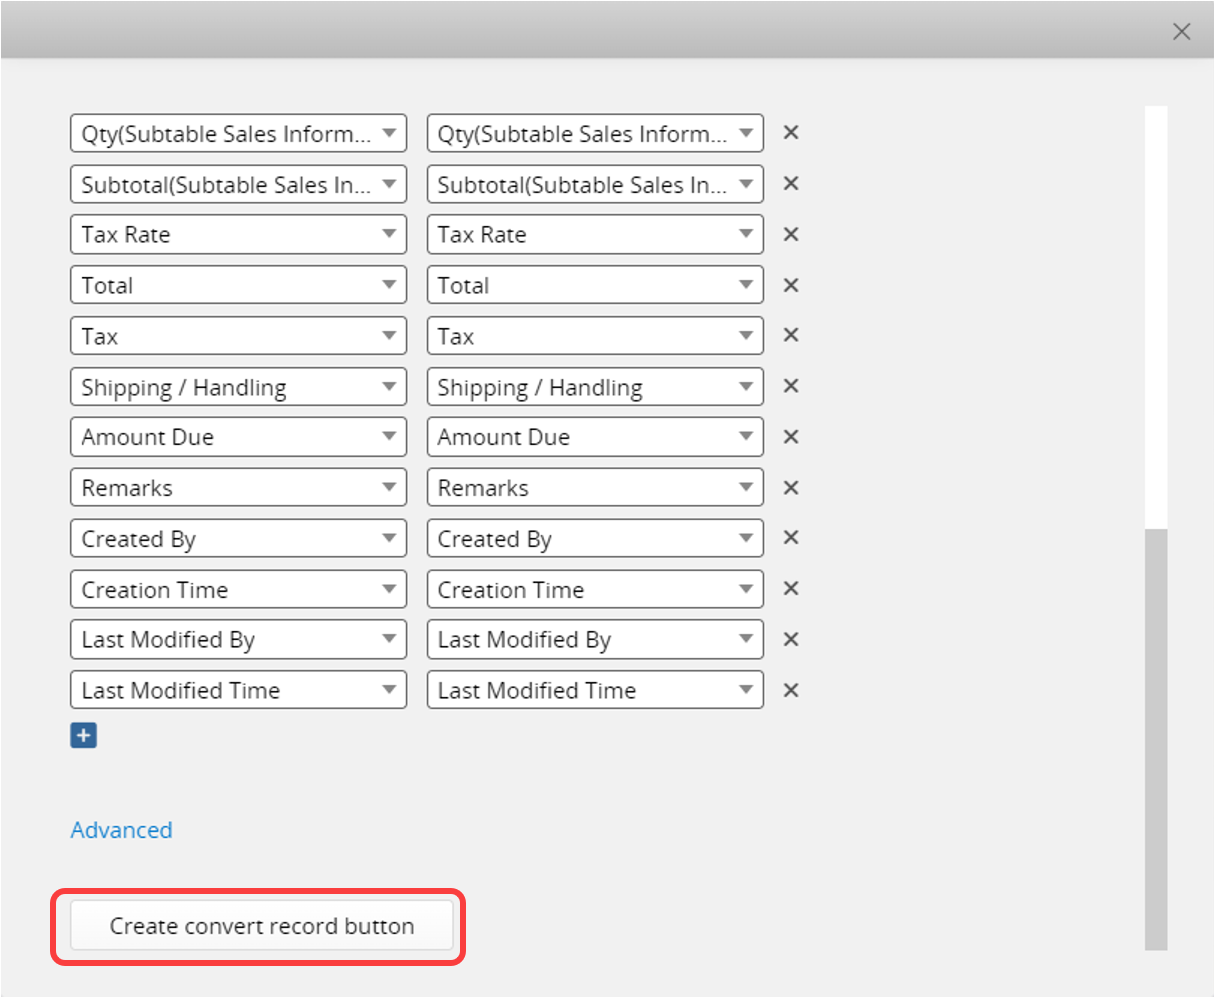
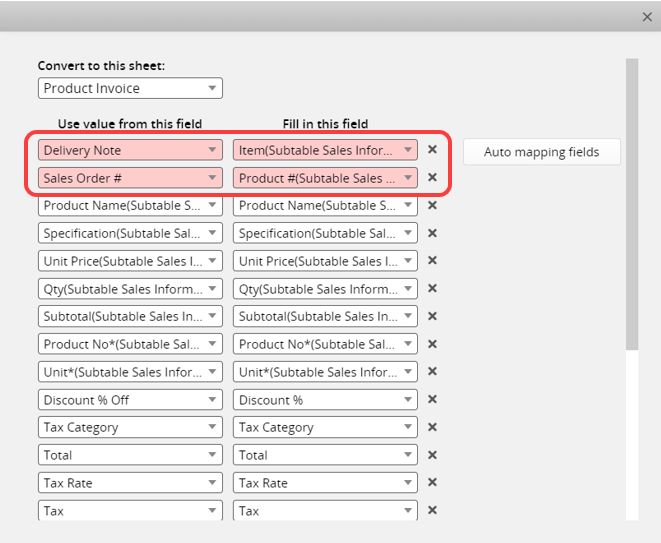
Configure which fields from the current sheet should be copied to which fields in the target sheet. You can add corresponding fields using the + button or use the Auto mapping fields on the right to automatically populate fields with matching names on both sides.
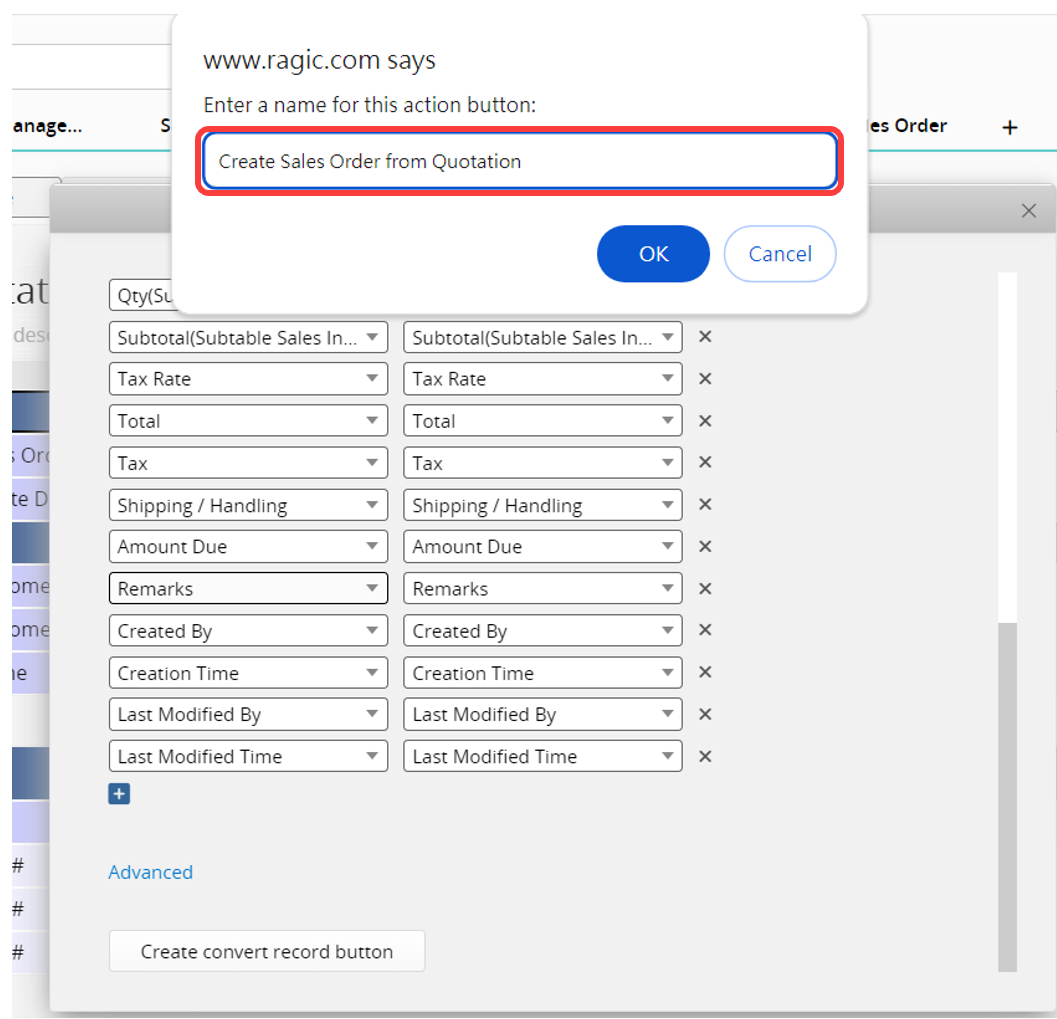
After configuring, click the Create convert record button and name it. It's recommended to use a clear and concise name that allows users to quickly identify its purpose.
After saving and exiting Design Mode, you will see the added button in the lower-right corner of the source sheet.
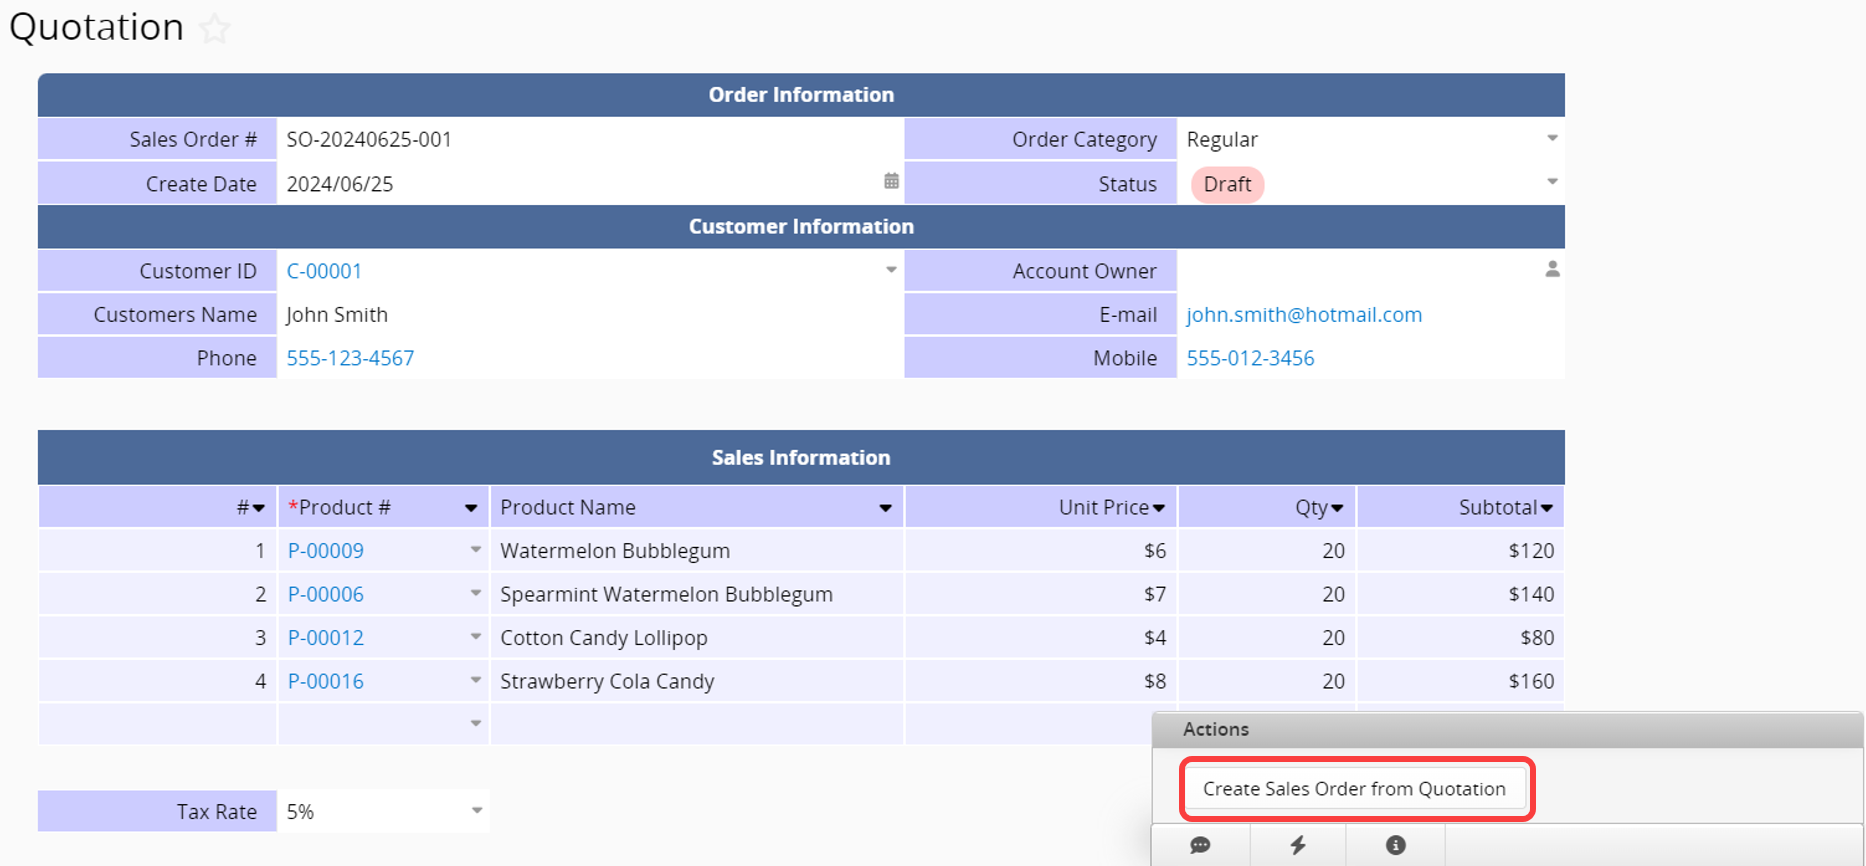
When a user clicks this button, this will create a new record in your destination sheet.
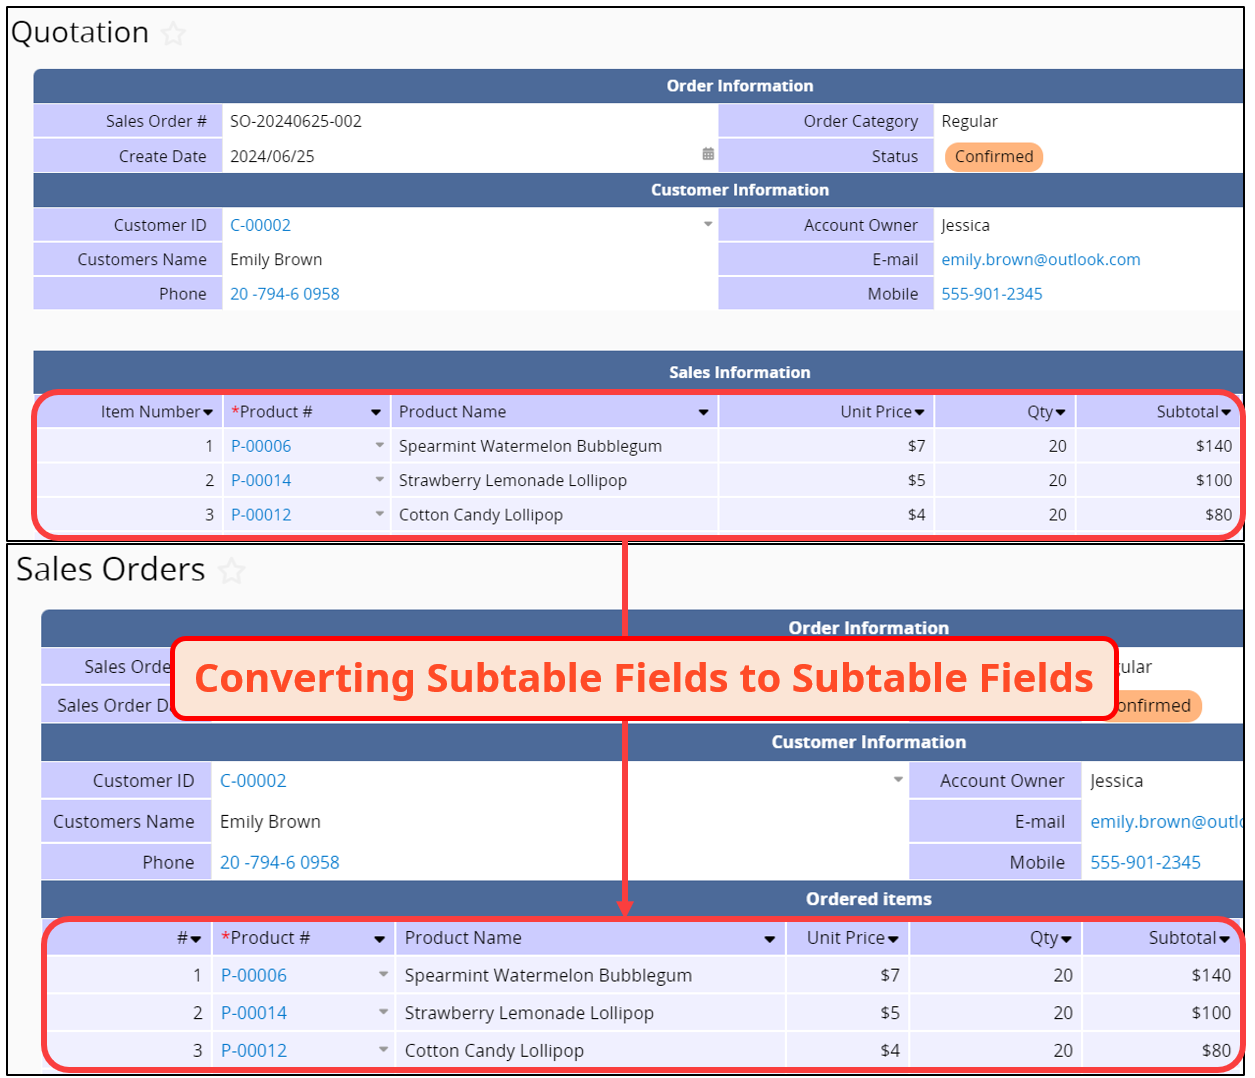
For example, the values from this "Quotation" record will be saved as a new record in the "Sales Orders" based on the configuration.
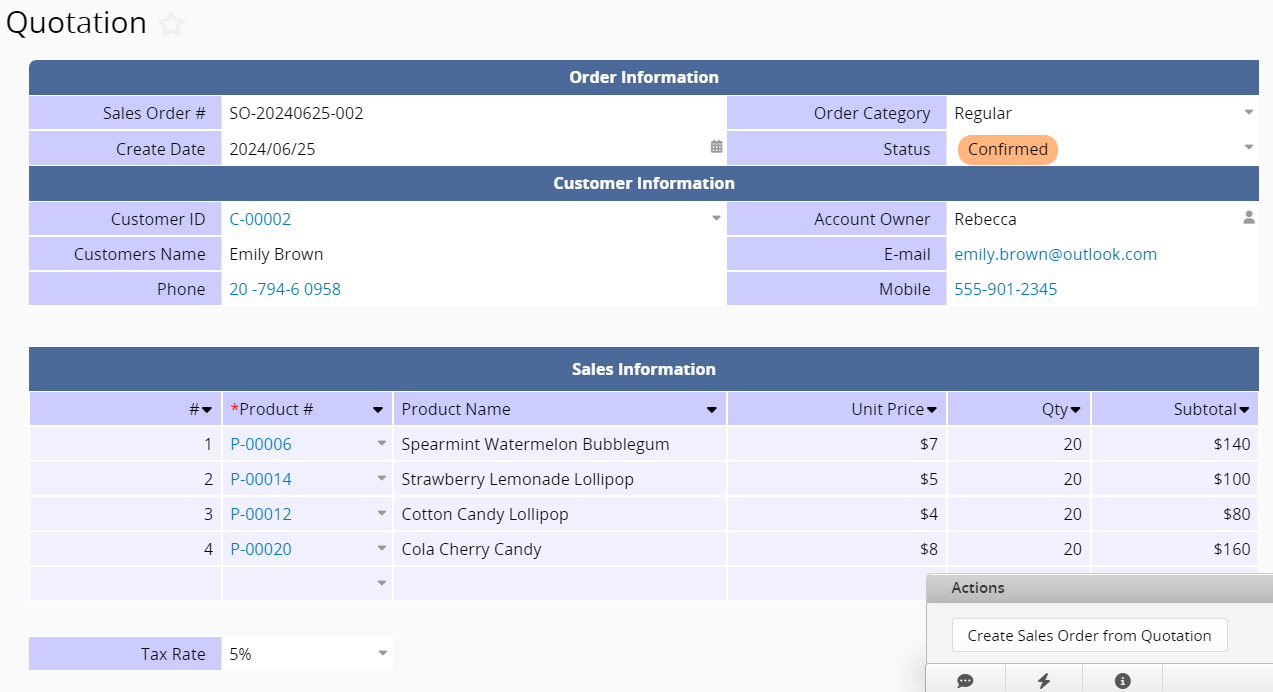
You can see that both independent fields and Subtable values are converted
If you click this Action Button multiple times on the same record, it will generate multiple duplicated records in the destination sheet. To avoid duplicating the same record multiple times, you can refer to this article.
To edit the Convert Record button again, you can return to Design Mode, find this button in the Form Tools menu, click on the button name, and make your modifications.
In addition to converting independent fields to independent fields on another sheet, you can also convert Subtable fields.
This can involve converting Subtable fields to Subtable fields or Subtable fields to independent fields.
Here are two cases of converting Subtable fields:
In the previous example, from a "Quotation" to a "Sales Orders", when you click the Convert Records button, it not only converts independent fields like "Quotation Number" and "Customer" from the "Quotation" sheet to the corresponding fields in the "Sales Orders" sheet but also Subtable fields like "Product Name" and "Qty" to the corresponding Subtable fields in the "Sales Orders" sheet. Each time you click this button, a new record will be created in the "Sales Orders" sheet.
The use case is slightly different. If the Subtable has N rows of data, clicking the button once will create N records in the target sheet. For example, there is a "Quotation" sheet and another "Product Quotation Details" sheet. You want to convert values from the Subtable in the "Quotation" sheet to independent fields in the "Product Quotation Details" sheet.
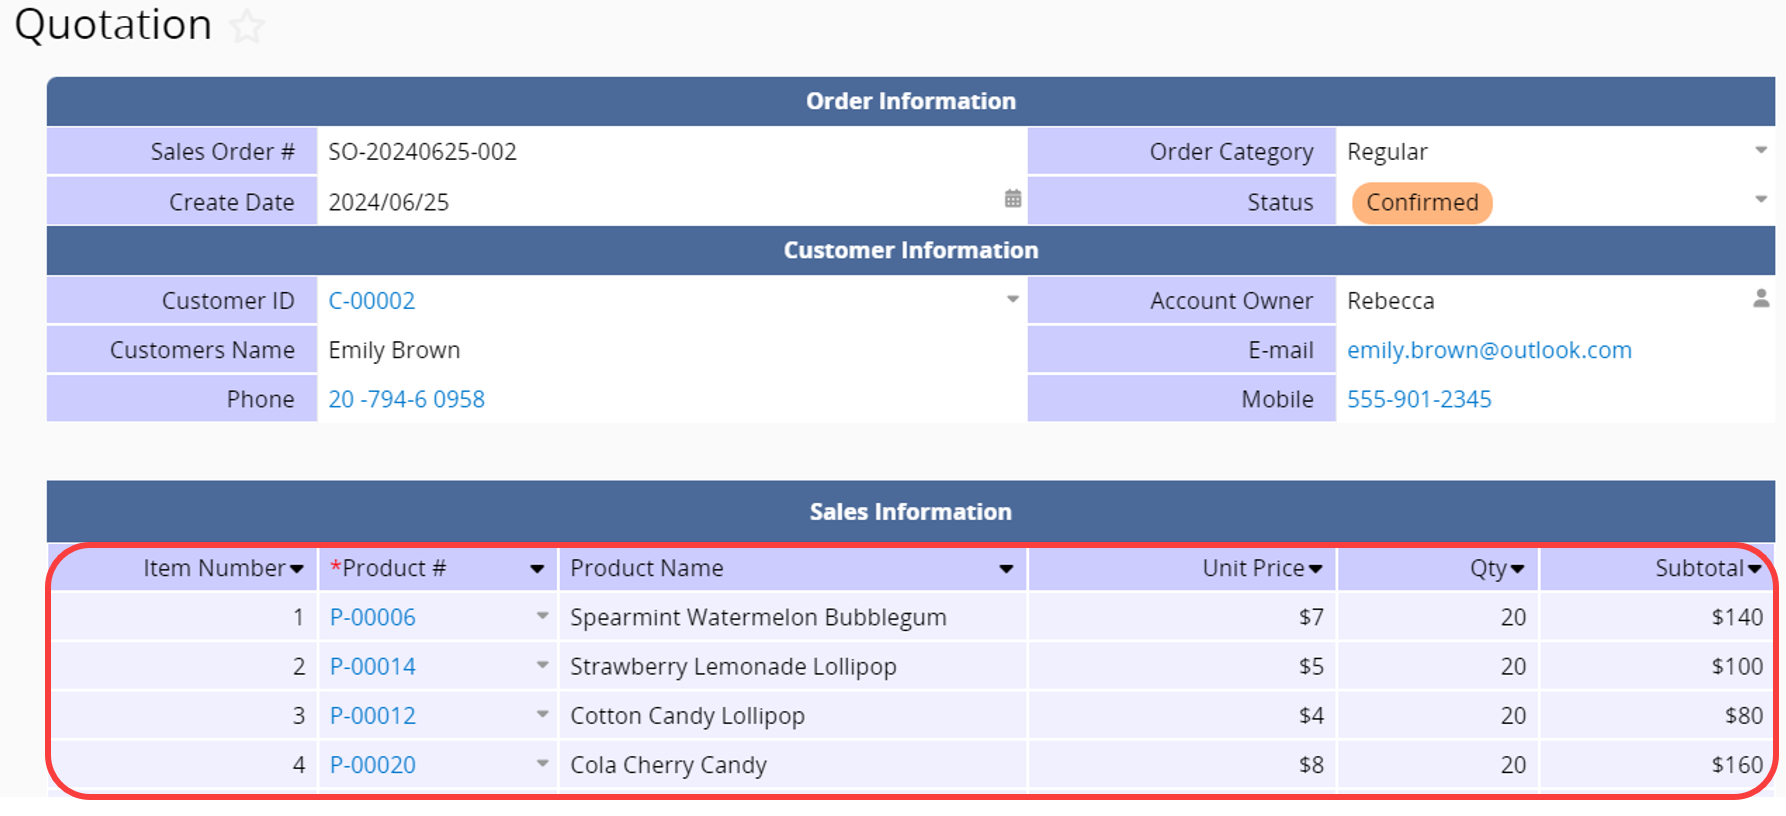
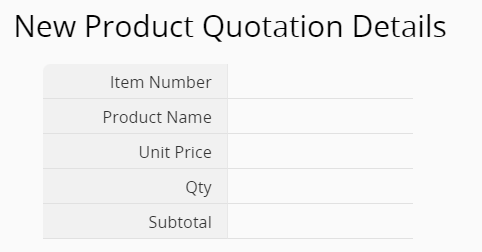
The "Quotation" sheet has independent fields and Subtable fields such as "Item Number", "Product Name", "Unit Price", "Qty", and "Subtotal".
The "Product Quotation Details" sheet has independent fields for "Item Number", "Product Name", "Unit Price", "Qty", and "Subtotal".
Set up Convert Records to the "Product Quotation Details" in the Design Mode of the "Quotation" sheet.
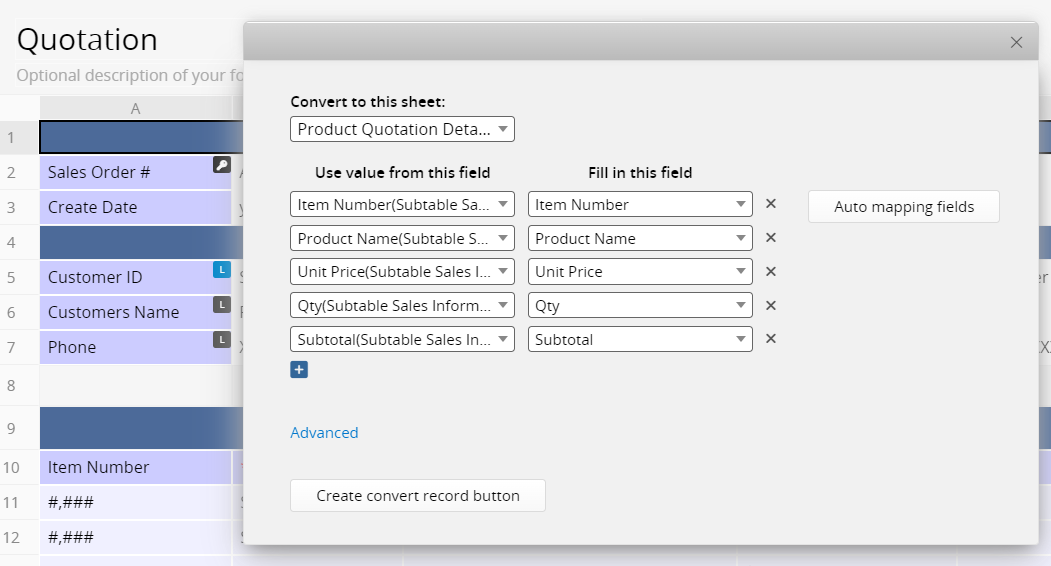
After converting the records, for instance, since the Subtable in the "Quotation" sheet contains 3 quotation items, the "Product Quotation Details" will create 3 corresponding records.

For advanced settings of Converting Records, please refer to the table below:
| Advanced Setting | Default Value | Description |
|---|---|---|
| Check if converting empty values to "Not Empty" fields when executed | Off | Prevent the target field from being left empty if it is a Not Empty field. |
| Check if converted values match the "Validation" settings on the target fields | Off | Prevent the converted value from not meeting the target field's Validation setting. |
| Check if all "Not Empty" fields on the target sheet are converted | Off | Check if there are any Not Empty fields left unfilled in the target sheet after the conversion. |
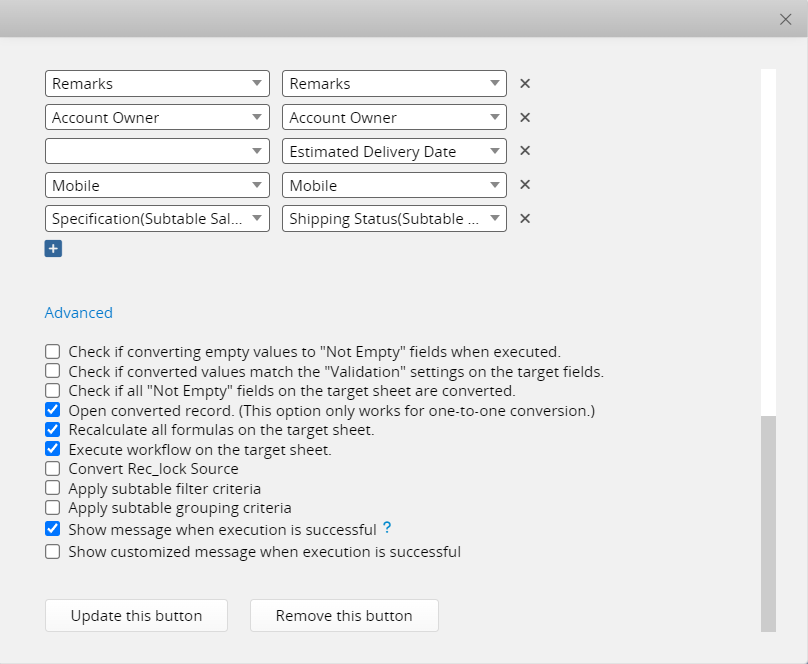
| Open converted record (This option only works for one-to-one conversion) | On | After the conversion, it opens a new page displaying the converted record; one-to-many conversions of Subtable fields are not applicable. |
| Recalculate all formulas on the target sheet | On | Enabled by default; if you don't want to trigger Formula Recalculation, remember to uncheck this option. |
| Execute workflow on the target sheet | On | Enabled by default; if you don't want to trigger Workflow, remember to uncheck this option. |
| Convert Rec_lock Source | Off | Prevent users from modifying the source sheet data after the conversion. |
| Apply subtable filter criteria | Off | Refer to the following section on applying subtable filtering criteria. |
| Apply subtable grouping criteria | Off | Refer to the following section on applying subtable grouping criteria. |
| Show message when execution is successful | On | It is recommended to keep this option checked. If unchecked, it may be difficult to confirm success during long execution times. |
| Show customized message when execution is successful | Off | After checking this option, you can enter a custom message in the field that appears below. Please note the character limit. |
When converting from a source sheet with Subtable fields, you can apply filtering conditions to convert only the Subtable value that meets specific criteria.
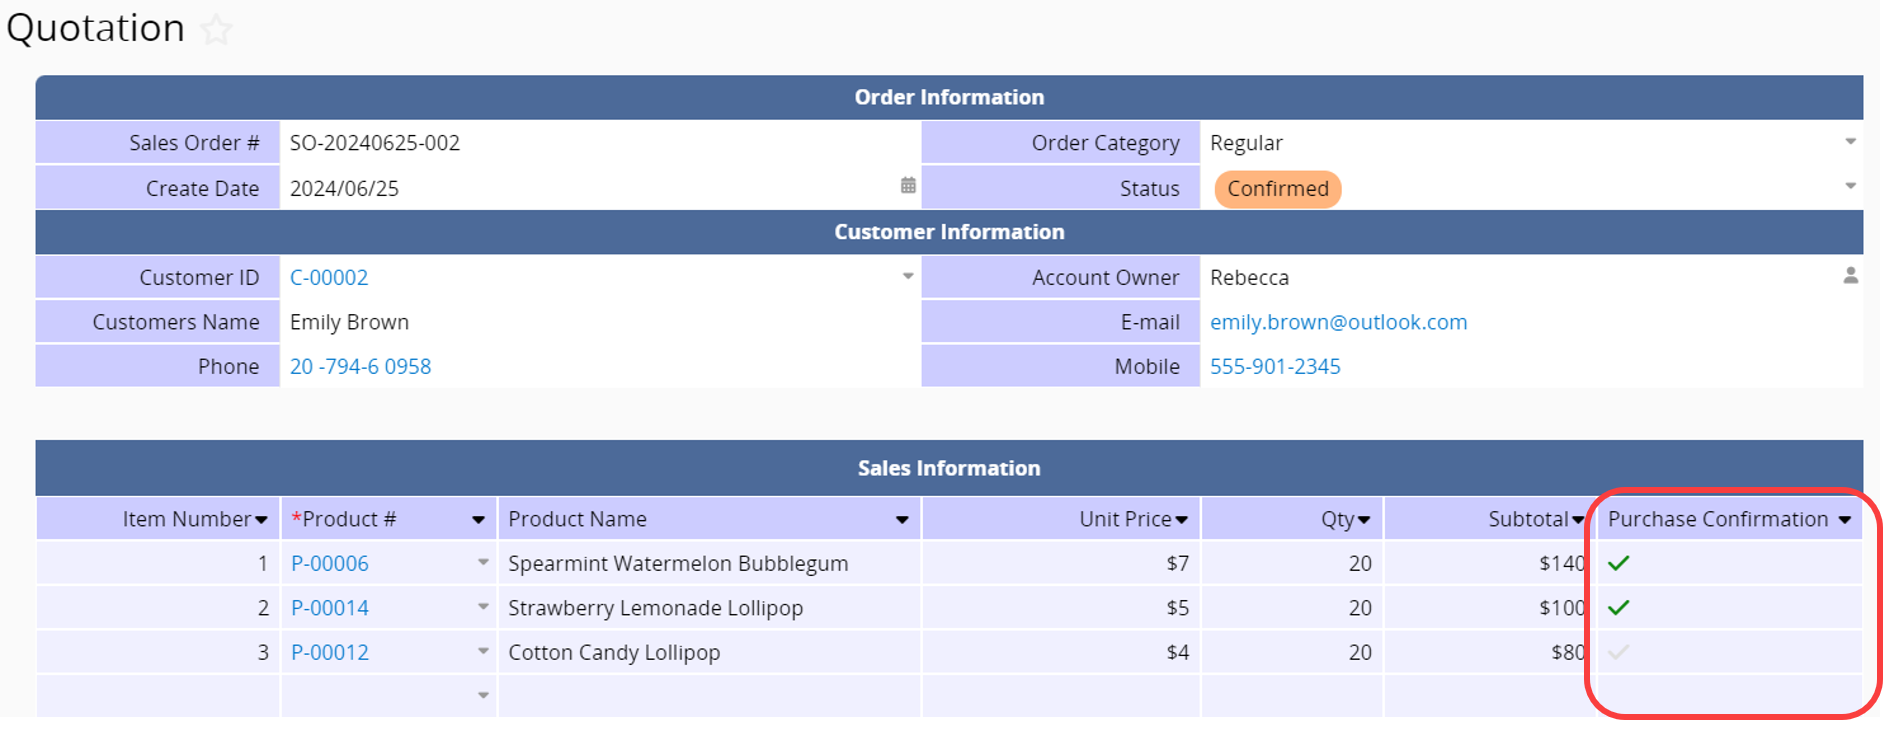
For example, when converting from "Quotation" to "Sales Orders", the customer may decide to purchase only certain products instead of all. If the Subtable includes a "Purchase Confirmation" field, you can use this field value to apply filtering criteria.
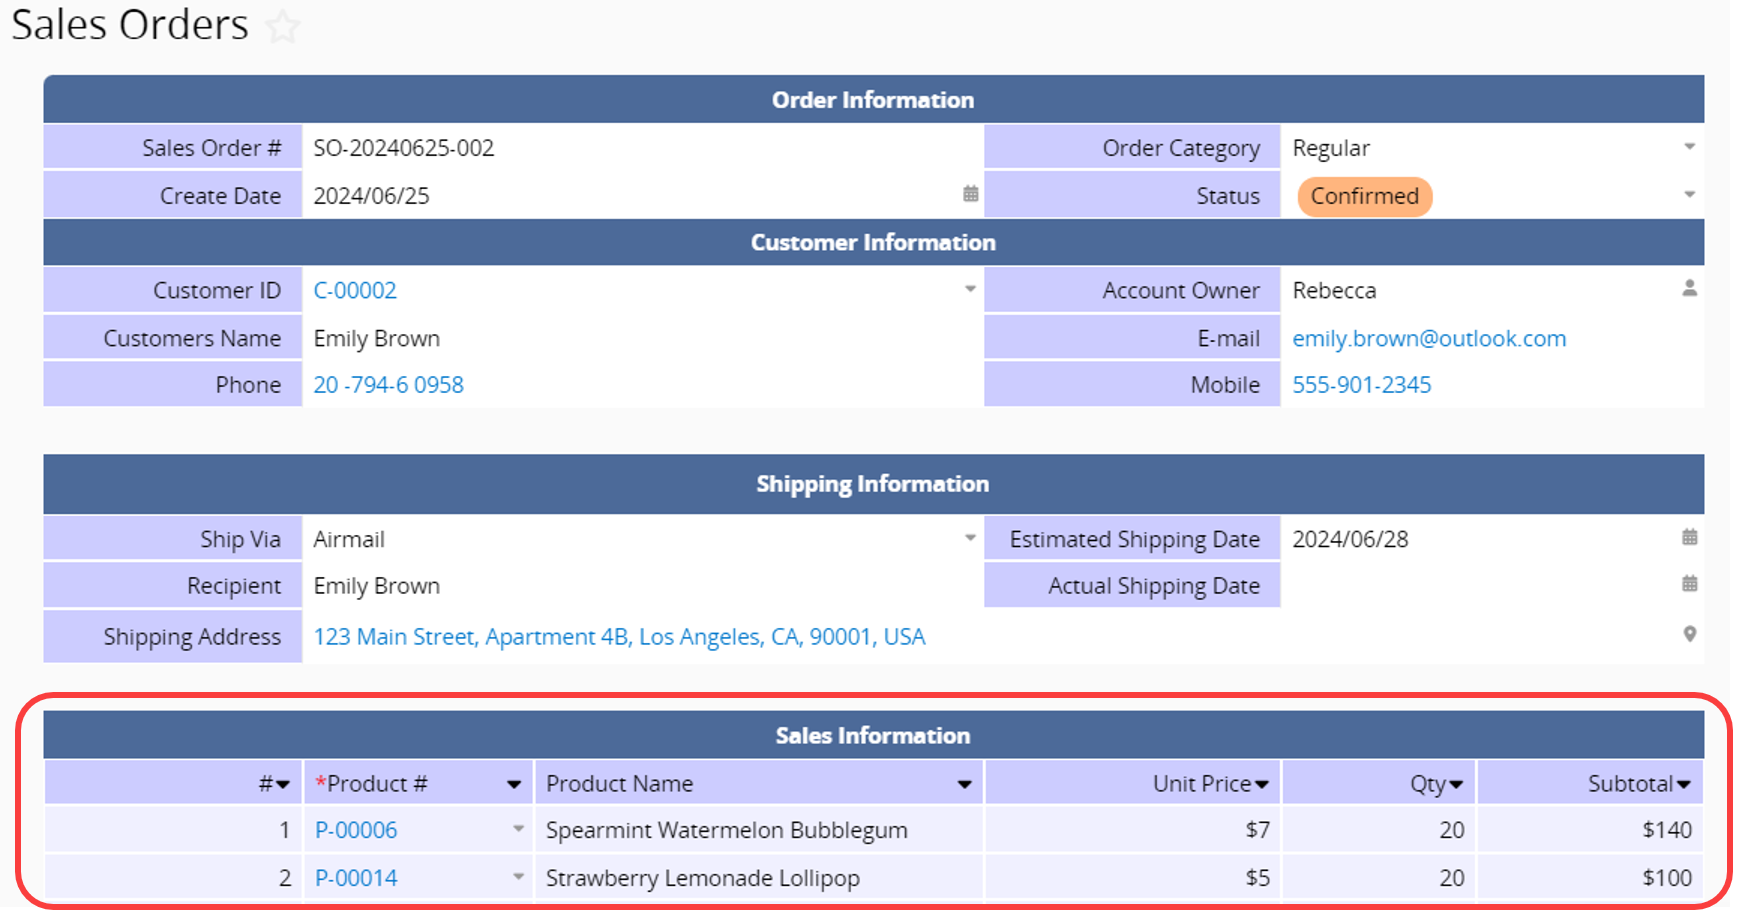
In the example below, three items were initially quoted in the "Quotation" sheet, but the customer purchased only two. The Subtable also includes a field indicating which two items were purchased.
If you directly convert to the "Sales Orders", all Subtable values will be transferred. Later, you may need to manually delete any unnecessary items. Setting up Subtable filtering criteria can help avoid manual deletion.
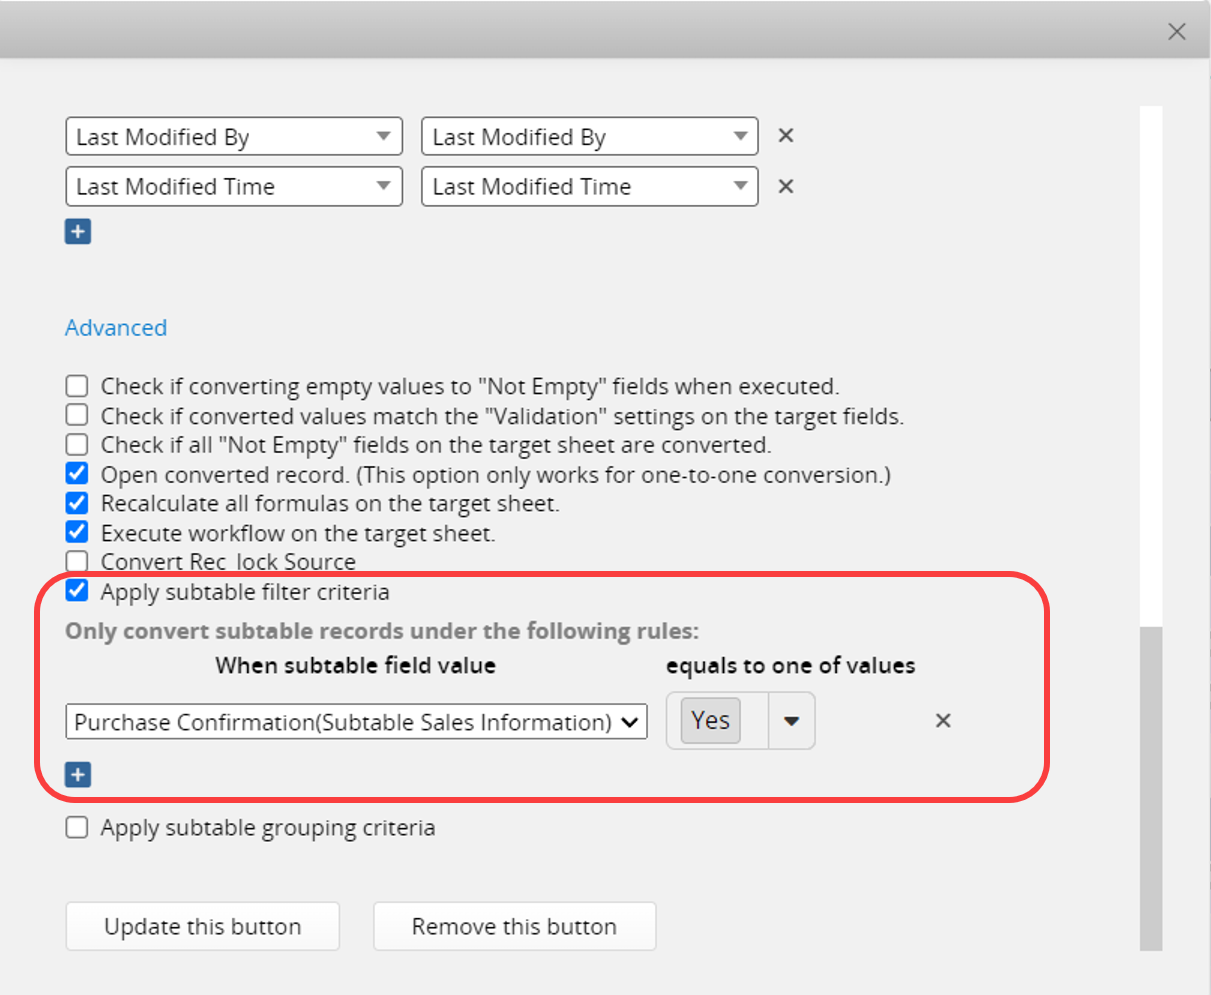
Based on the configured conditions, the converted "Sales Orders" will only include two records of Subtable value that meet the criteria.
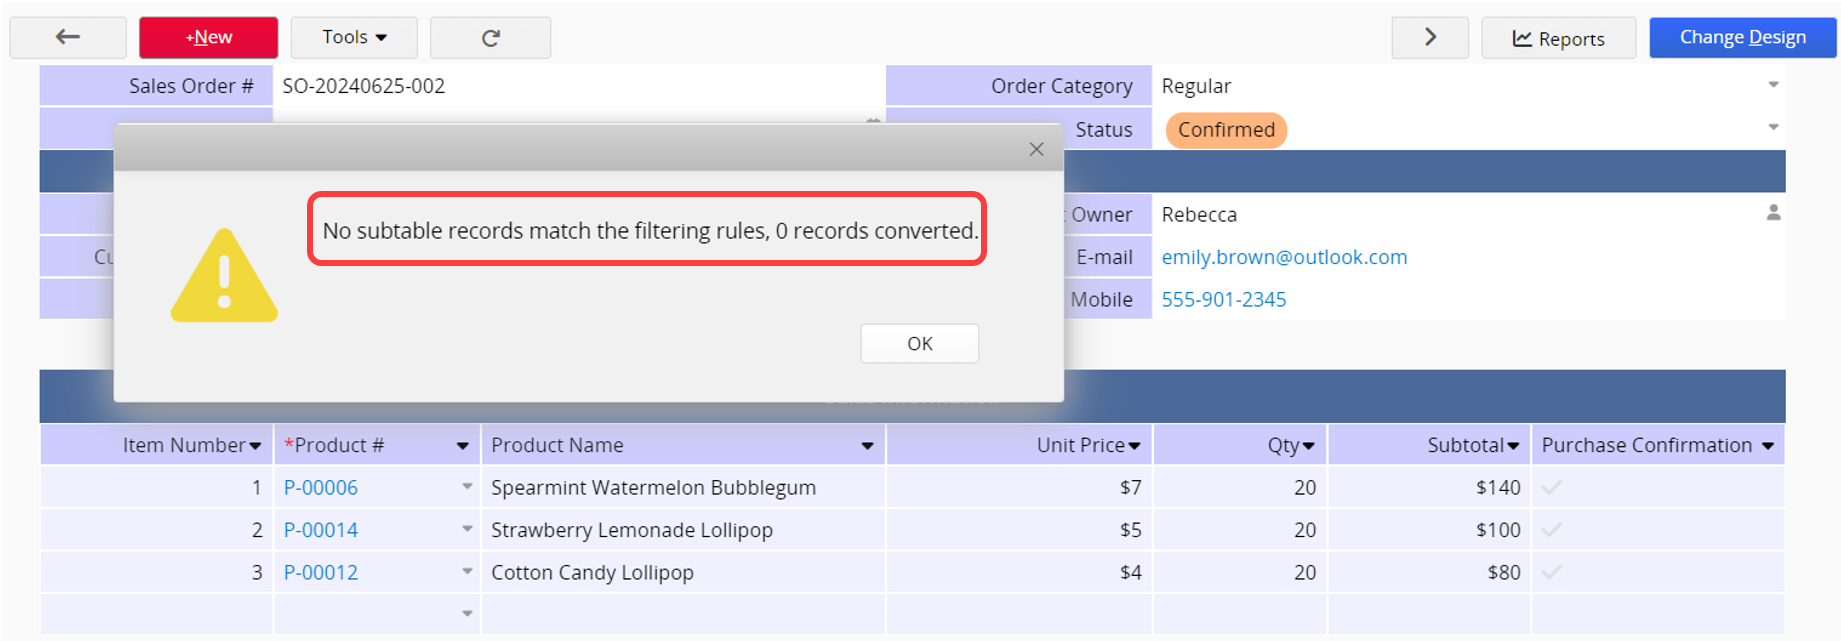
Note: When converting Subtable fields to independent fields, even if there are no values that meet the filtering criteria, the conversion will not be considered a failure. It will still proceed with the conversion process, resulting in "0" records converted.
If your convert record settings involve converting Subtable fields to independent fields and Subtable fields on the target sheet, you will create N records on the target sheet corresponding to the N records in the Subtable on the source sheet (for detailed information, please refer to this section). However, if you wish to group these Subtable records into N sets based on a specific field value, determine the creation of N independent records, and based on the grouped results, decide how many items each record's Subtable will contain, you can apply Subtable grouping criteria.
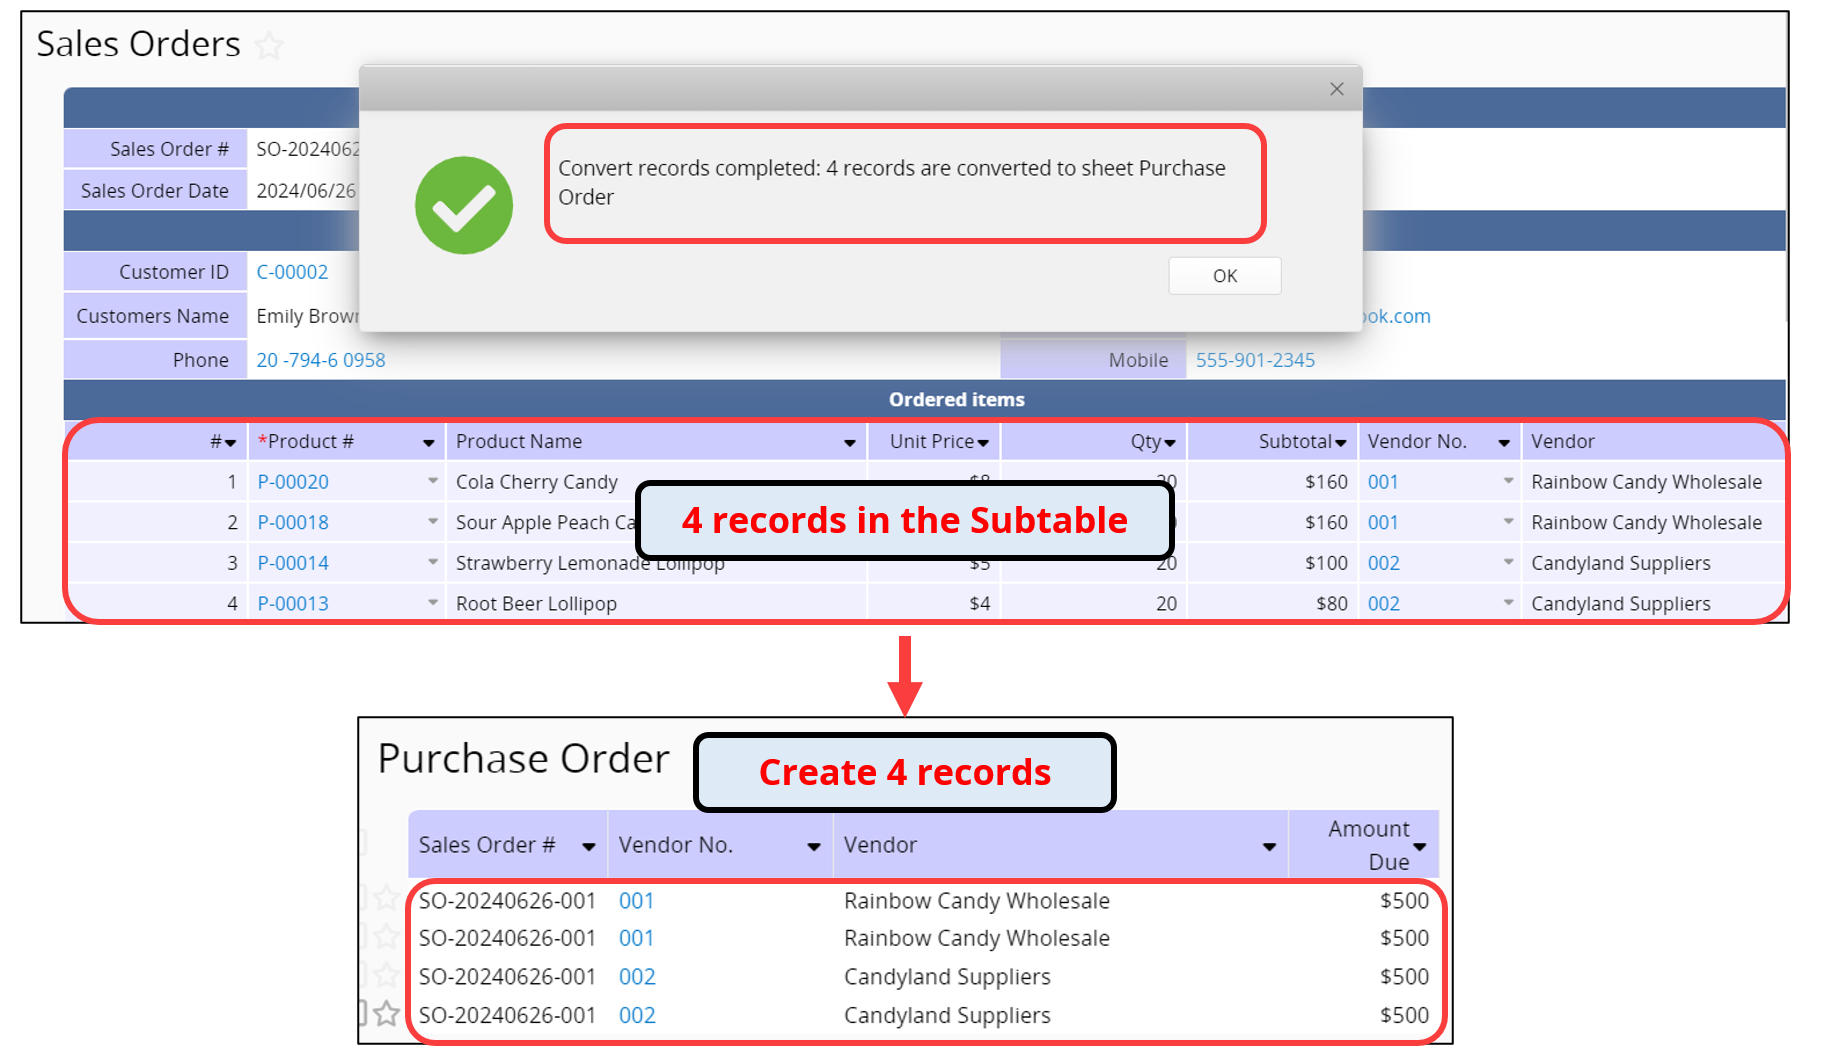
When creating a "Purchase Order" from "Sales Orders" using the Convert Records button, if the setup includes converting independent fields to independent fields and Subtable fields to Subtable fields, each "Sales Order" will generate one corresponding "Purchase Order".
However, if the "Sales Orders" items are intended for different vendors, directly converting records requires manually performing the conversion N times based on the number of vendors. You also need to manually select the vendor for each "Purchase Order" and delete Subtable items not belonging to that vendor.
In the example below, if multiple sales items on this "Sales Order" are sourced from two different vendors:
Using advanced settings with Subtable grouping criteria, based on the "Vendor No." in the Subtable converted to independent fields:
You can directly convert them into "Purchase Order" for the two vendors, each containing the respective Subtable items belonging to that vendor.
Note: If the field value used for grouping is "empty", it will not be grouped and converted by default. However, if you wish to convert Subtable data even when the grouping field value is empty (treating empty values as a group), you can check the option to Allow subtable record(s) with empty value in grouped field(s) to be converted.
| to an independent field | to Subtable fields | |
|---|---|---|
| from an independent field | ✔ (clicking the button once to create one record) | ✘ |
| from Subtable fields | ✔ (clicking the button once to create N records, N = the number of Subtable records) | ✔ (clicking the button once to create one record) |
Note: The system does not allow converting an independent field from one sheet to Subtable fields in another sheet because an independent field holds only a single value per field, whereas Subtables can contain multiple values.
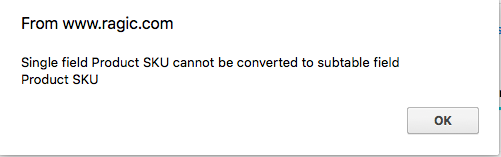
When mapping fields, if selecting an independent field to convert it into a Subtable field, the system will mark the row in red to prevent accidental selection.
If you want to delete the Action Button, you can refer to this article.
Alternatively, if you need additional settings for the Action Button, such as restricting user access rights to use the Action Button, you can refer to this article.
 Thank you for your valuable feedback!
