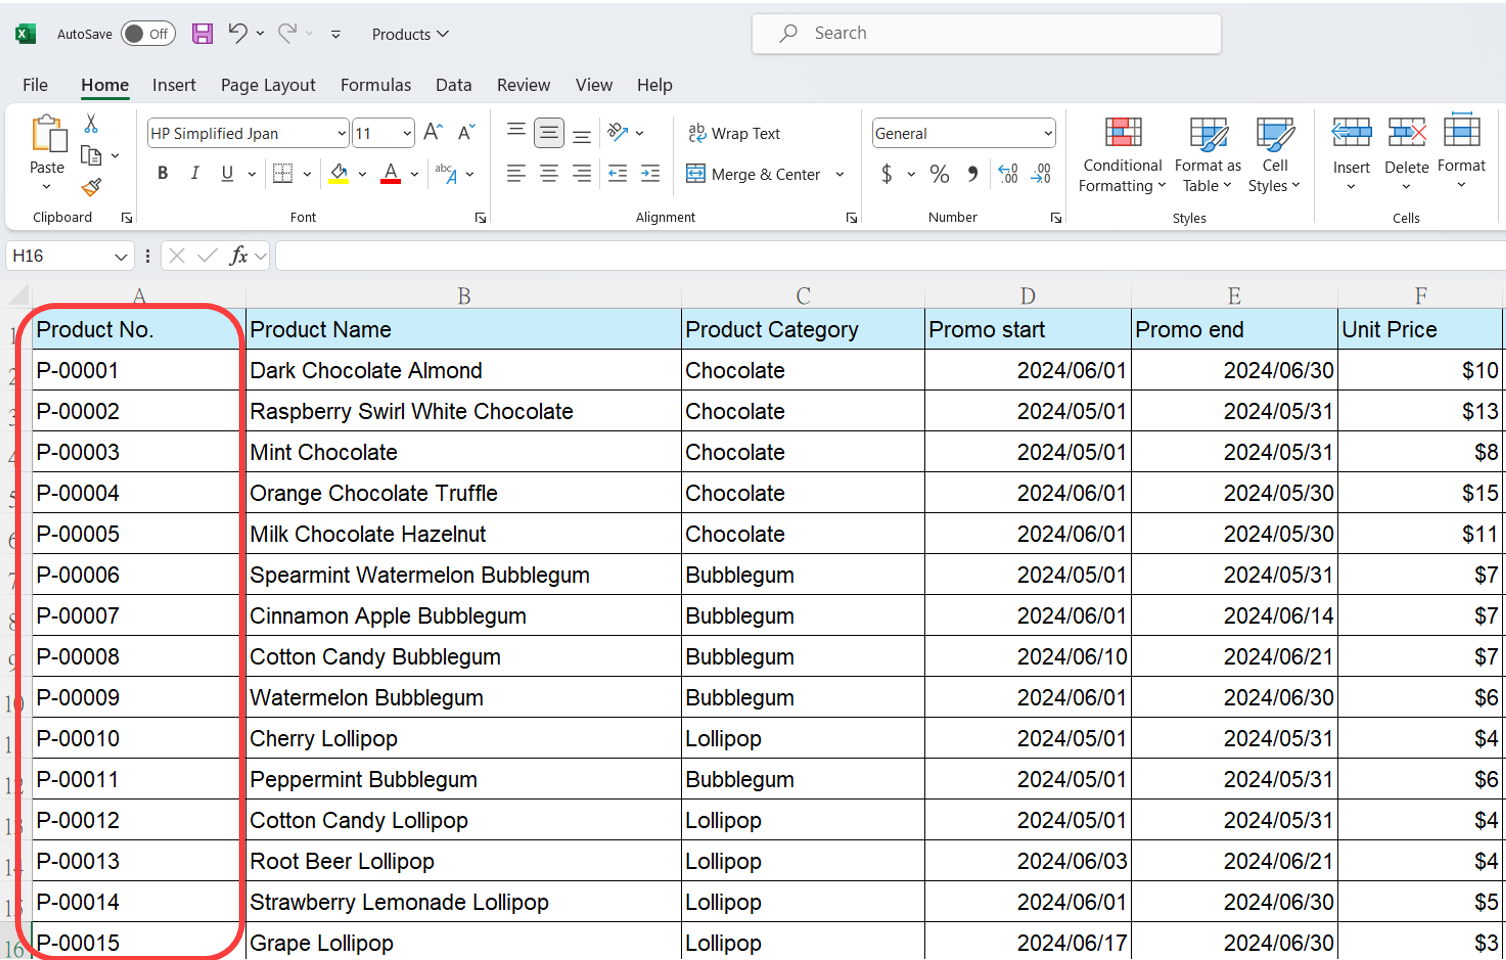
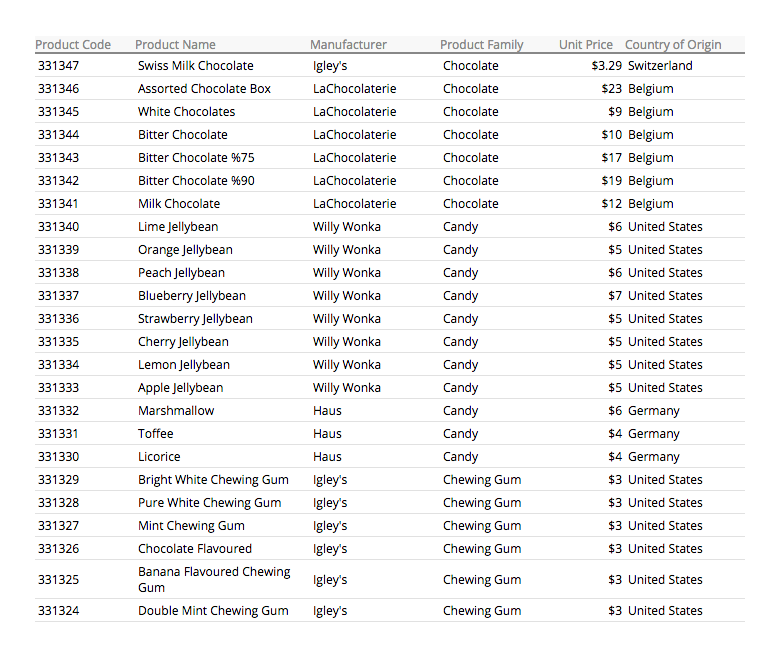
To accurately read your import file, the first column should contain a Unique Value field (Key Field) to allow the system to identify each record. For example, the "Product No." for products or the "Customer No." for customers.
Ragic supports .xls .xlsx and .csv files. We recommend that you save your file as .csv for the best performance.
Here is the maximum size for each file format:
| Format | Maximum File Size |
|---|---|
| .xls | 10 MB |
| .xlsx | 10 MB |
| .csv | 200 MB |
For the On-premises Plan, there is no import file size limit.
Note:
1. To import data into a User Page, the first column of the import file must be Email. Using other Unique Value fields, such as "name" or "employee ID", may cause the import to fail or prevent updating existing data.

2. To import multiple values for Multiple Select fields, use commas (,) or vertical bars (|) to separate the values in the import file. (If the value itself contains a comma, use vertical bars to separate them).
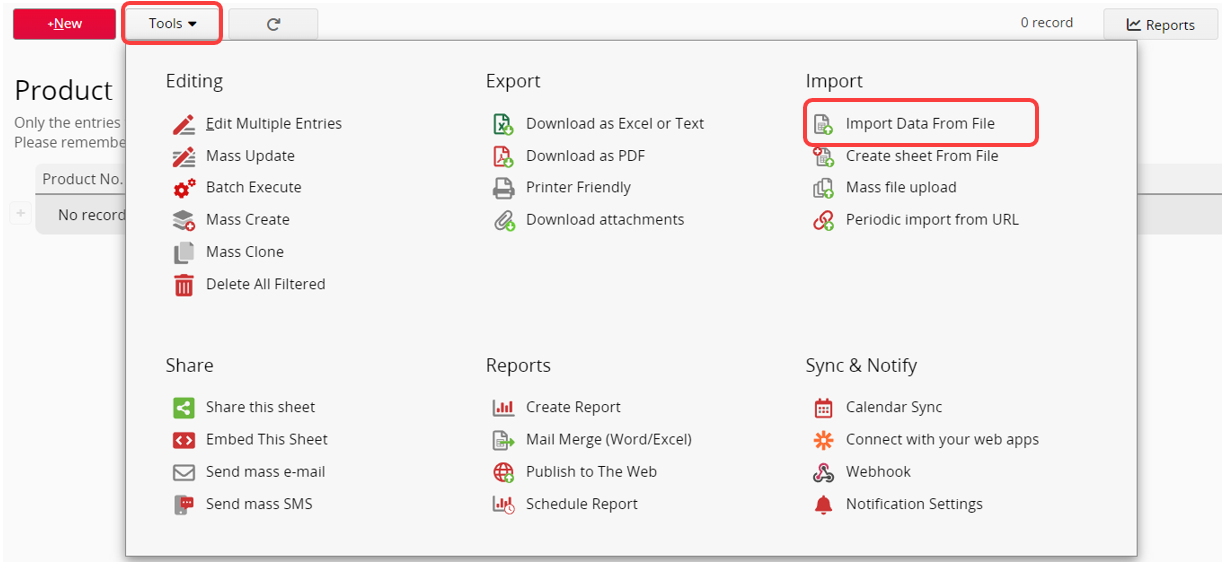
Users can import existing data from Excel or CSV files into Ragic. Go to the Listing Page of the sheet where you would like to import data and choose Import Data From File under Tools.
Upload your file and click "Next".

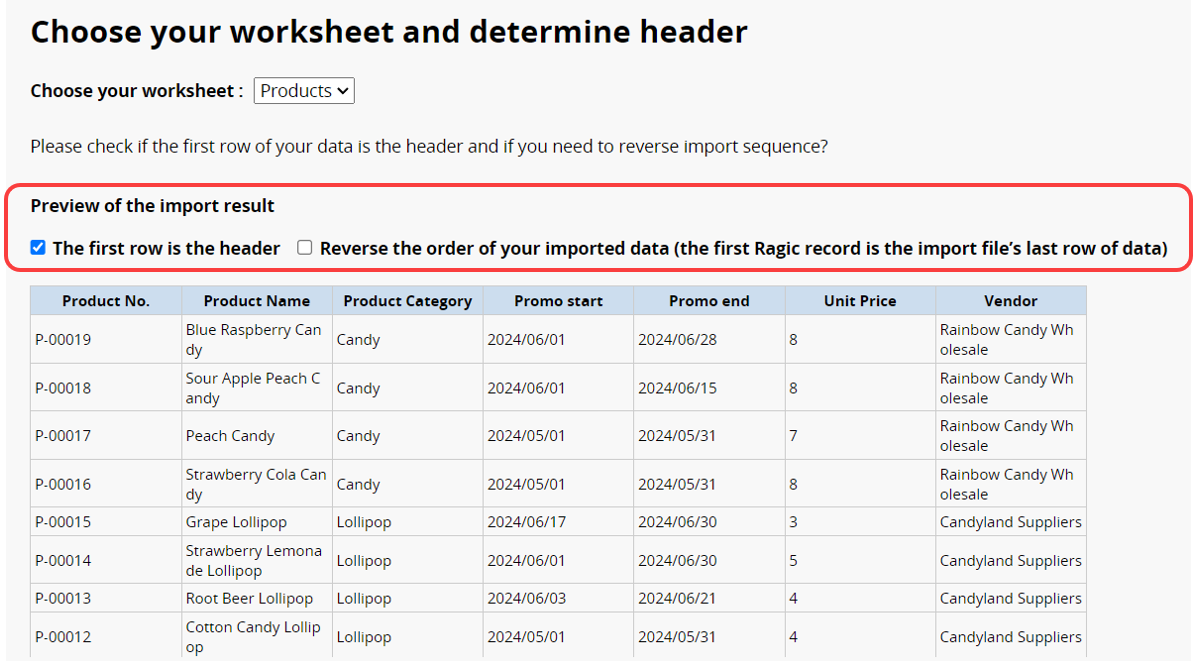
Check if the first row of your data is the header and if you need to reverse the import sequence.
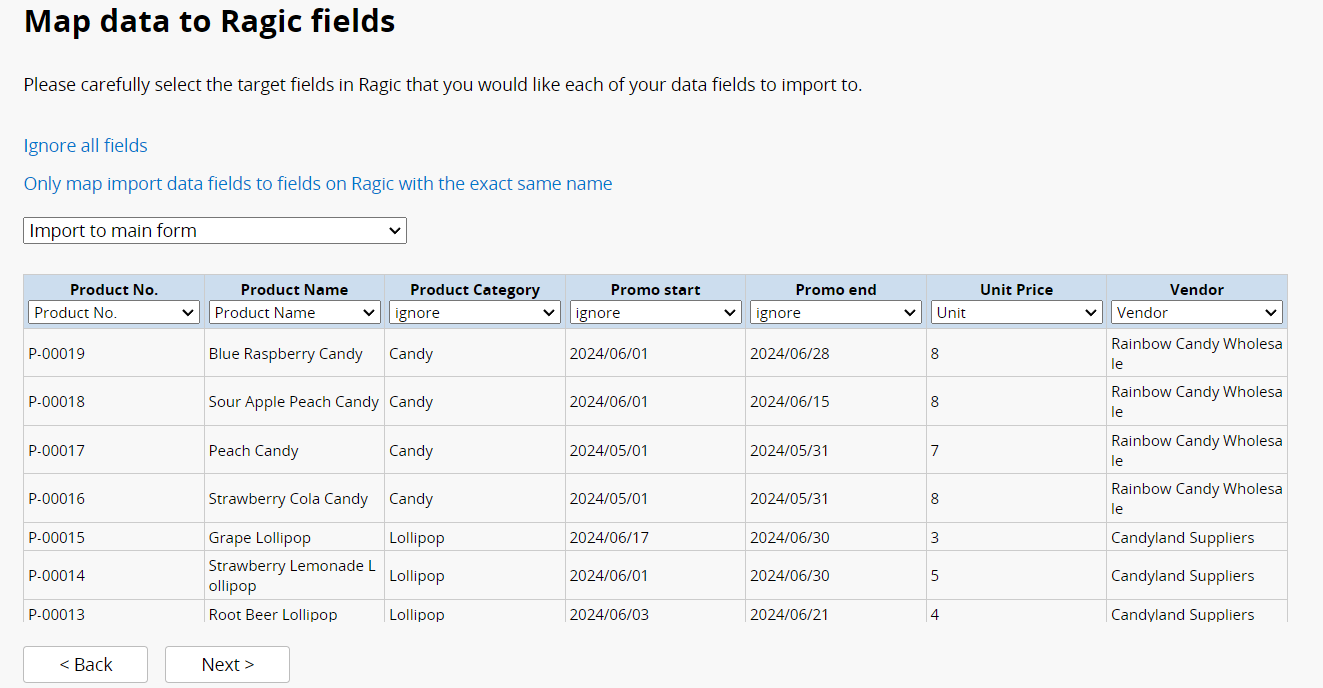
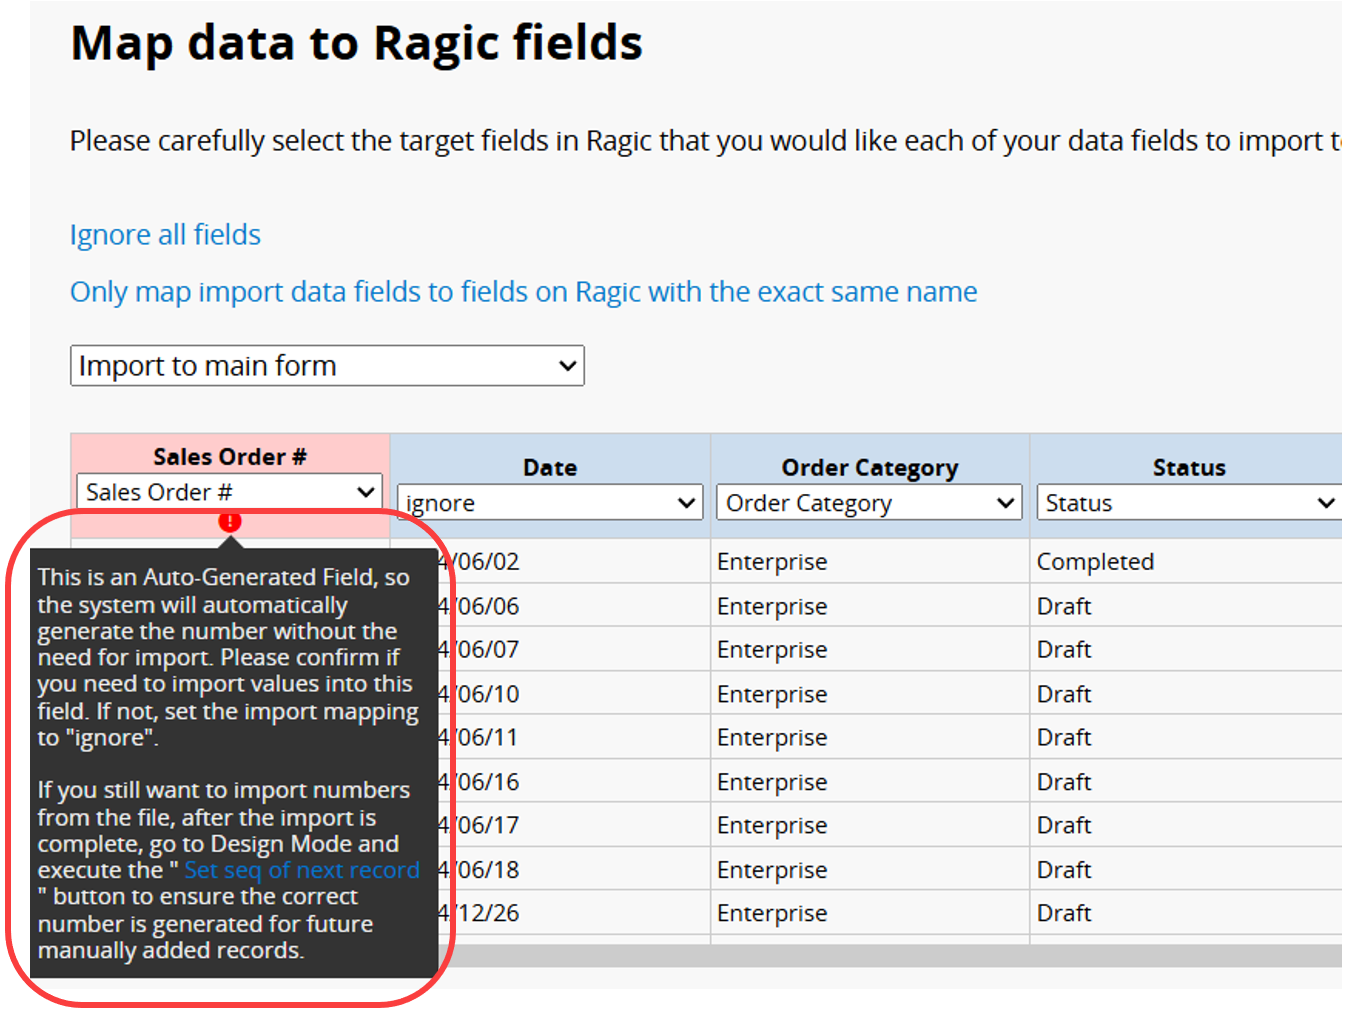
If there are fields with similar names, ensure that each target field correctly corresponds to the intended import fields on the next page. You can choose to ignore columns of data that you do not want to import. Note that the target field values should be in the correct format; for example, if the date format in the import file is yyyy/M/d and the date format in the sheet is yyyy/MM/dd, mismatched formats may result in unsuccessful import of the field values.
When importing into an Auto Generated field, which generates numbers automatically without the need for import, a prompt will appear. Please confirm whether you want to import data into this field. If not, set the import mapping to ignore.
If you choose to import numbers from the file, after the import is complete, go to Design Mode and execute Set seq of next record to ensure correct numbering for future records.
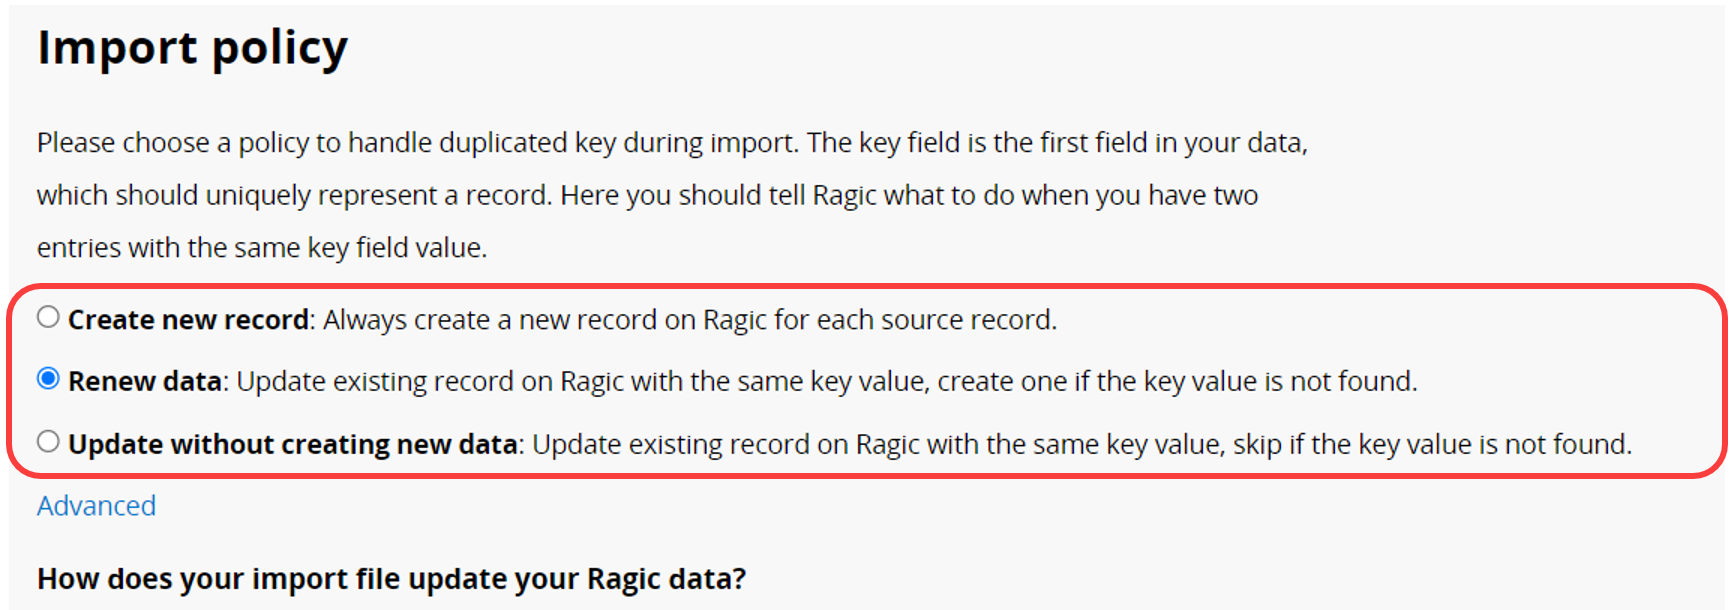
Choose the Import Policy when importing data. Ragic will match the data in the import file based on the Key Field in the first column with entries in your sheet.
Create new entry: If a duplicate Key Value exists in entries, a new entry will still be created.
Renew data: If a duplicate Key Value exists in entries, the existing data will be updated. If the Key Value does not exist in your database, new entries will be created for this Key Value. This import policy allows for updating existing data and creating new entries.
Update without creating new data: If a duplicate Key Value exists in entries, the existing data will be updated; otherwise, new data will not be imported if the Key Value doesn't exist in your database.
If there are fields in the sheet that are automatically populated, such as Link and Load, Default Values, or Formulas, you can configure Advanced Settings in the import policy.
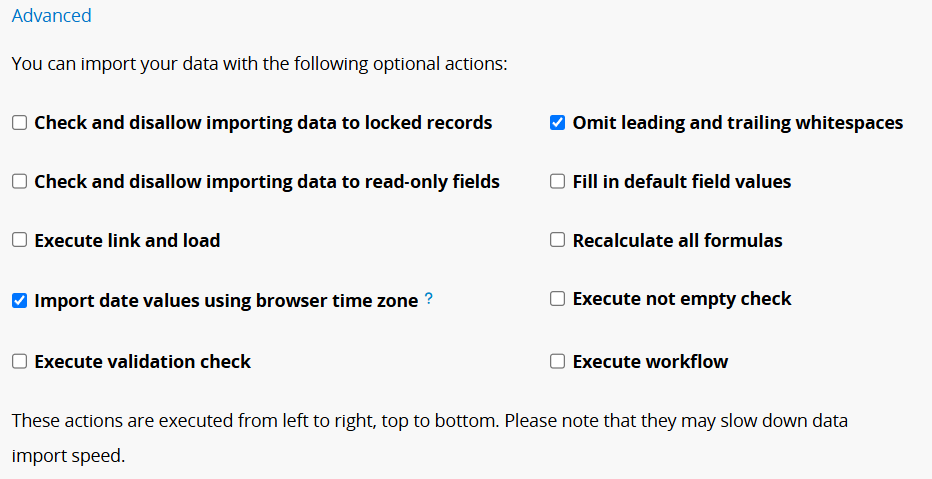
The following explains each item in the order they are executed during import.
| Advanced Setting | Description |
|---|---|
| Check and disallow importing data to locked records | If you want to prevent field values in locked records from being updated during import, select this option. |
| Omit leading and trailing whitespaces | Unwanted leading and trailing whitespaces will be omitted during import (checked by default). |
| Check and disallow importing data to read-only fields | If the imported file contains Read Only field values, those values will not be written into the database. |
| Fill in default field values | This option can automatically populate fields with Default Values and Exchange Rate fields. |
| Execute link and load | When Link and Load settings are configured on the sheet, select this option to load field values based on imported data. If not selected, the loaded fields will remain empty. |
| Recalculate all formulas | Recalculate all Formulas during the import. |
| Import date values using browser time zone | When enabled, date values in your import file will align with your browser's time zone. If not selected, they will default to UTC+0 time zone. |
| Execute not empty check | Check if there are field values configured as Not Empty. If a field is empty, it will be skipped during the import. |
| Execute validation check | Check if the field value meets the configured Validation. If they do not, they will be skipped during the import. |
| Execute workflow | Execute workflow (specific to each database's configuration). |
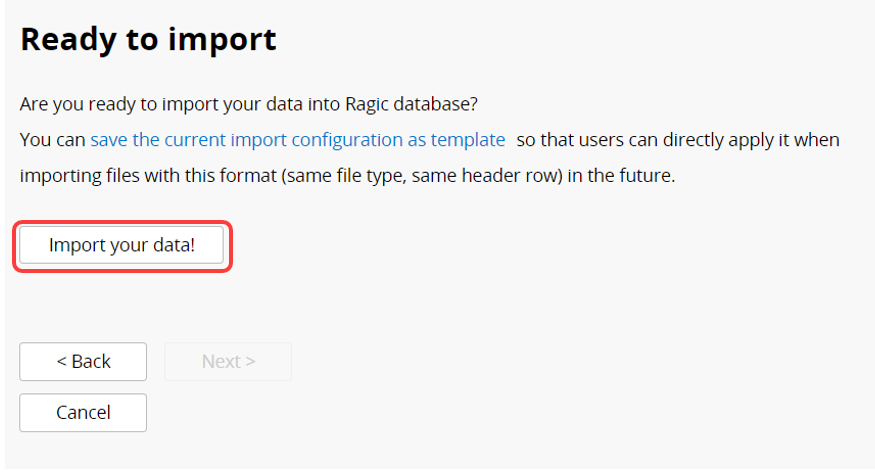
Finally, click "Next" to proceed to the next page, then click "Import your data!" to import your data into the sheet.
You can also create new sheets by importing if needed.
For more details, you can refer to the following video to see how to import data into Ragic.
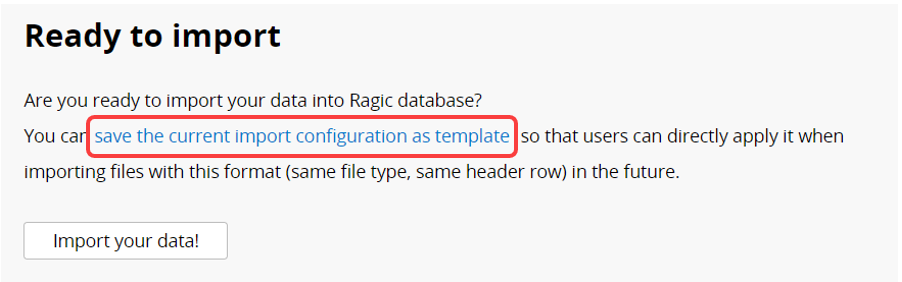
After mapping fields and choosing import policy and advanced settings, you can save the current import configuration as template so that users can directly apply it when importing files with this format in the future. However, the import template for each sheet is independent.
This function is only available when all the following conditions are met:
1. The import is executed by a SYSAdmin or group administrator in their respective tabs.
2. The import is not executed with an existing import template.
3. The import is not periodic.
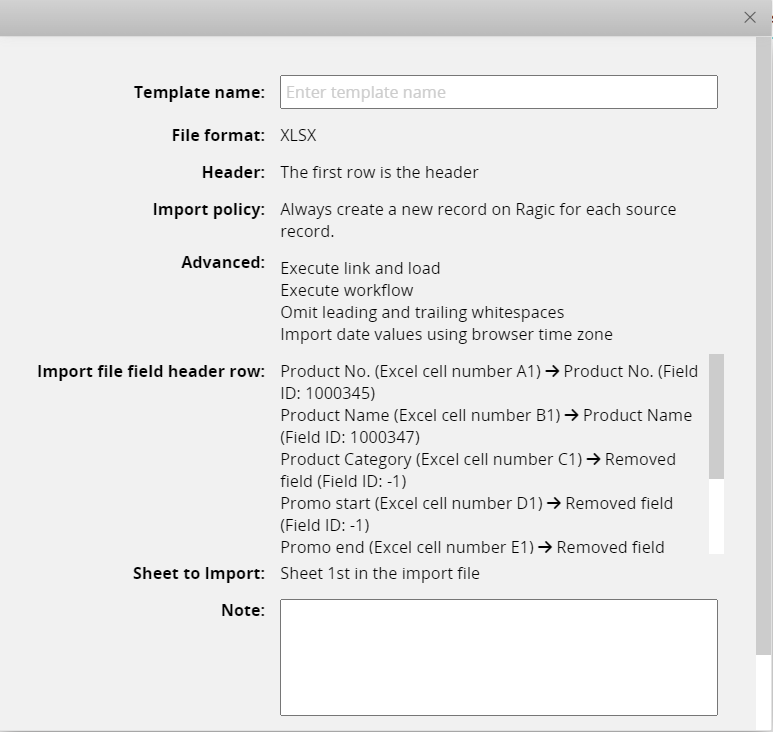
In the pop-up window, name the template, review the import settings, and save it.
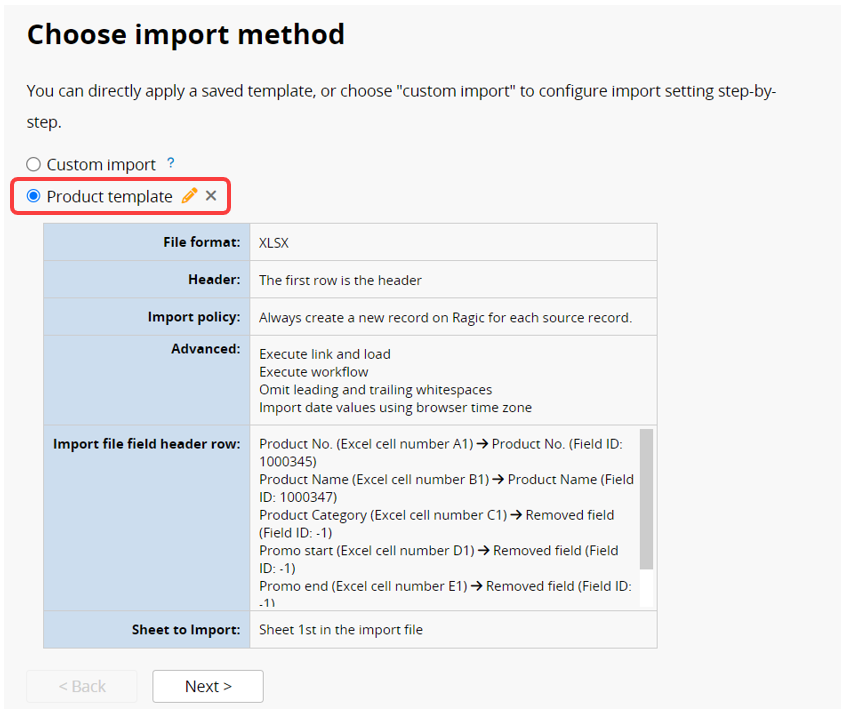
You can select the saved template to import data into the sheet in the future.
You can create a new sheet by importing your data from an Excel or CSV file into Ragic, instead of starting from scratch.
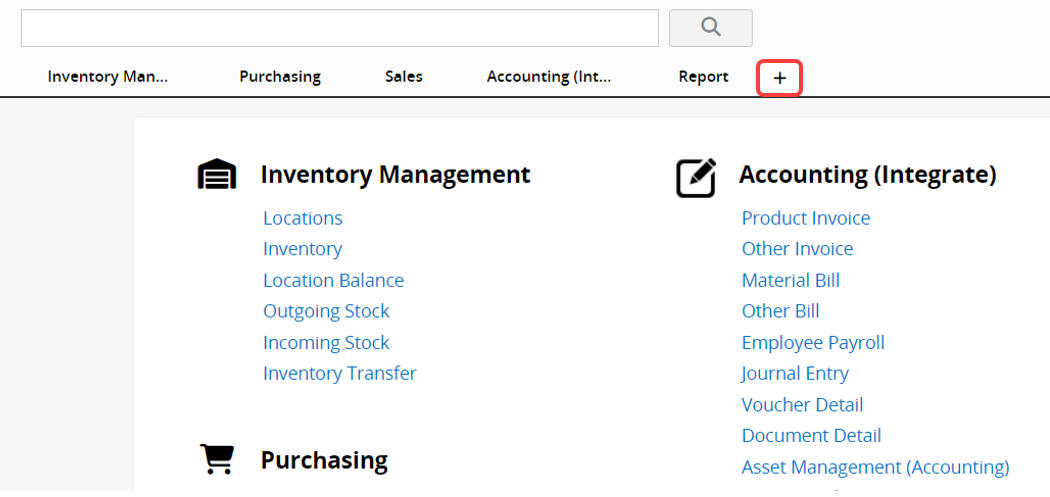
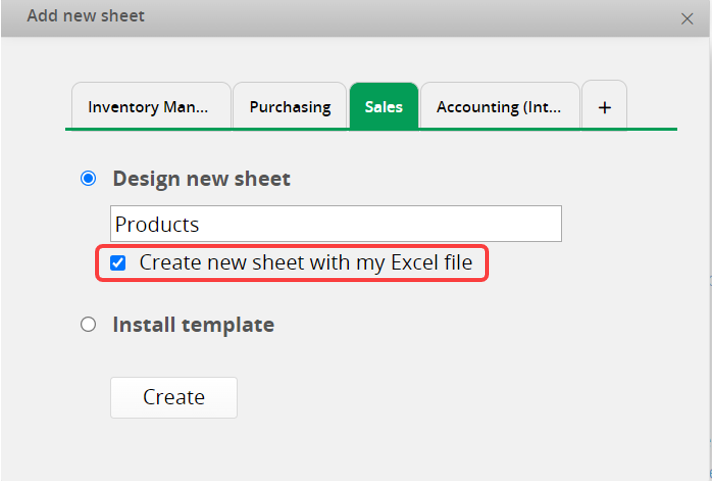
Click on the + sign at the top of your page to create a new sheet.
Name the new sheet and check the box Create new sheet with my Excel file.
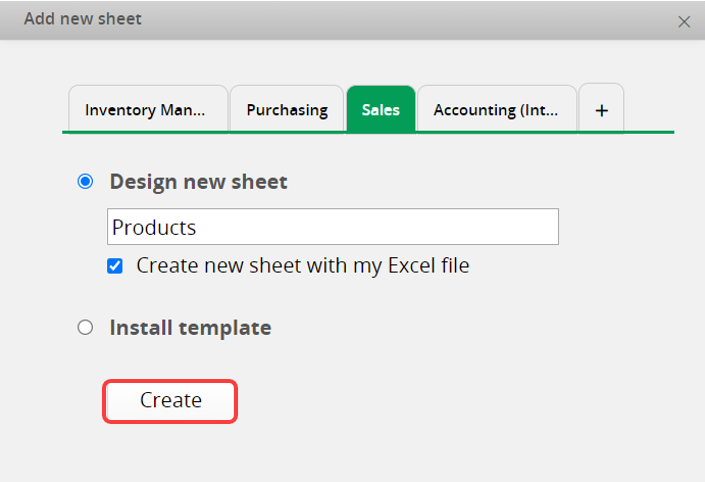
After clicking "Create", it will guide you through the same steps as importing data.
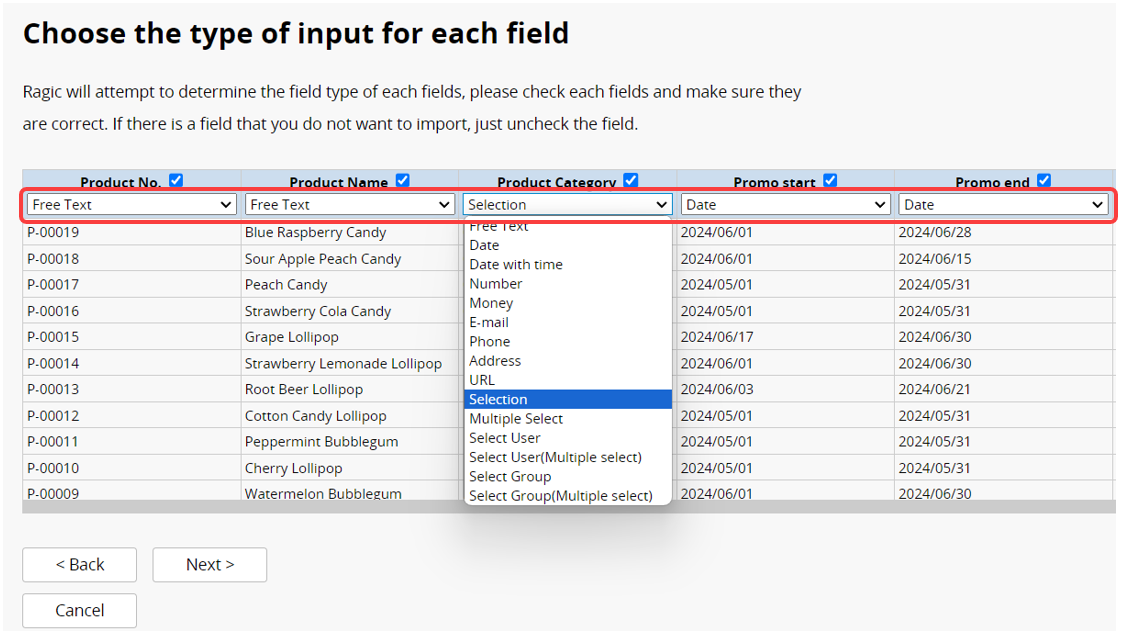
However, the field mapping step will involve setting the Field Types for each column.
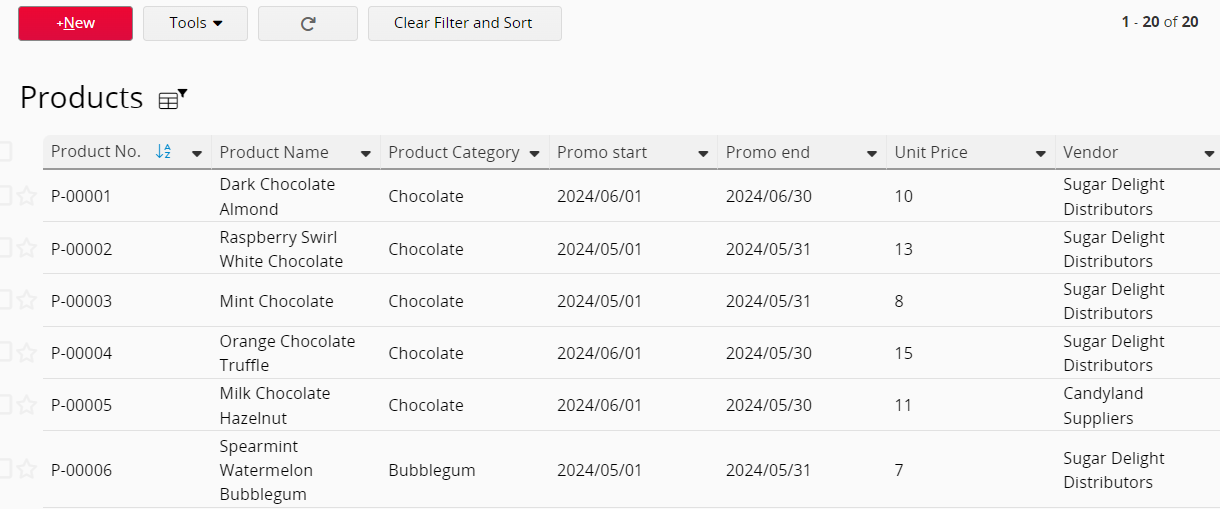
After importing, both the sheet and the records will be created simultaneously.
To import data into a Subtable, enter the Form Page Design Mode, navigate to Form Settings in the left sidebar, click on the Form Settings tab, and check the Selection Title Field option.

You can change the Selection Title Field as needed, but make sure to select a Unique Value field to ensure the system correctly identifies which data each import entry belongs to. Incorrect settings may cause mismatches during the import process.
For example, to import into the "Order Details" Subtable in the "Sales Orders" sheet, follow the steps below:
Place the "Selection Title Field," such as "Sales Order Number", in the first column of the import file and fill in the corresponding values.
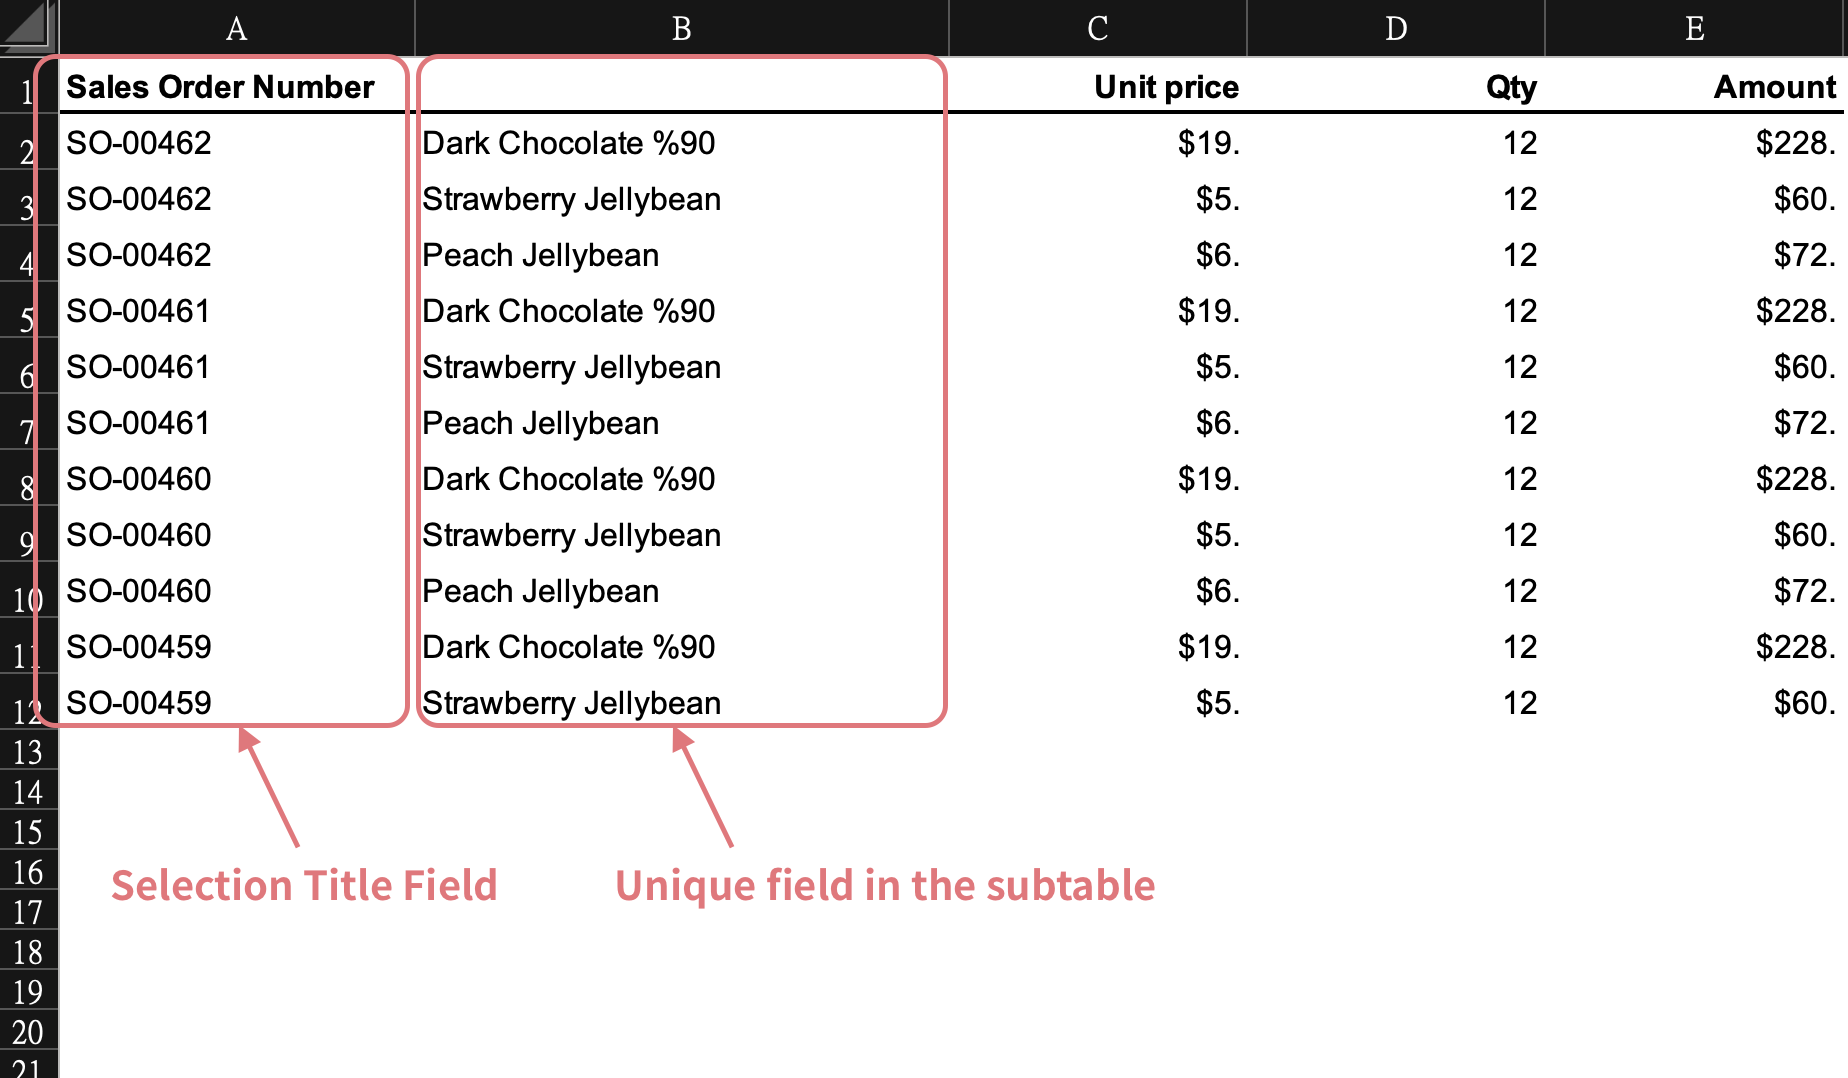
During import, the system uses the value in this column to determine which row in the Subtable belongs to which record. For example, it uses the "Sales Order Number" to decide into which "Sales Order" record each "Order Details" in the Subtable should be imported.
Before importing, ensure that the main record you intend to import into already exists. For instance, if you want to import "Order Details" for "Sales Order Number" "SO-20201022-001", there must already be a corresponding record with this "Sales Order Number" in the "Sales Orders" sheet. If not, please create it before you import data into the Subtable.
Select the name of the Subtable you want to import into from the dropdown menu.
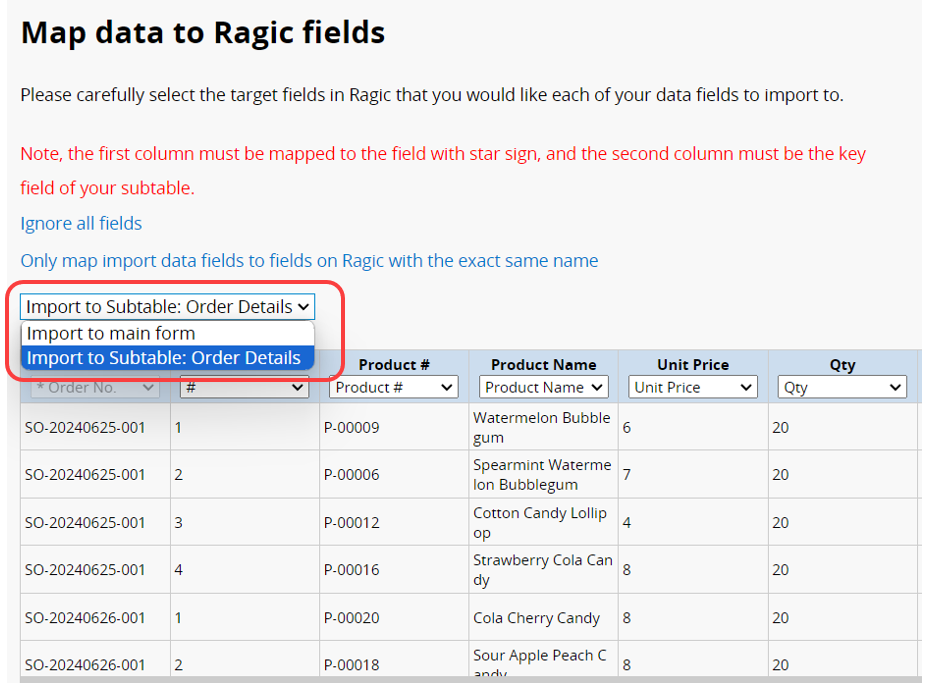
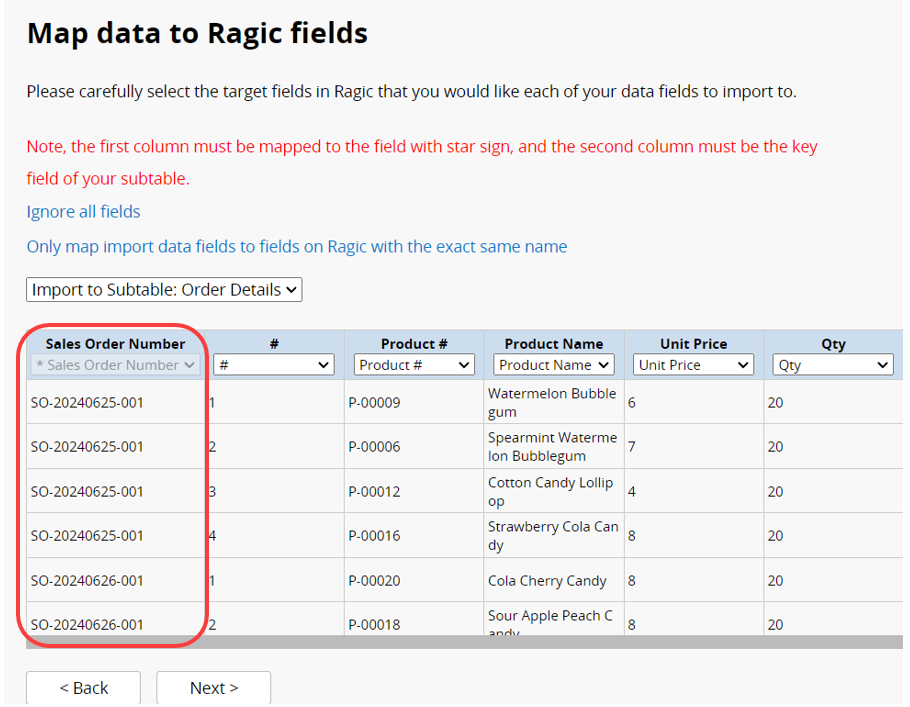
In the mapping process, the system automatically locks the first column. You can choose corresponding names for the other columns or ignore them if they are unnecessary.
Note: The second column must be the Subtable’s Unique Value field. If ignored, the system cannot import Subtable data. Therefore, be sure to select the correct Unique Value field for the Subtable in the second column.
After mapping fields, you may select the proper import policy and advanced settings and then import your data.
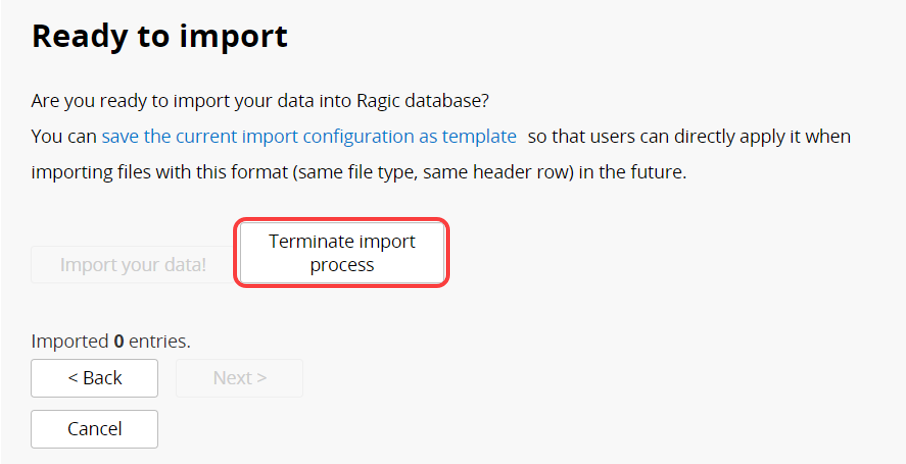
If you would like to terminate the current import process, you can click Terminate import process in the import interface.
During an import, if you attempt mass updates, deletions, or additional imports, a warning window will appear. You can also terminate the import from this window.
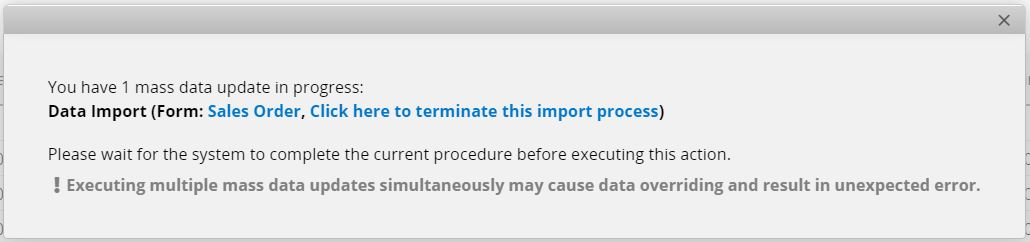
Note: Clicking the button to Terminate Import will not immediately stop the import process. It will complete the current record being imported before stopping. Once terminated successfully, the system will send an email to notify the user who terminated the import.
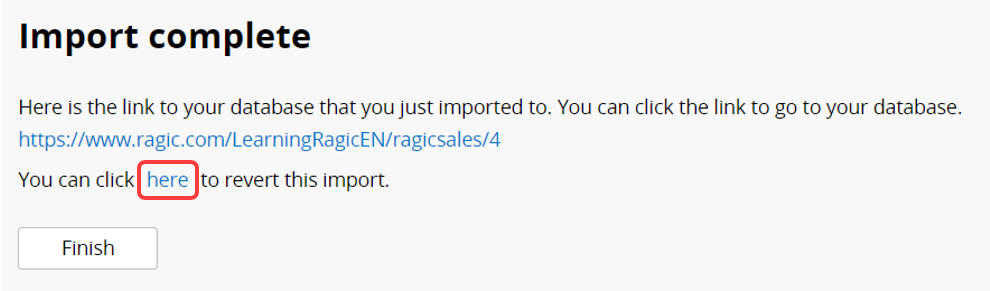
To revert the import, click "here" on the Import complete page.
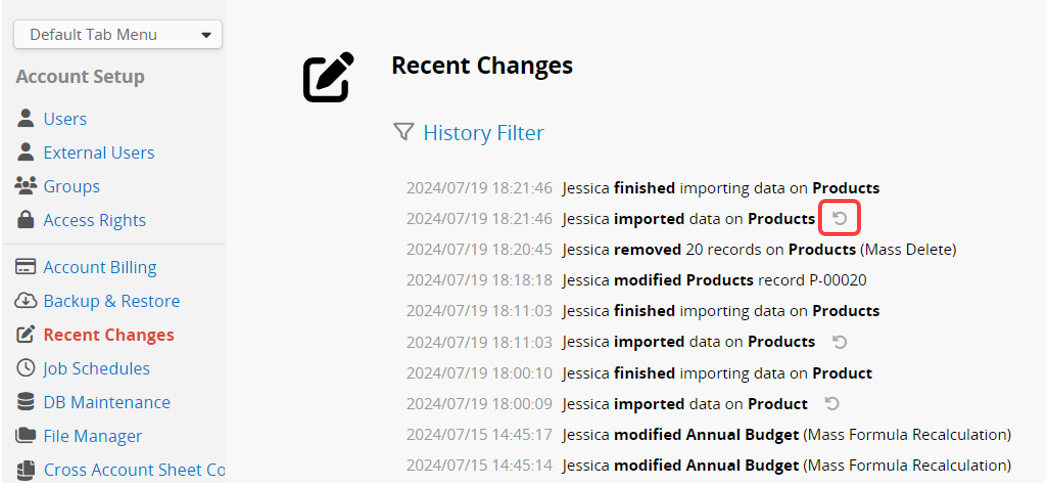
Additionally, you can navigate to Recent Changes and click the Revert Icon next to the import history to perform the reversion. Please refer to this section.
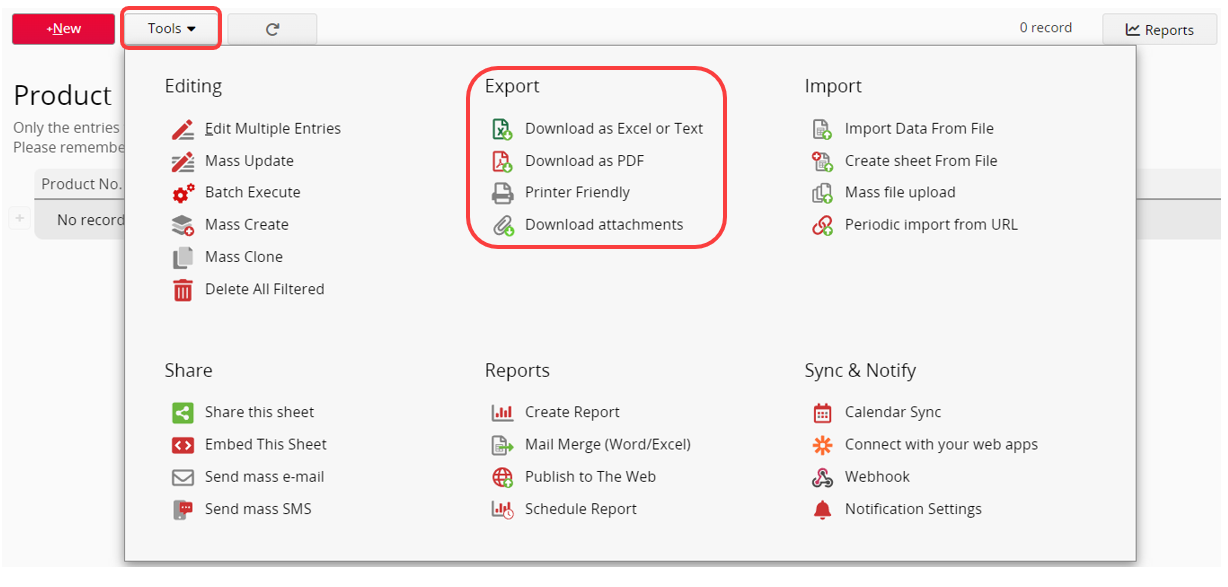
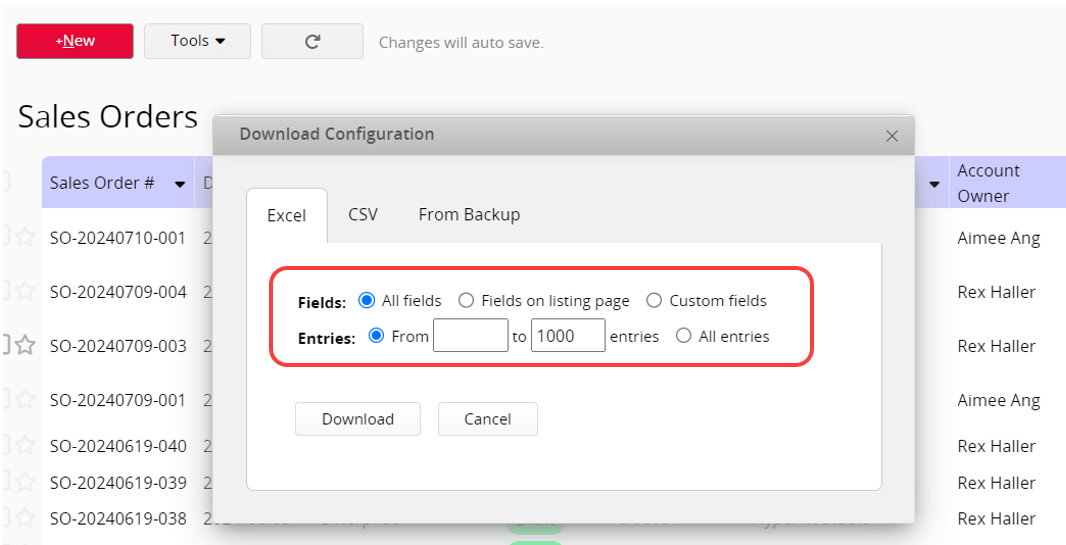
Ragic offers various options for exporting files accessible from the Tools Menu. Please note that when exporting from the Listing Page, the applied search filters will affect the range of records exported.
In the "Download Configuration", you can choose whether to export data from all fields or only from fields displayed on the Listing Page. You can also select the specific range for export.
To export one record, navigate to Tools under the Form Page instead.
Note:
1. When downloading Excel files from the Listing Page, the hidden fields can only be downloaded by SYSAdmin and Group Administrators (for sheets under that group's tab). Files downloaded by other users will not include hidden fields. If the field is present on the Listing Page, the system will first check whether the field is hidden; if the field is not on the Listing Page, it will check whether the field is hidden on the Form Page instead.
2. If you have more than 5000 records to export, the system will export records into CSV format. Furthermore, if you are exporting more than 30000 records, the system will generate the CSV file asynchronously and send the file to your email when it is done.
3. Supports downloading up to 5,000 records and 50,000 cells of Subtable data.
4. If the sheet contains Image Upload field(s), when downloading as an Excel file from the Listing Page with a specified range of fewer than 100 records, the Excel file will automatically embed the images. However, if no range is selected or if more than 100 records are chosen, the Excel file will not embed the images but will instead display URLs linking to them.
5. For File Upload field: Due to Excel's limitation of allowing only one hyperlink per cell, when there is only one file in the field, exporting to Excel will present it as a hyperlink with the file name and its URL. However, if there are multiple files in the field, due to the limitation, the file names and file URLs will be presented in a text format.
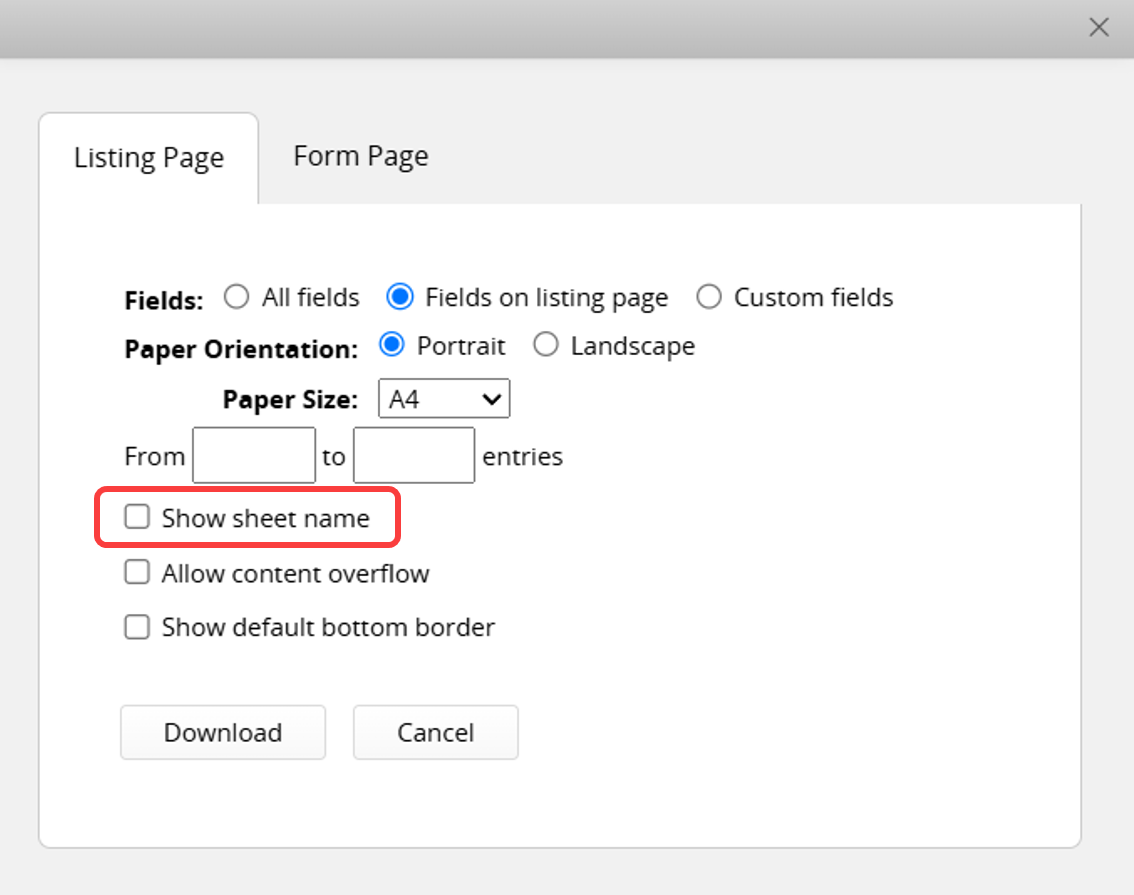
In the "Download Configuration", you can choose whether to export data from all fields or only from fields displayed on the Listing Page, along with selecting the desired number of records to export.
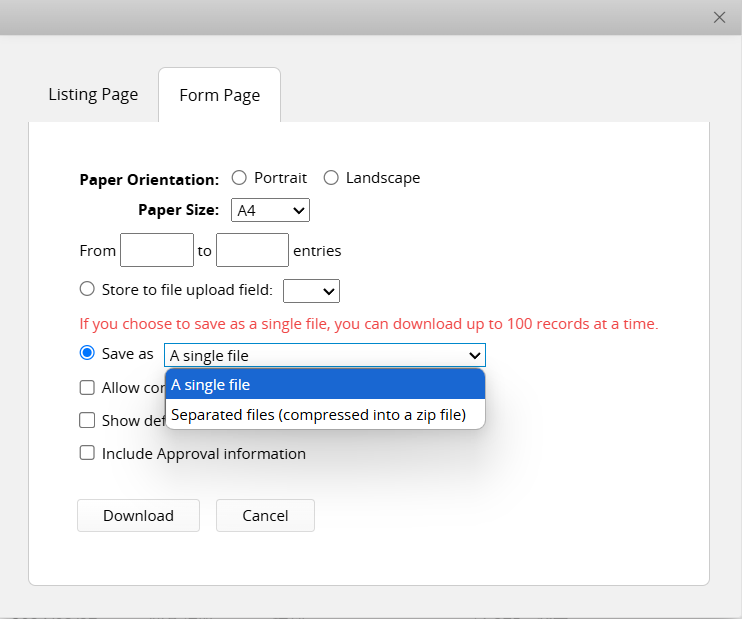
You can also export in the format of Form Pages. If you want to export multiple sheets at once, you can choose to save your records as a single file, or as separate files compressed into a zip file.
Note: If you choose to save as a single file, you can download up to 100 records at a time.
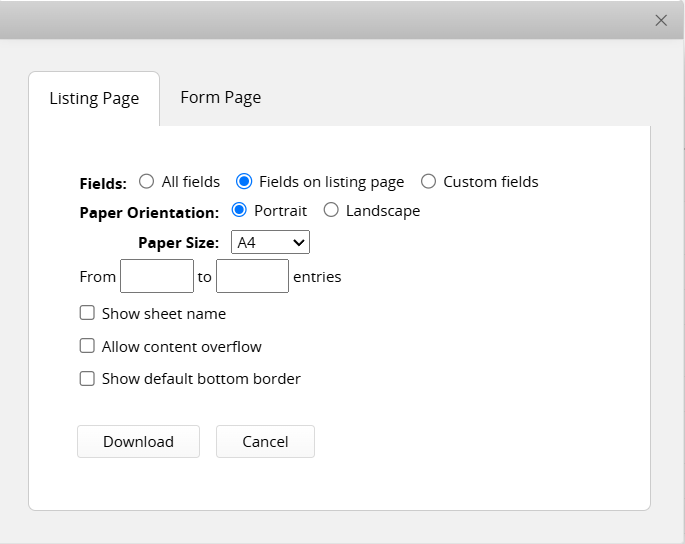
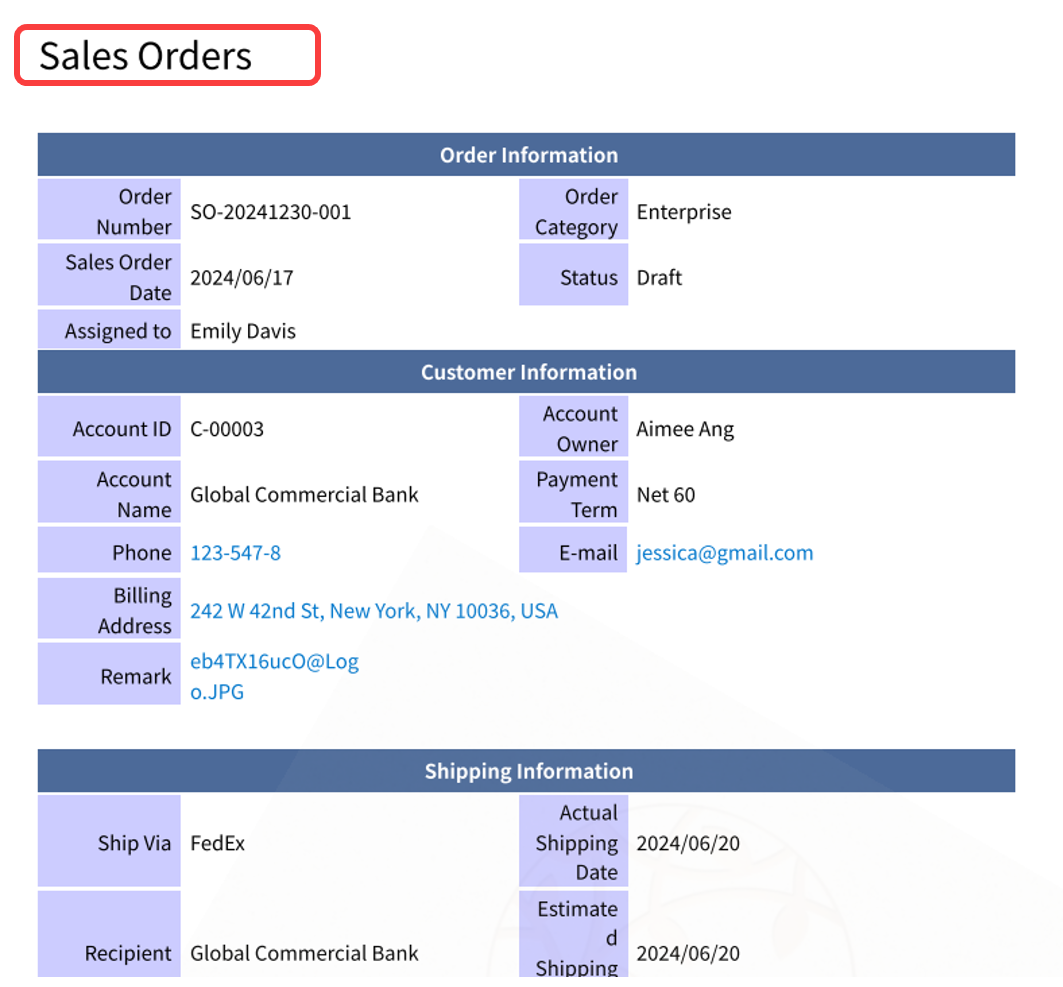
Show Sheet Name
Checking this option will display the sheet name at the top of the page. When downloading the Listing Page, the sheet name will appear only on the first page; for the Form Page, it will appear on every page.
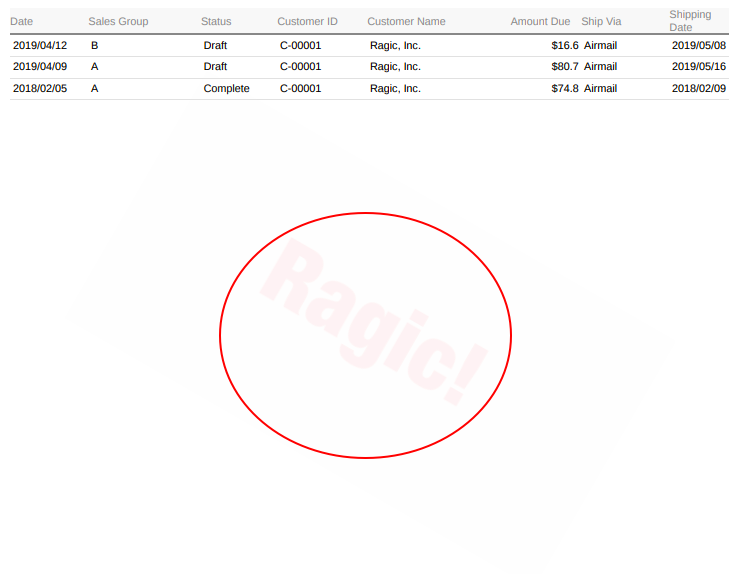
Watermark
You can also attach a watermark of your company logo on the PDF file by uploading the image of the logo to the Watermark field in the Company Setting sheet.
You can also Set Print Header and Footer to customize the fixed content displayed on each page, such as a company header, descriptive text, or page numbers.
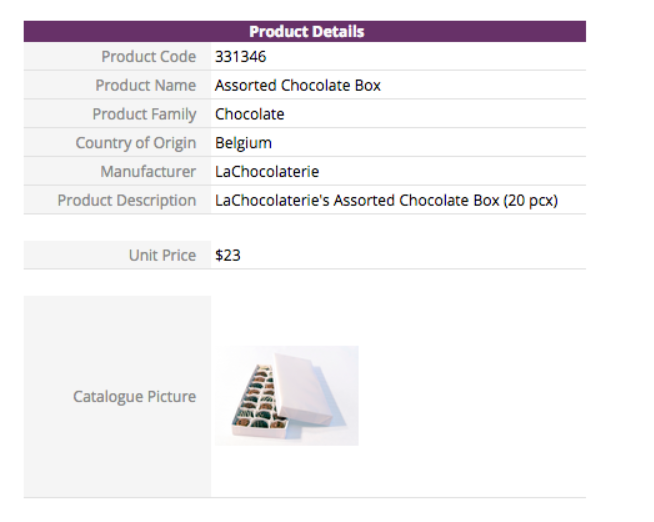
The Printer Friendly shows the data layout as seen in the browser. You can use your browser’s print function to print either the data shown on the Listing Page or individual records based on their layout on the Form Page.
Note:
1. Aside from the settings described below, other print-related options (such as page layout, margins, and color) should be configured in your browser’s print settings.
2. You can Set Print Header and Footer to customize the fixed content displayed on each page, such as a company header, descriptive text, or page numbers.
3. Printer Friendly supports up to 5,000 records and 50,000 cells of Subtable data.
Form Page
On the Form Page, clicking Printer Friendly will take you directly to the print page.
Listing Page
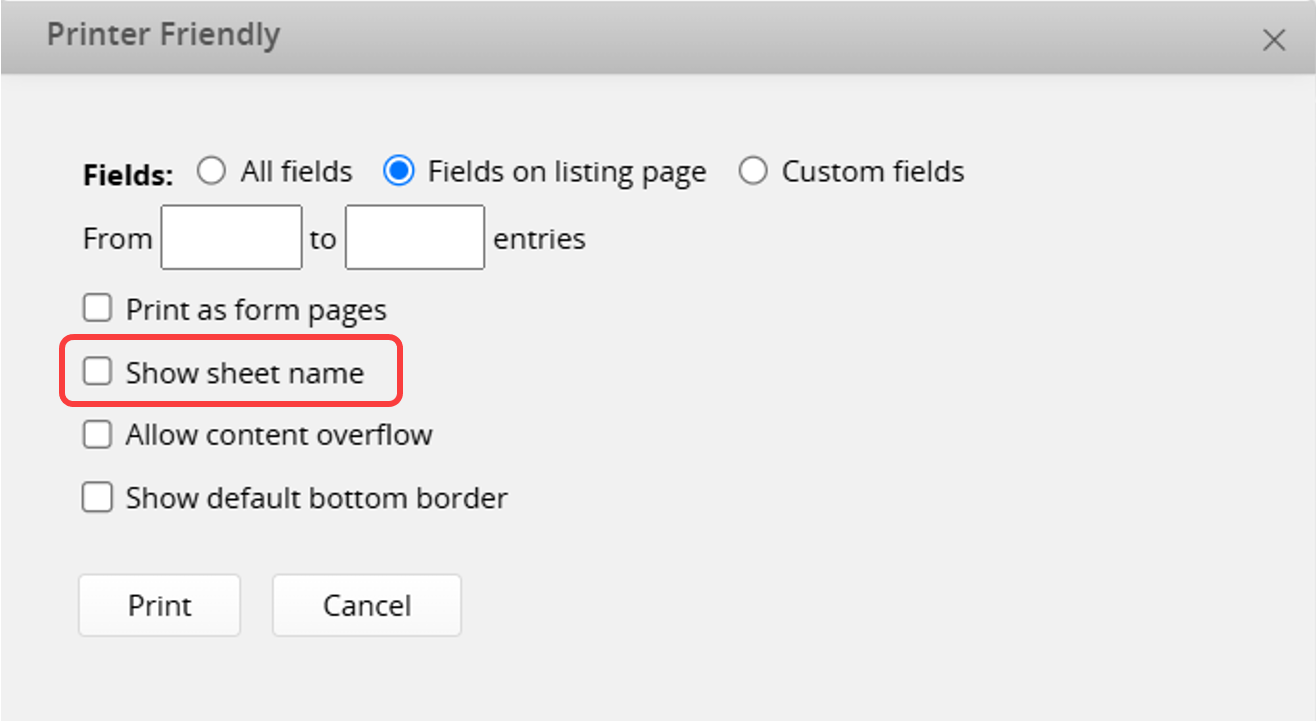
On the Listing Page, clicking Printer Friendly will open the following window:

You can set the field range and record range for output in the Listing Page format.
Alternatively, you can check Print as Form Pages, which will export the selected records in the Form Page layout all at once.

Switching Between Multiple Versions
If there are Multiple Versions of the sheet, you can switch directly to the friendly printing view of a specific version by clicking the gear icon in the top right corner. Additionally, by clicking the gear icon, you can configure the layout settings.
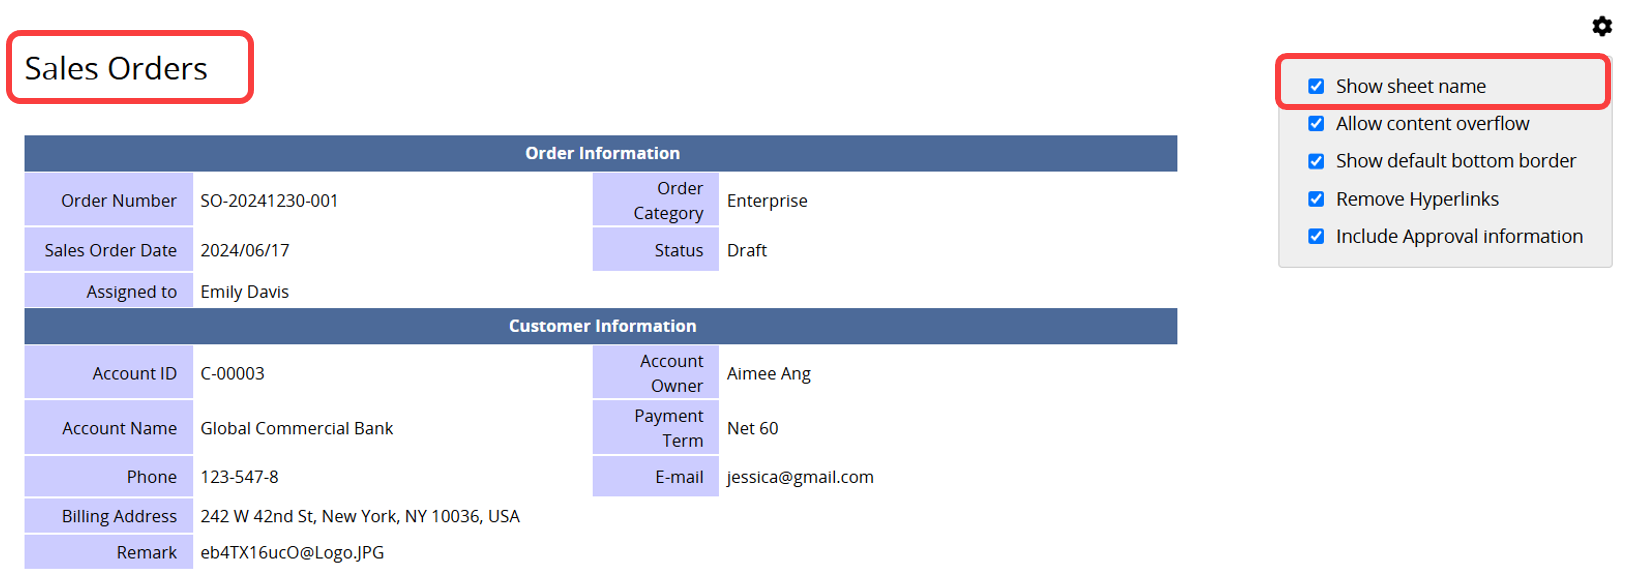
Show Sheet Name
Checking this option will display the sheet name at the top of the page. When printing the Listing Page, the sheet name will appear only on the first page; for the Form Page, it will appear on every page.
You can also enable this setting by clicking the gear icon in the upper-right corner when entering the Printer Friendly view.
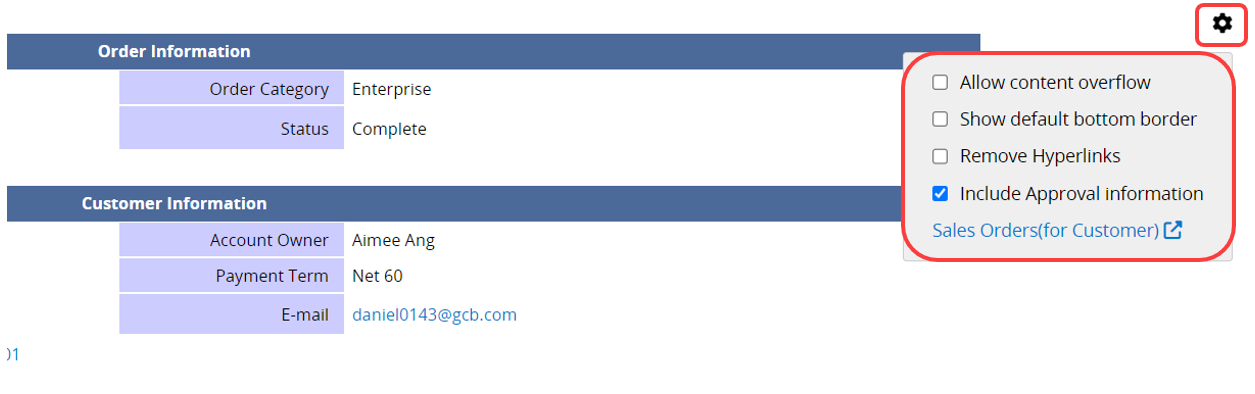
Other Settings
Click the gear icon in the upper-right to access these settings:
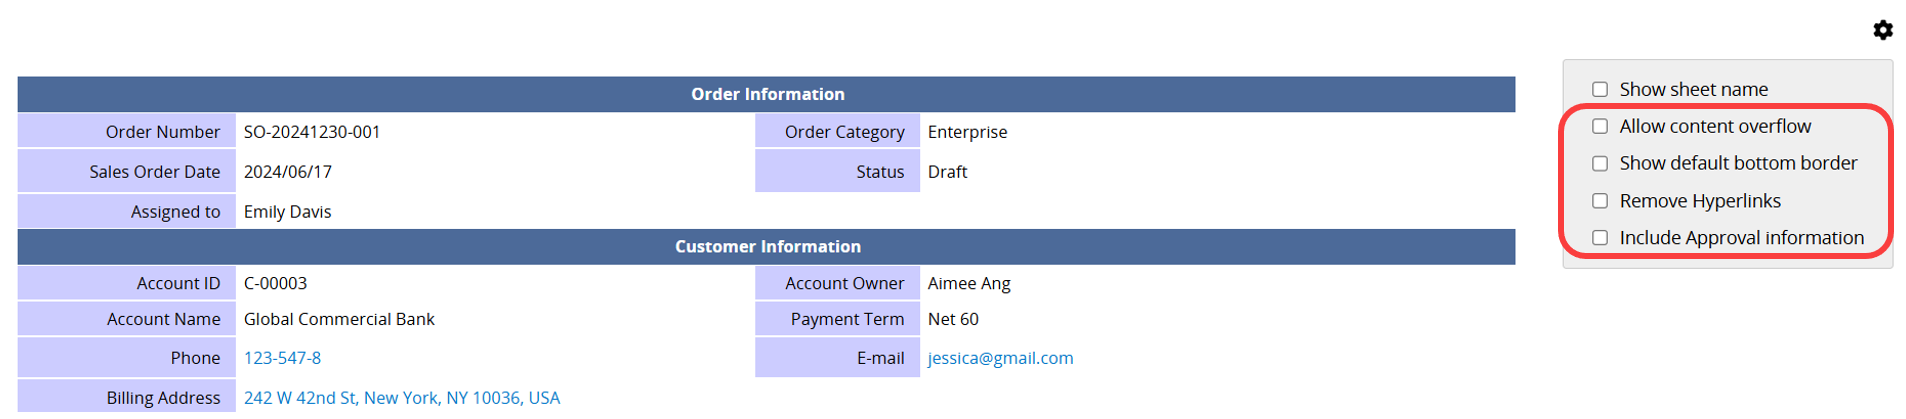
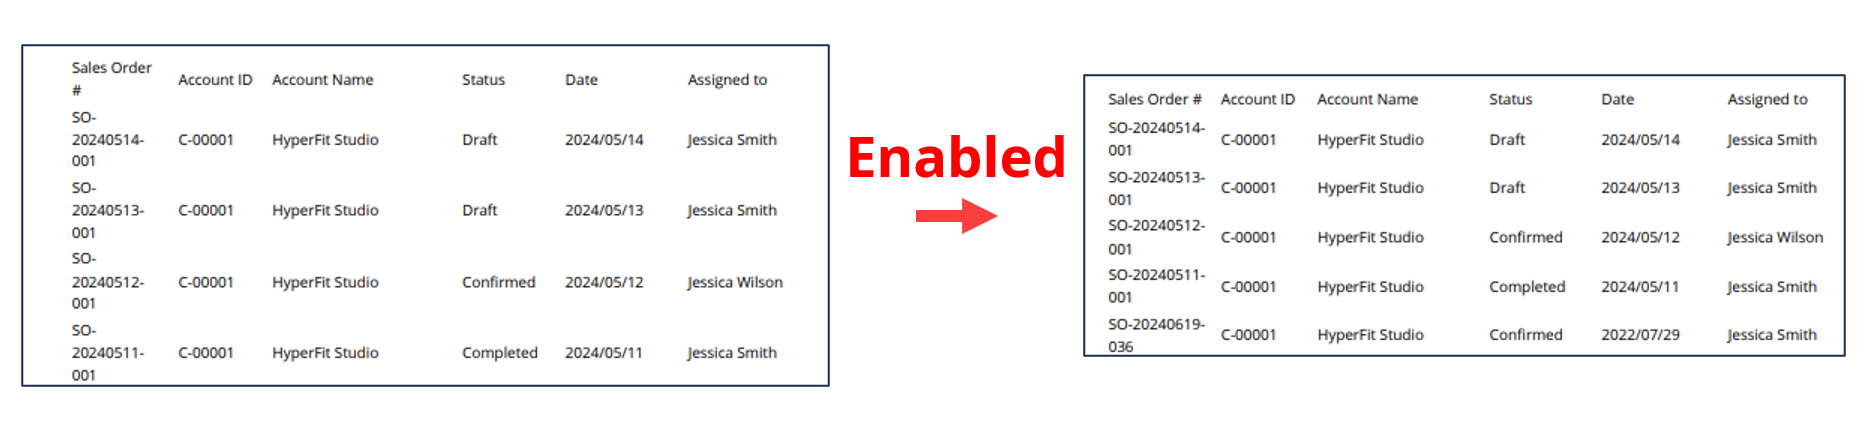
1. Allow content overflow: Long content will not be wrapped whenever possible.
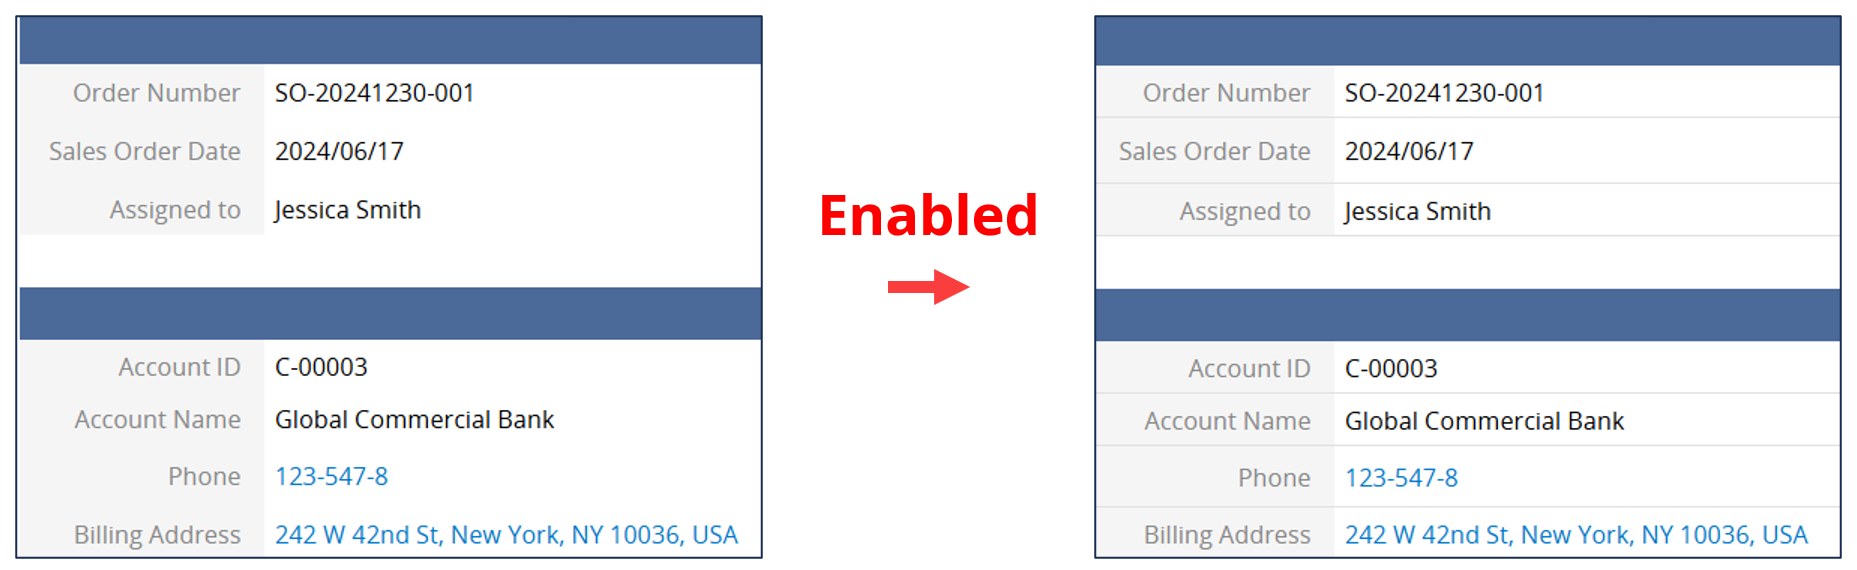
2. Show default bottom border:
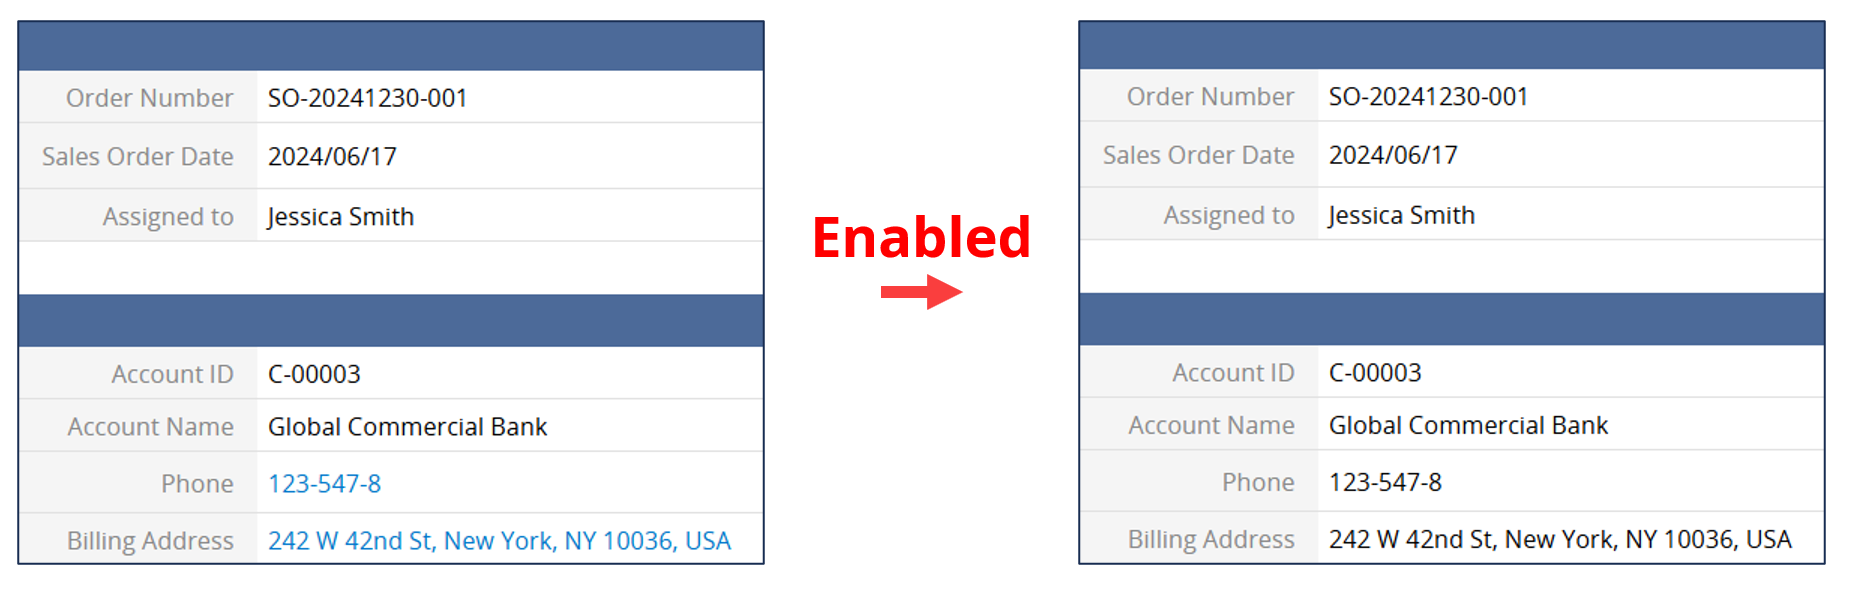
3. Remove Hyperlinks: Convert the hyperlink field's value to text.
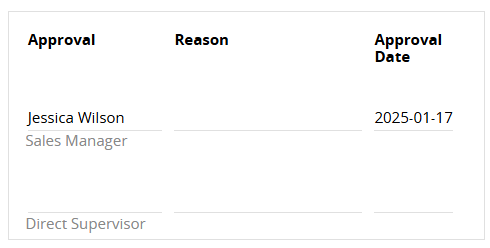
4. Include Approval information: Display approval information at the bottom of the page.
1. Learn more about the types of reports you can generate here.
2. Mail Merge allows you to export your data into a specific Excel or Word template.
3. Use the Custom Print Report to export records into custom PDF, Word, or PNG formats.
4. Backup your entire Ragic database directly.
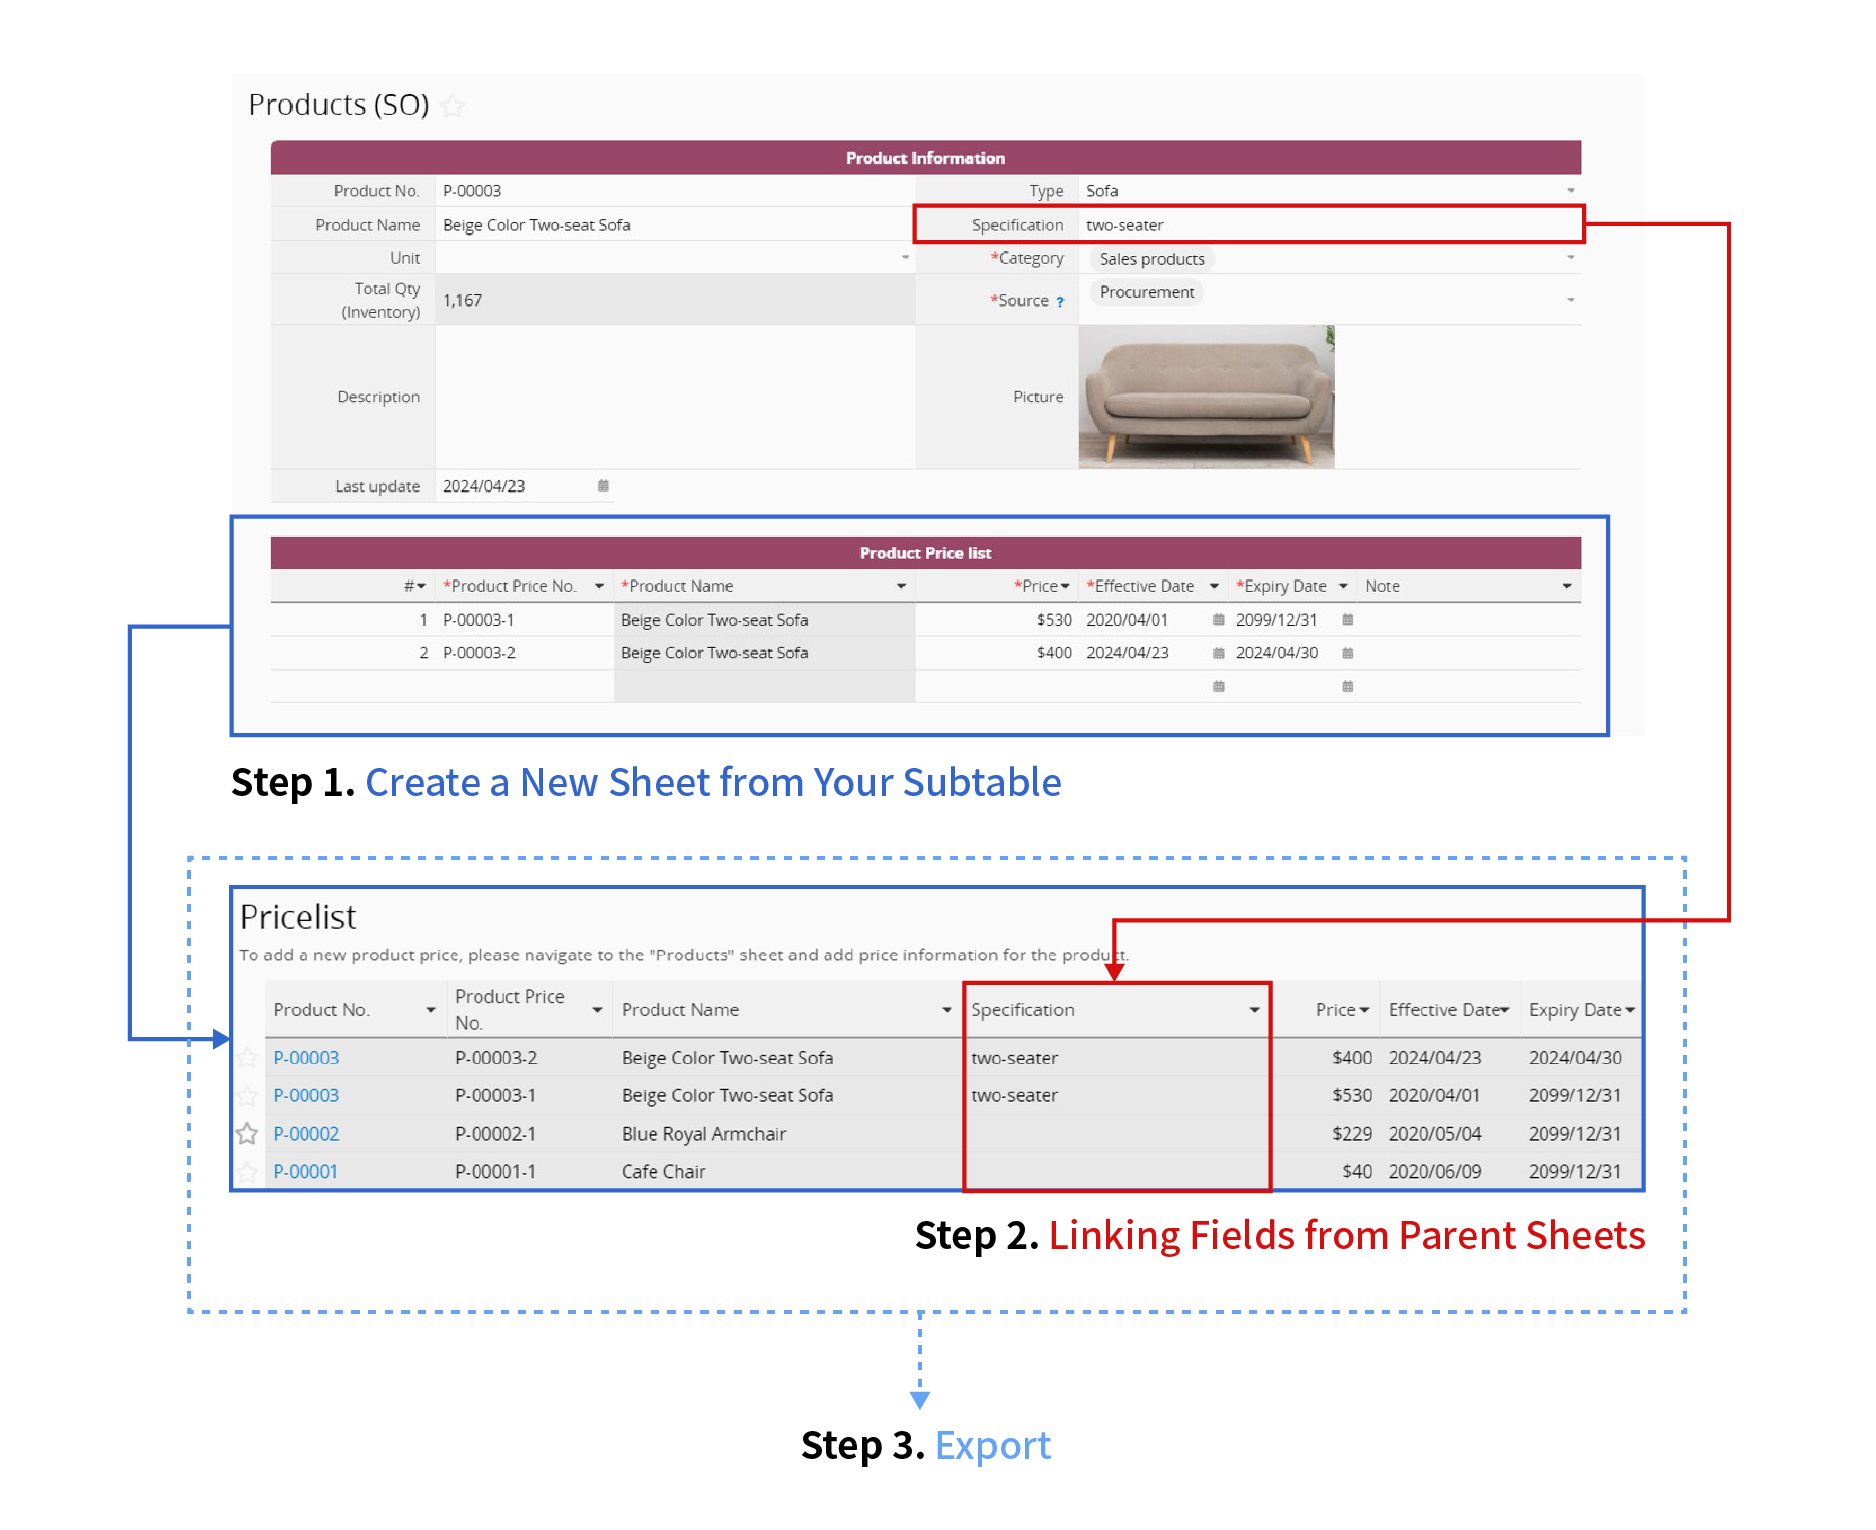
If you want to export data from your Subtable, you can follow these steps:
1. Create a New Sheet from Your Subtable. This will generate a new sheet with all the records from the Subtable of the original sheet.
2. By Linking Fields from Parent Sheets, you can add "independent fields" from the parent sheet. This ensures that the necessary data from the parent sheet will also be exported along with the Subtable data.
3. Export your data from your new sheet. It works just like exporting from a sheet.
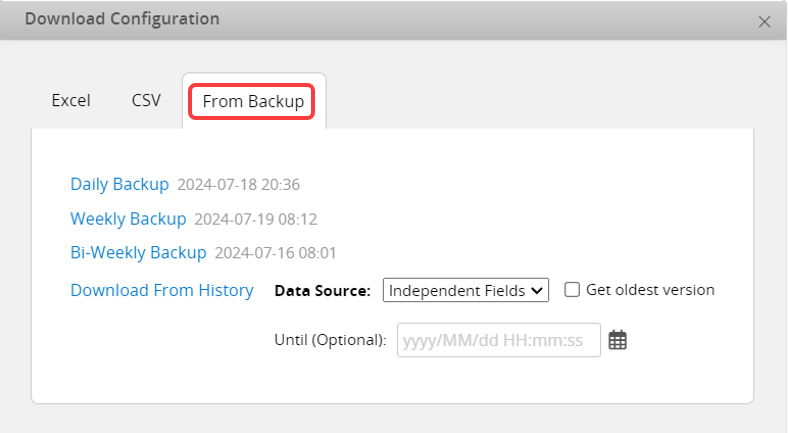
Select Download as Excel or Text, and click the From Backup tab to download sheet data from auto backup.
 Thank you for your valuable feedback!
