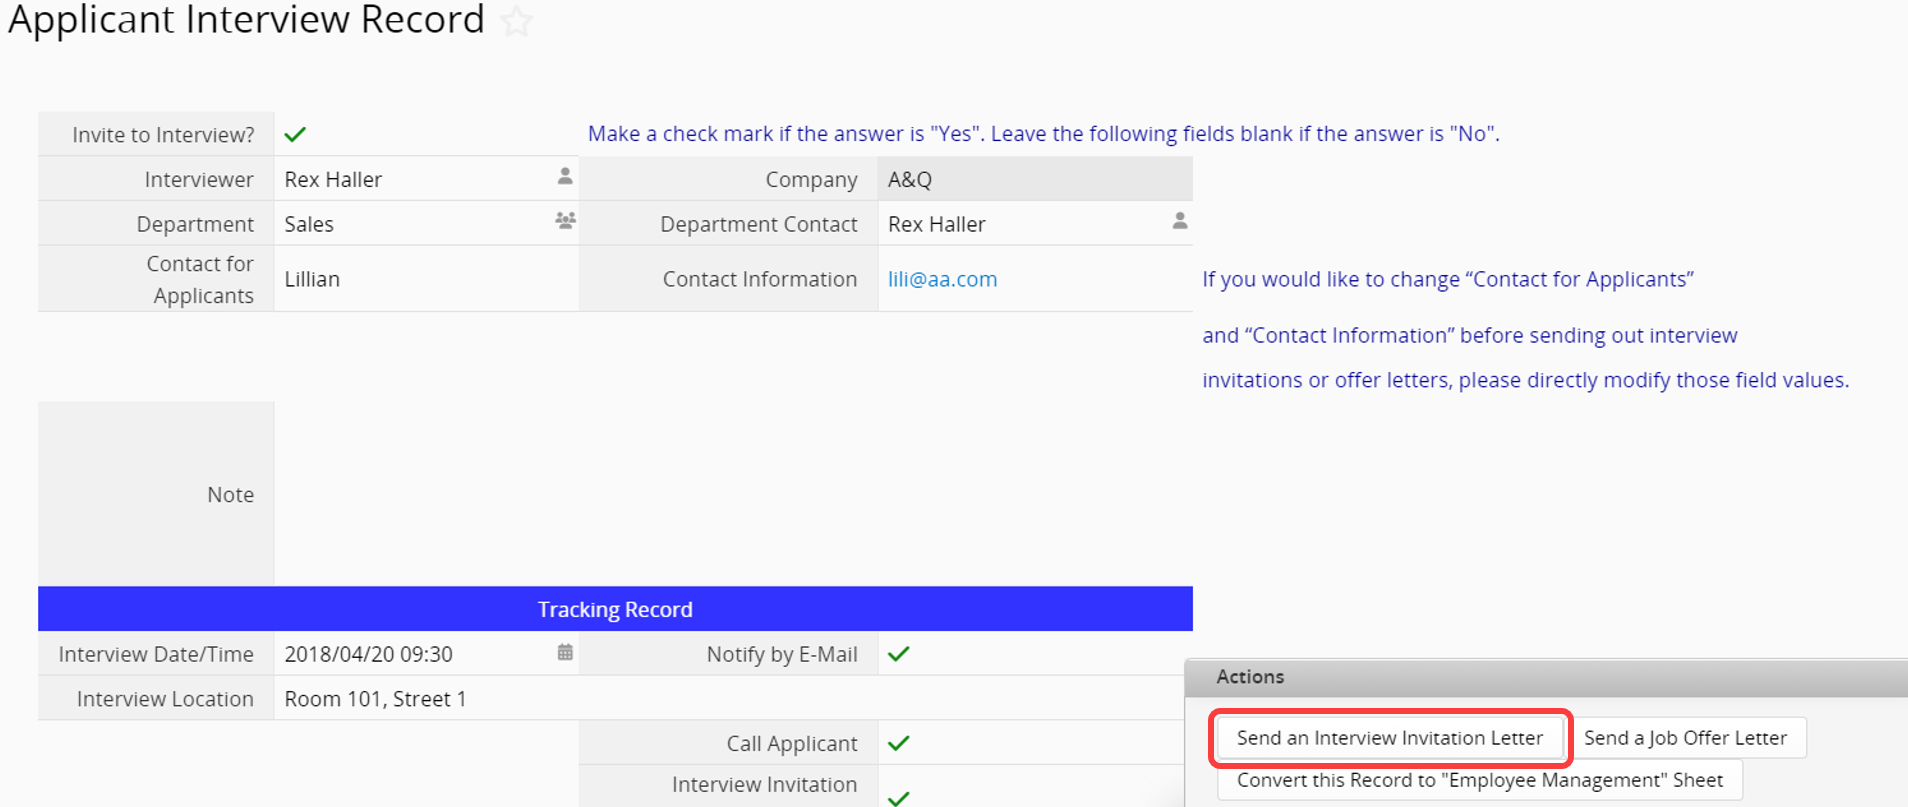
The Send Custom Email Action Button lets you create templates to send emails that contain values saved in your database. Users can directly press this Action Button to send emails to specific email addresses.
This feature is useful for sending interview invitations, order confirmations, or purchase details to vendors.
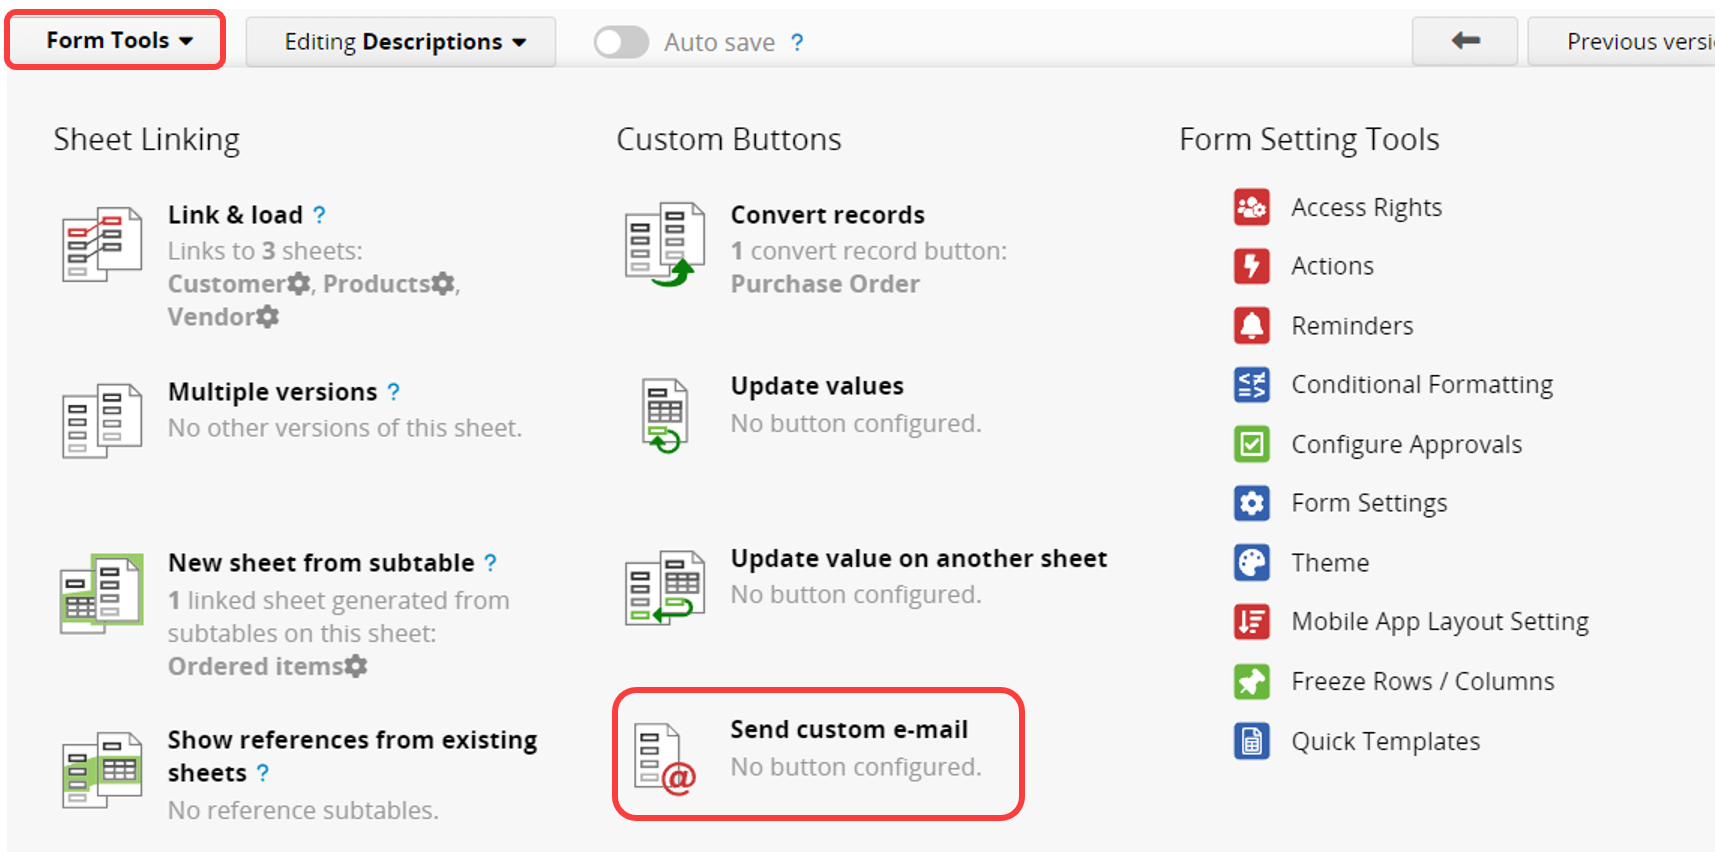
Navigate to the Design Mode on your Form Page and click Form Tools > Send Custom E-mail under the Custom Buttons section.
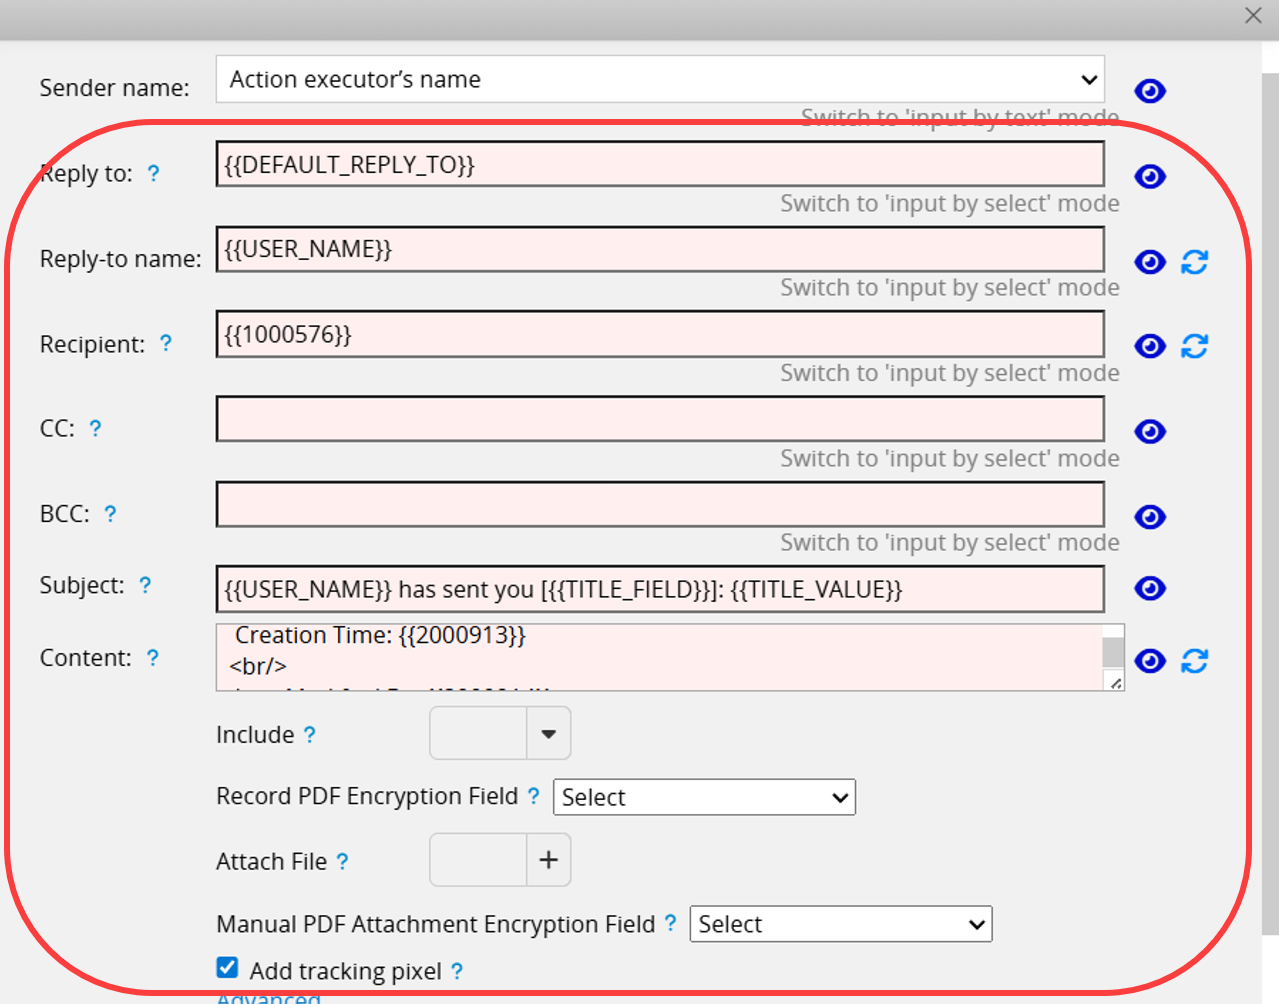
In the Custom Template Settings, you can enter text, select field values, or apply supported variables to design the template.
Note: Variables cannot be applied to a single subtable field. They can only display all field data in the Subtable. For more details, please refer here.
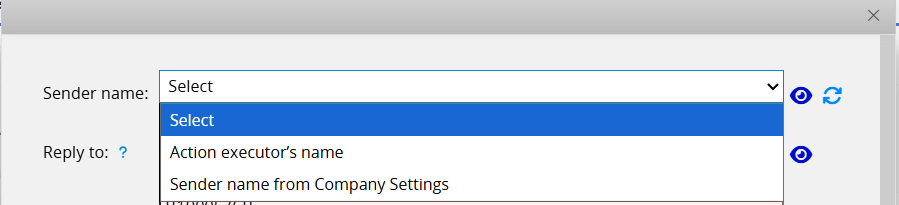
Sender Name: You can configure the Sender name using either the "input by text" mode or the "input by select" mode:
In "input by text" mode, you can directly enter the sender name you want to display, such as a company name or an email variable.

In "input by select" mode, you can choose either the Action executor’s name or the Sender name from Company Settings.
For other custom email settings, please refer to this article.
Remember to "Save" before exiting the window.
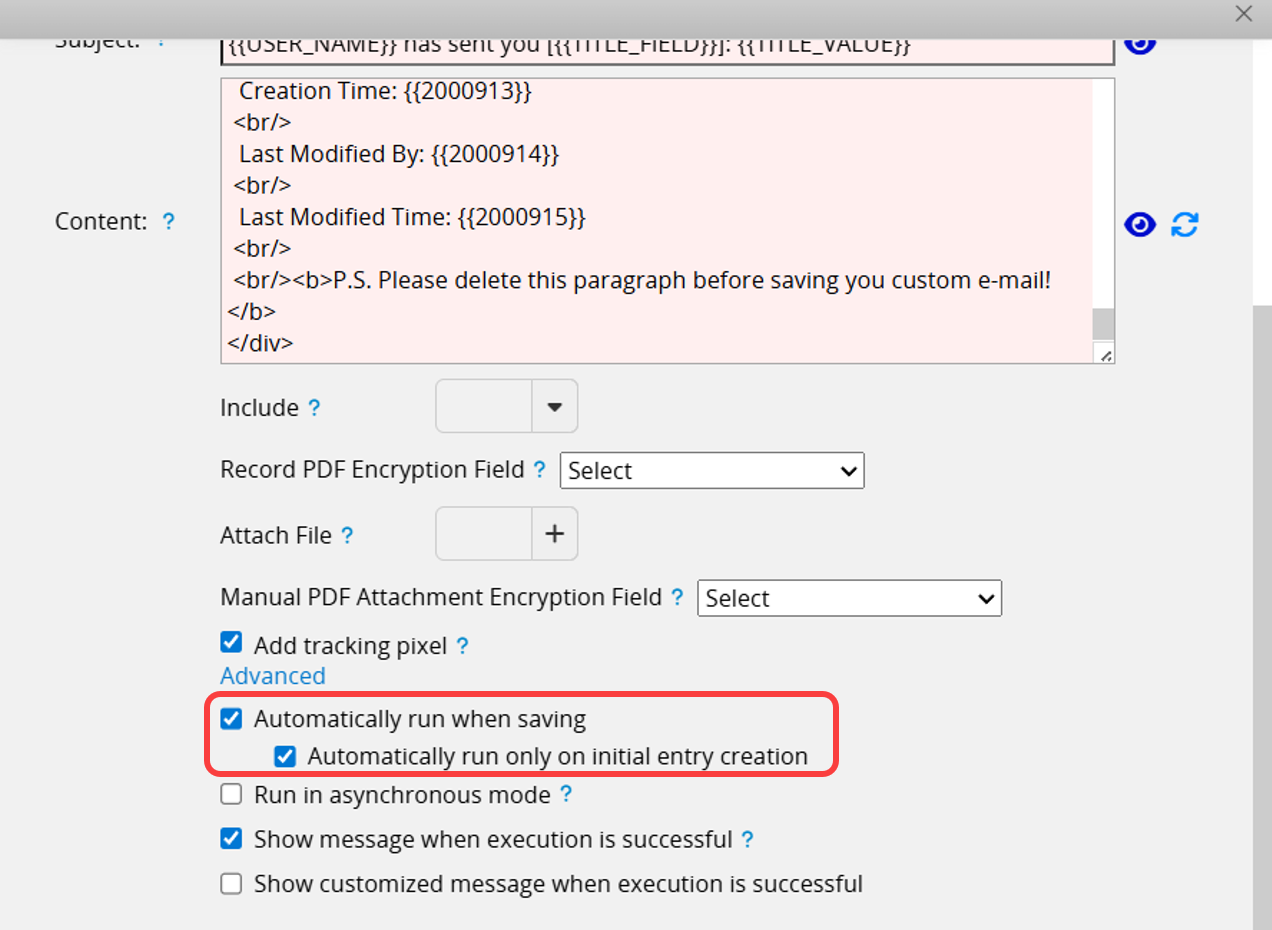
In the advanced settings, you can check the option to Automatically run when saving. By default, custom emails are sent Automatically run only on initial entry creation.
To send emails automatically every time a record is saved (including creation and modifications), please uncheck this setting.
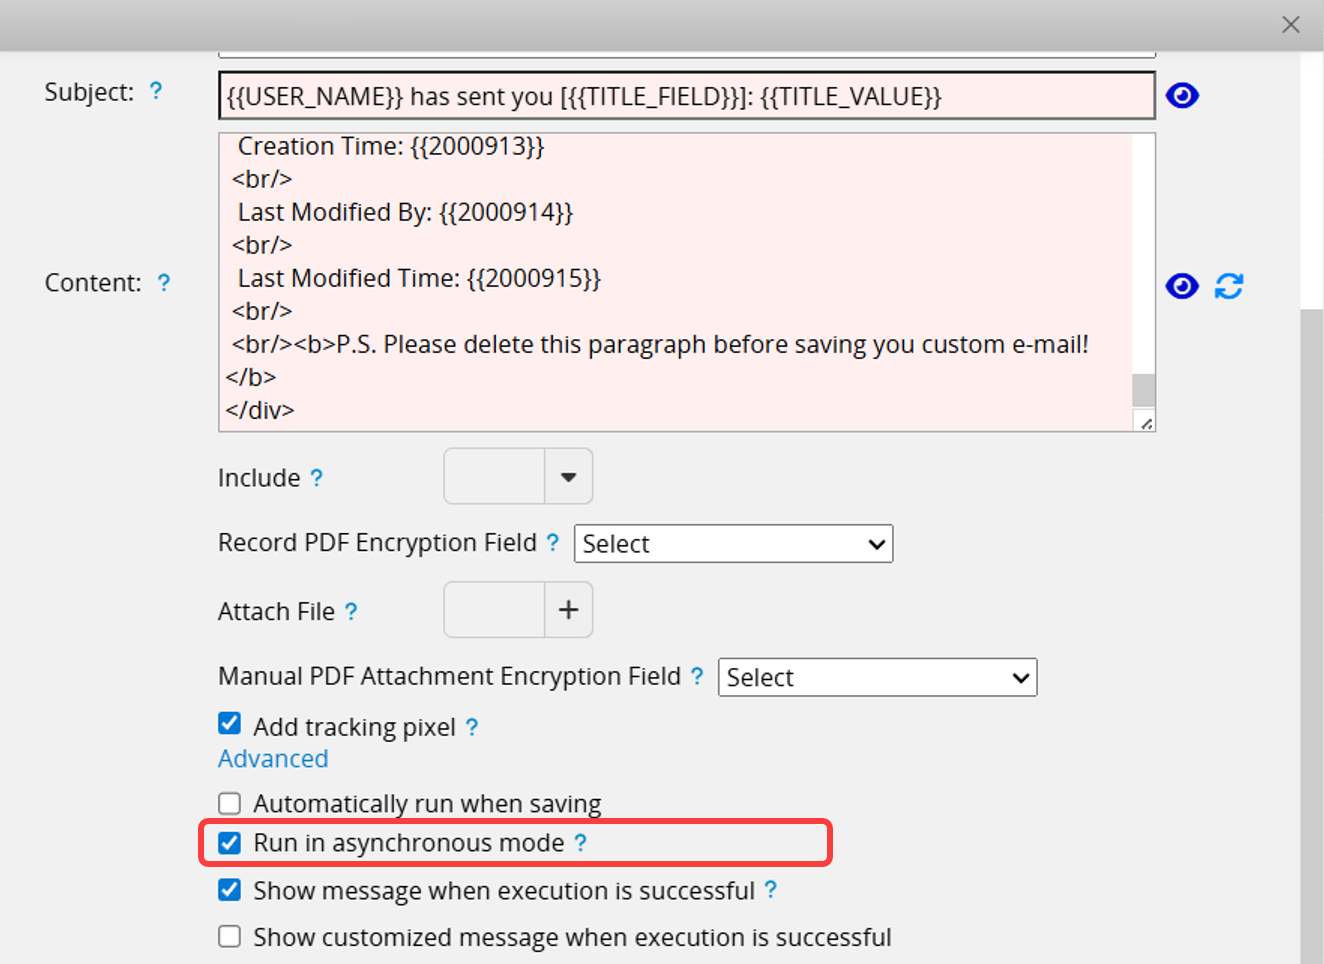
If the Excel or PDF file of this record is included, it may need more time to complete this action. Checking Running in asynchronous mode in advanced settings can shorten your waiting time but cannot guarantee when the email will be sent.
Note: It is NOT suggested to add an asynchronous button into a combined button.
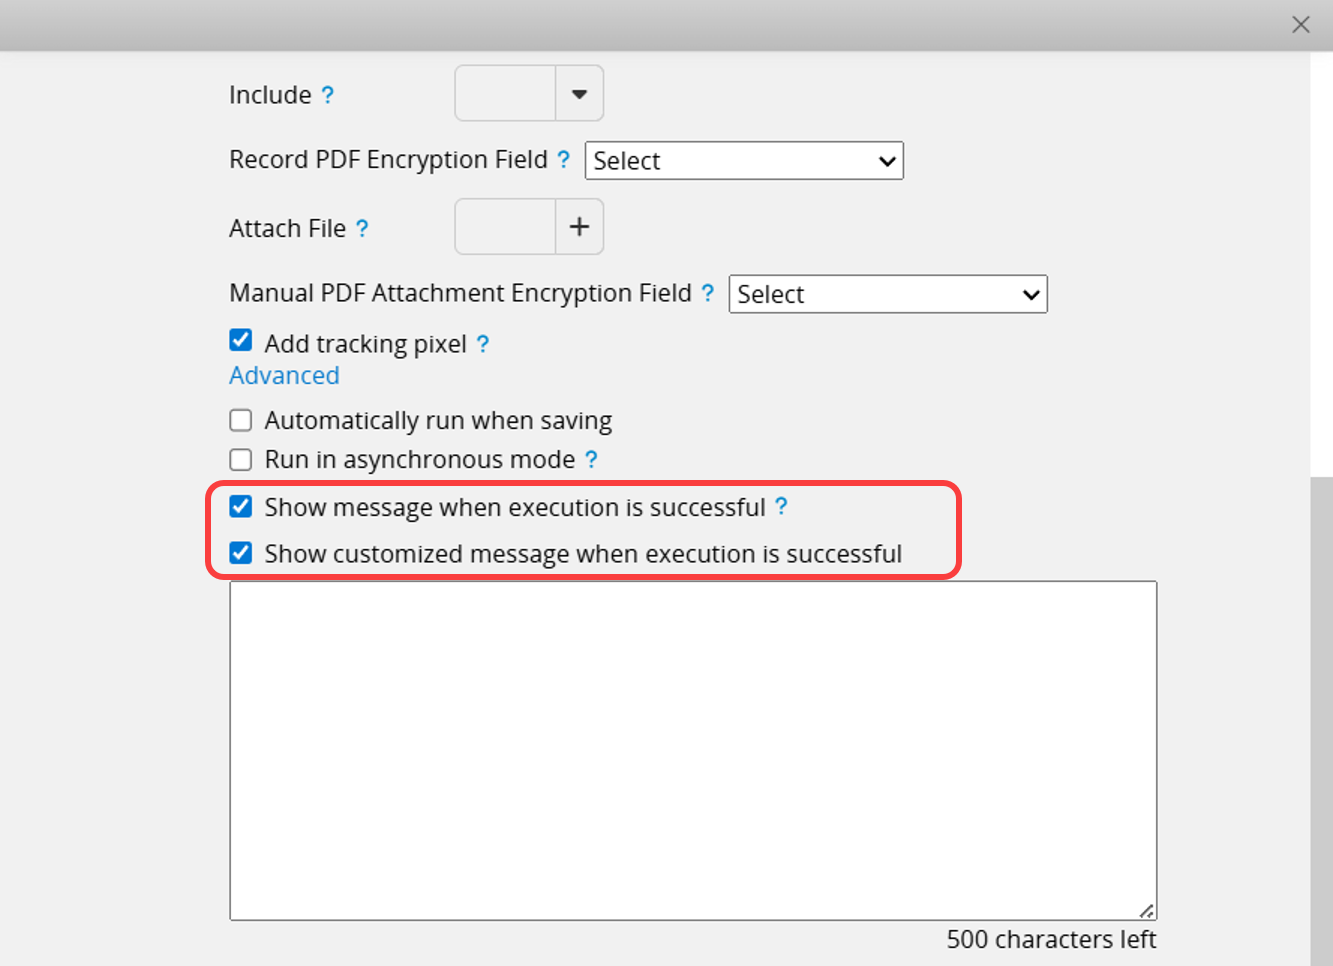
In the advanced settings, you can choose whether to Show message when execution is successful. It is recommended to keep this option checked. If unchecked, it may be difficult to confirm success during long execution times.
You can also check the option to customize the message. After checking, you can enter a custom message in the field that appears below. Please note the character limit.
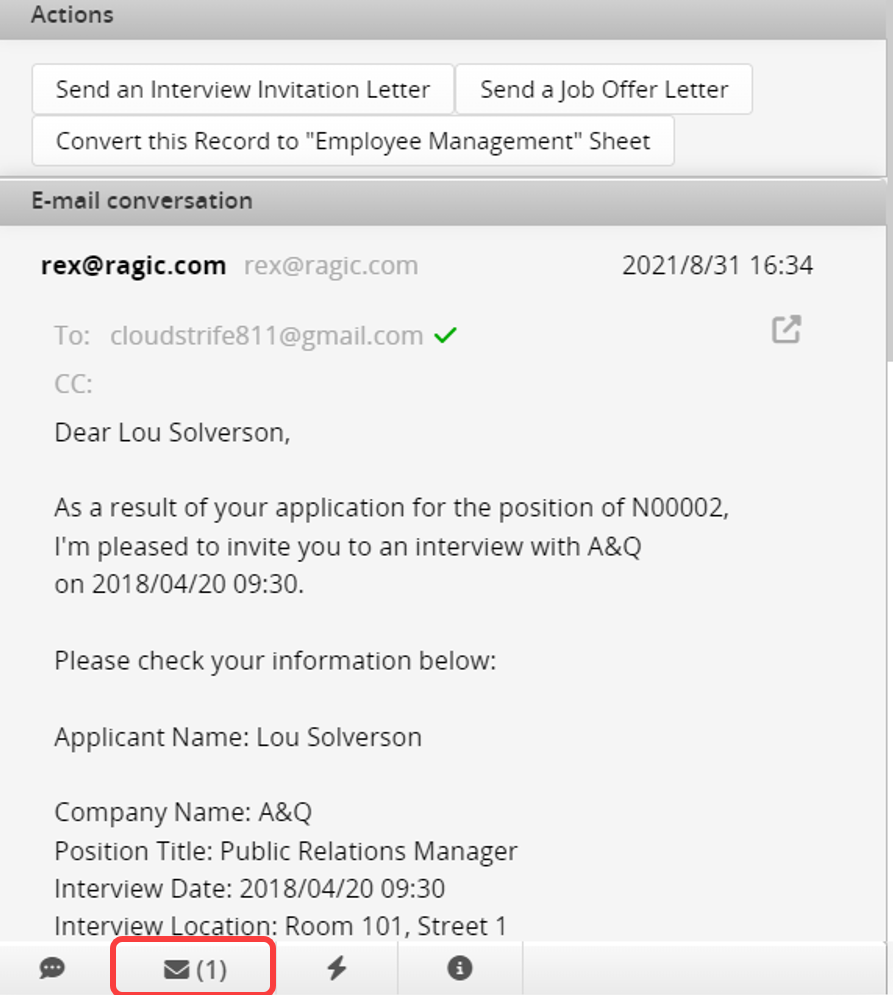
After sending a custom email, you can click on the mail icon to view the custom email history.
If you want to delete the Action Button, you can refer to this article.
Alternatively, if you need additional settings for the Action Button, such as restricting user access rights to use the Action Button, you can refer to this article.
 Thank you for your valuable feedback!
