Xero is a premium Zapier app that requires a subscription to Zapier's paid plan. Please refer to this page for Zapier’s pricing plan.
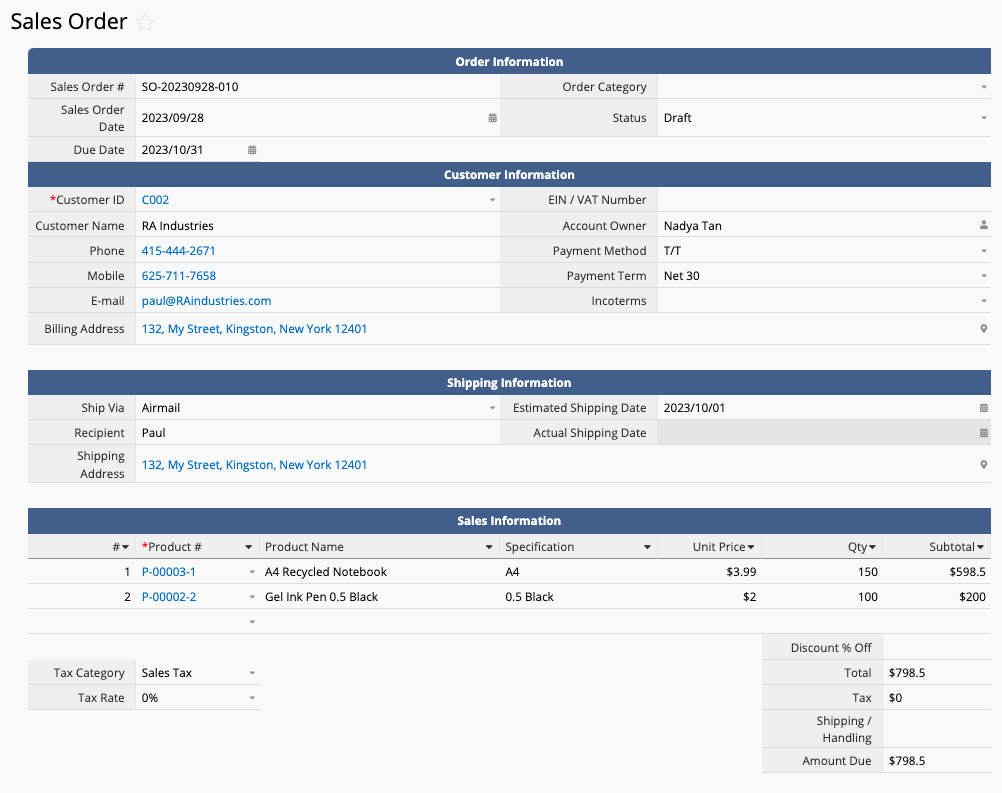
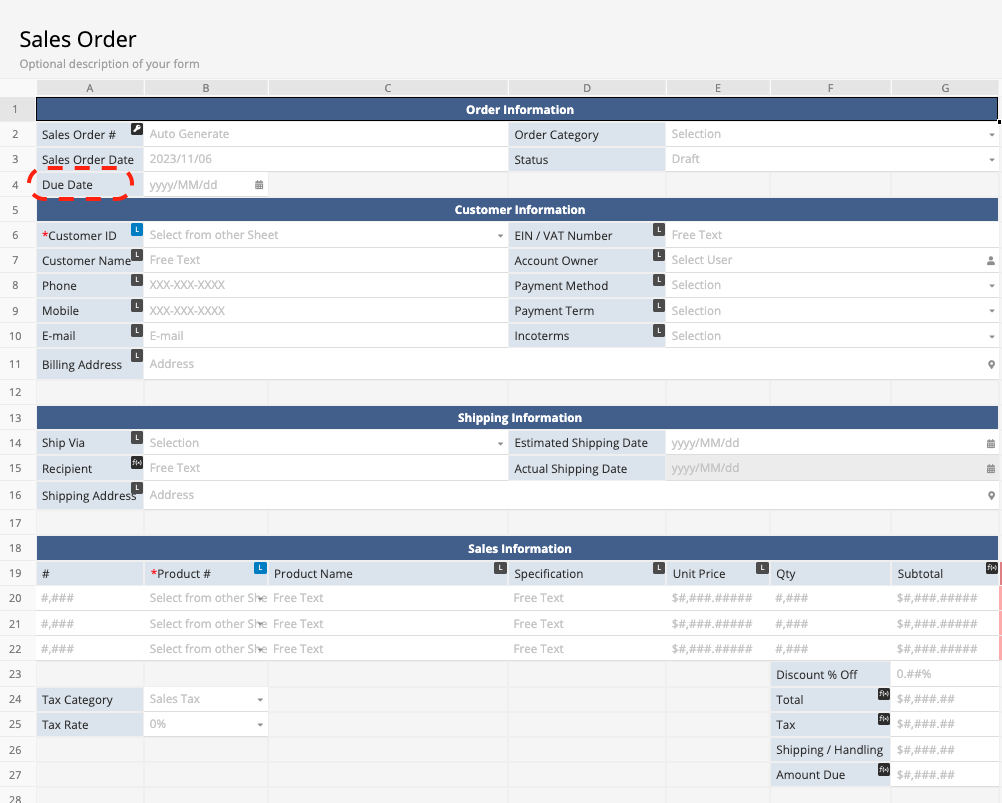
If your company primarily uses Xero for financial management but seeks to record additional operational data, such as sales, stocks, and shipments in Ragic, you can seamlessly integrate both systems using Zapier to eliminate repetitive data entry. This integration synchronizes operational data in Ragic with financial data in Xero. For instance, after creating a Sales Order in Ragic, as shown below:
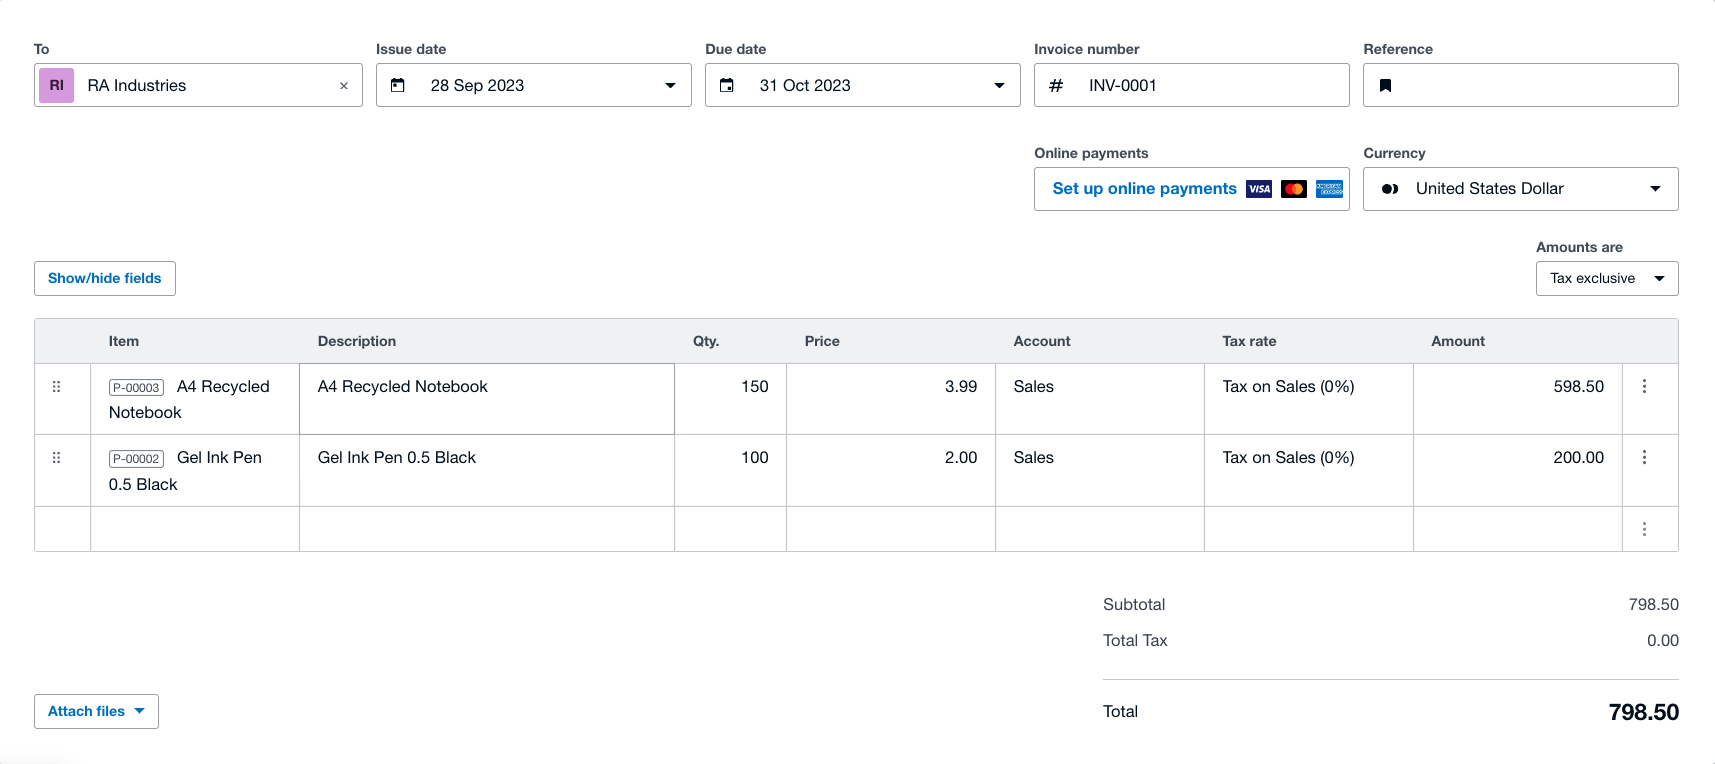
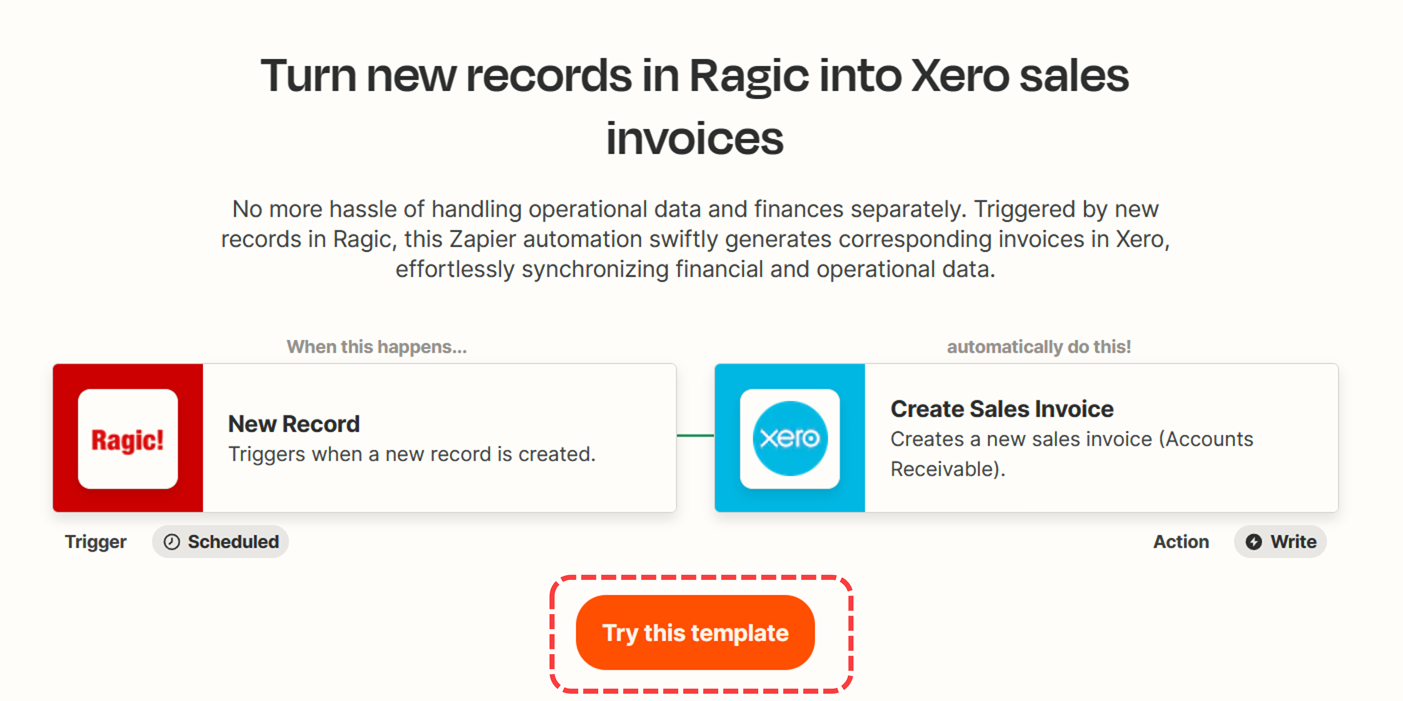
This Zapier integration will send the information on the Sales Order Sheet to issue a corresponding invoice in Xero:
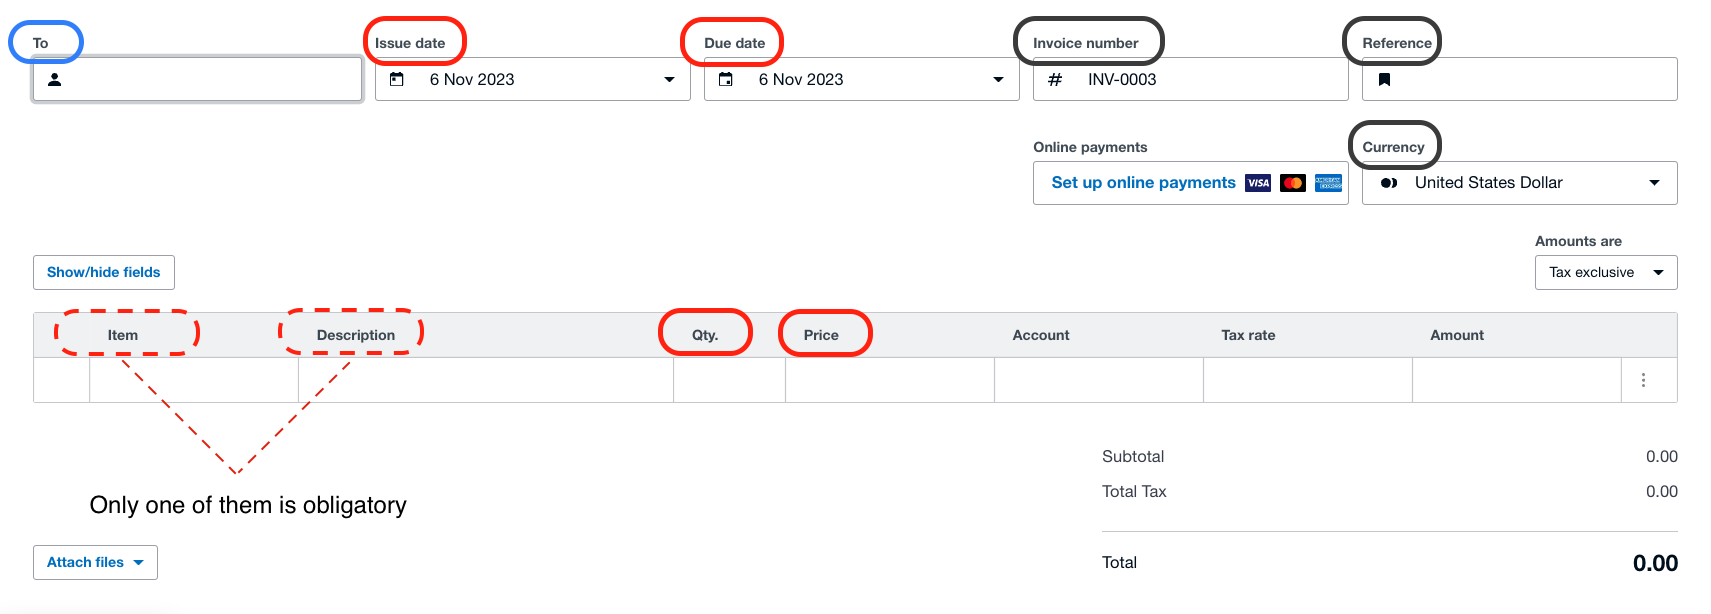
Before setting up the integration in Zapier, please ensure that your Ragic sheet matches the required fields for Xero invoices:
Tips:
1. Fields marked in bright red must correspond to a field in your Ragic sheet.
2. Fields marked in gray can remain blank, allowing Xero to generate values.
3. Fields marked in blue may require additional settings.
Create a Sales Order Sheet that includes all the information required by Xero’s invoice in Ragic:
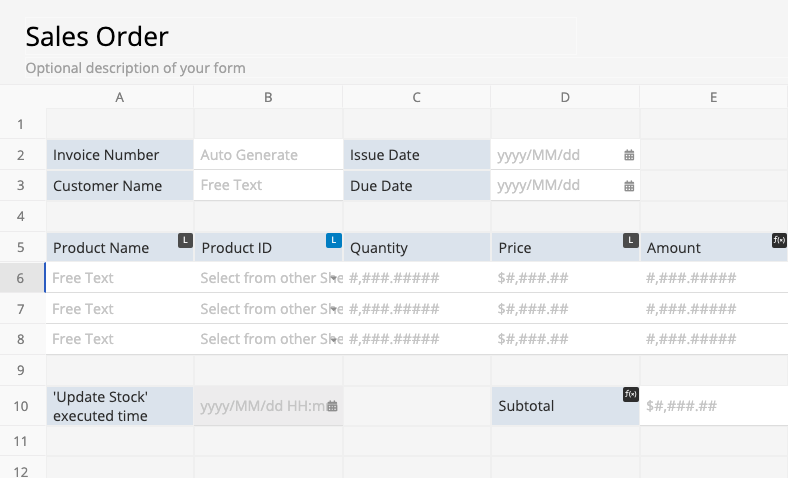
You can also use the Ragic Sales Order Template and customize it, adding fields like the Due Date to meet Xero's requirements.
P.S.: When setting up the workflow automation in Zapier, the system will need an entry to run the test. It is highly advised to create a test entry after designing the sheet for this purpose.
As Xero specializes in accounting, it comes with built-in features like a customer management system, stock management, and tax calculation. To ensure a seamless integration between Xero and Ragic, some preliminary setup is required. Here are several setup options based on the type of integration you need, either basic or advanced integration:
In Xero, every invoice will require at least the customer's name as a unique value.
Basic Integration: Xero will create customer contact information when issuing invoices as long as it finds a customer name in Ragic that hasn't been created in Xero yet. No additional setup is needed.
Advanced Integration: If you require more comprehensive customer information in Xero, you can refer to this page for managing contacts in Xero.
When issuing an invoice in Xero, you can choose to fill in only the "item" or "both description and unit price". By choosing to fill in the item, you can perform inventory management and sales analysis in Xero.
Basic Integration: For a simple integration and invoice issuance, just fill in the description and unit price.
Advanced Integration: If you wish to integrate the Ragic product ID with the Xero item field, you'll need to set up your product information. This ensures that the product ID in Ragic can match the corresponding product ID in Xero. To do so, you can either add an inventory item or import inventory items in Xero.
Xero has a built-in account information field to select tax categories and tax rates under each account.
Basic Integration: To generate an invoice based on an order, set the account to "Sales". Xero will automatically populate the Tax Category as "Tax on Sales" when issuing an invoice.
Advanced Integration: If you need to specify tax categories and rates, prior setup in Xero is necessary. You can refer to this page for more information about tax rate set-up in Xero.
Once you've aligned your Ragic sheet with Xero's requirements, proceed with setting up the integration (referred to as a "Zap" in Zapier). You can use this Zap Template to speed up your set-up process.
You need to connect your Ragic account first so Zapier can obtain your sheet information and set up the integration.
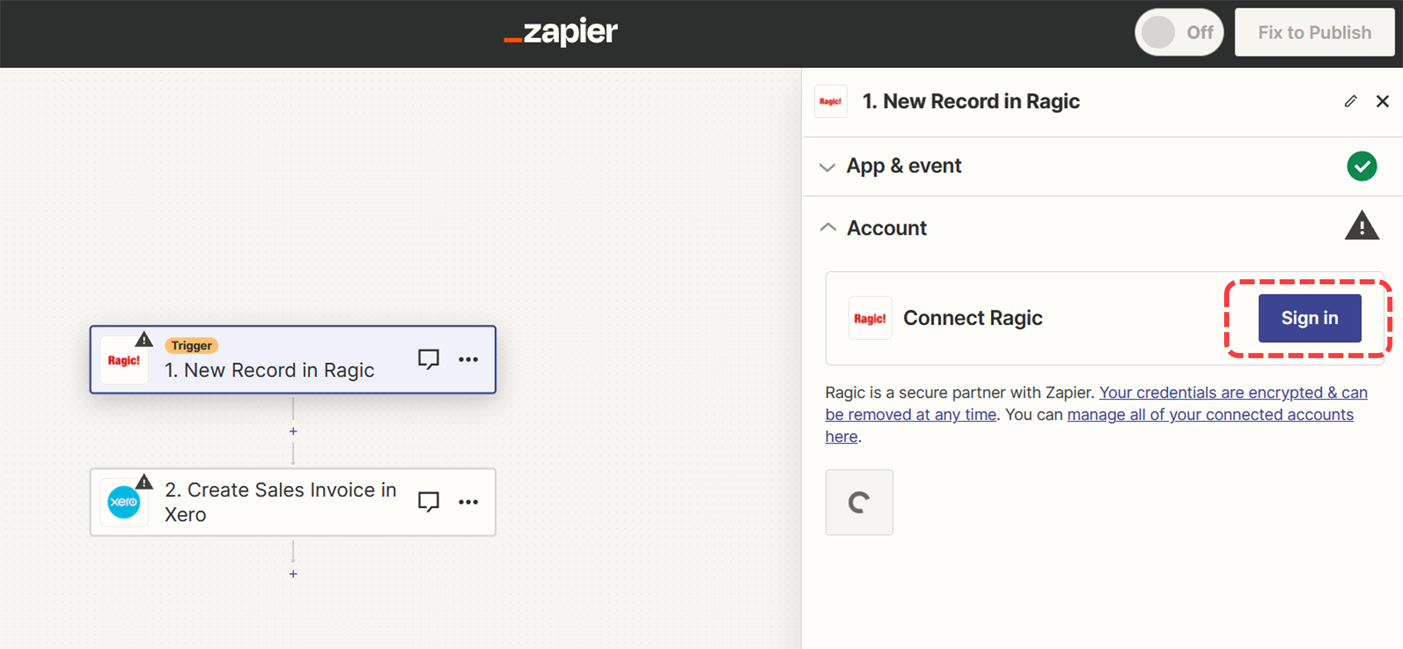
Connect your Ragic account in Zapier using your Ragic API key and server information.
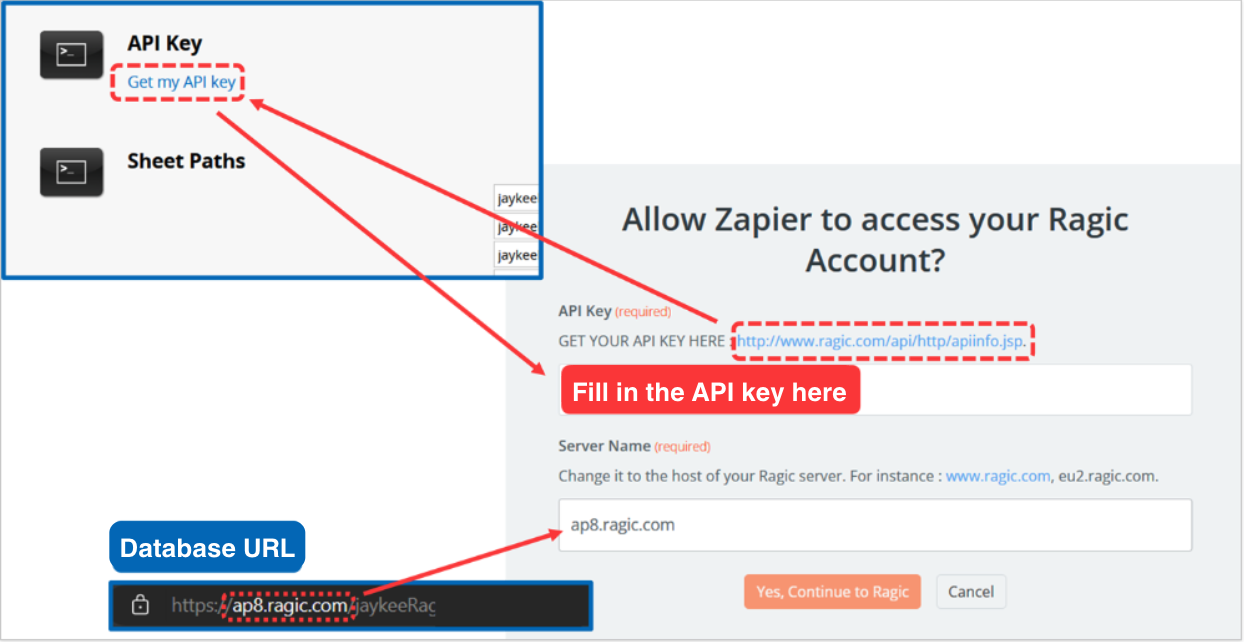
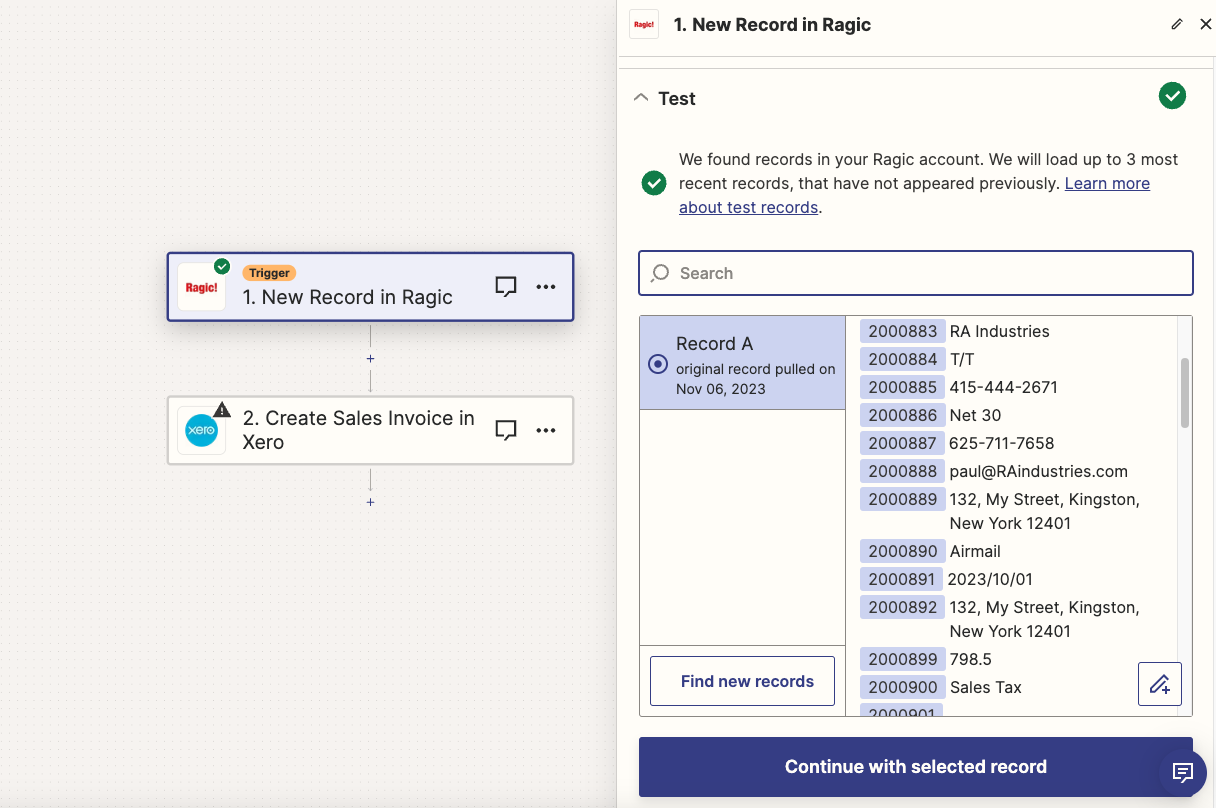
After completing this step, you can click "Yes, Continue to Ragic" to complete the Ragic account integration. The next step is to select the sheet to be integrated.

After choosing the sheet, Zapier will fetch the three latest entries in this sheet. You can choose one entry as the 'test entry' for this process.
As Xero serves as the action, it will receive information from Ragic and populate its invoices. After logging in and connecting your Xero account to Zapier, you'll need to specify the content in your Ragic sheet that should be transferred to each corresponding field in Xero's invoice.
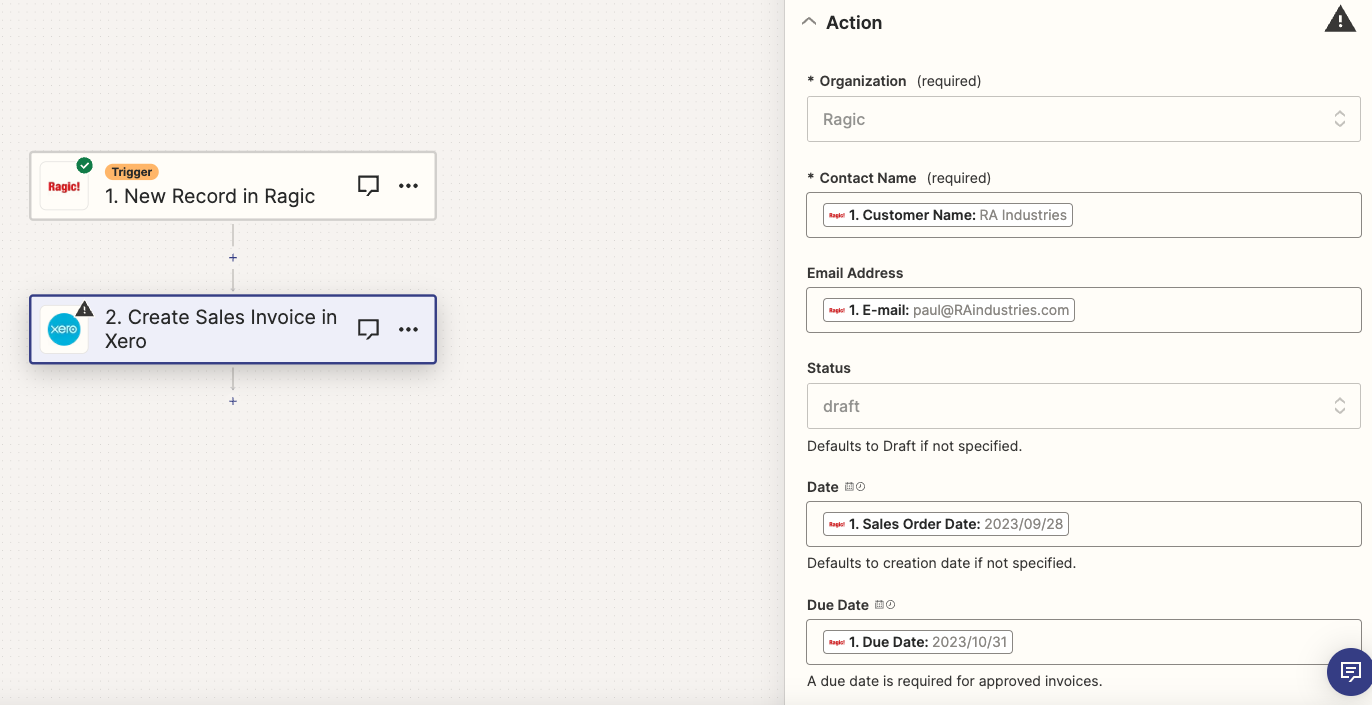
Following this, Zapier will display a list of the fields in Xero that require input, along with the corresponding field values you intend to import from Ragic. You can then initiate a 'Test Step' to ensure that your integration setup functions as anticipated.
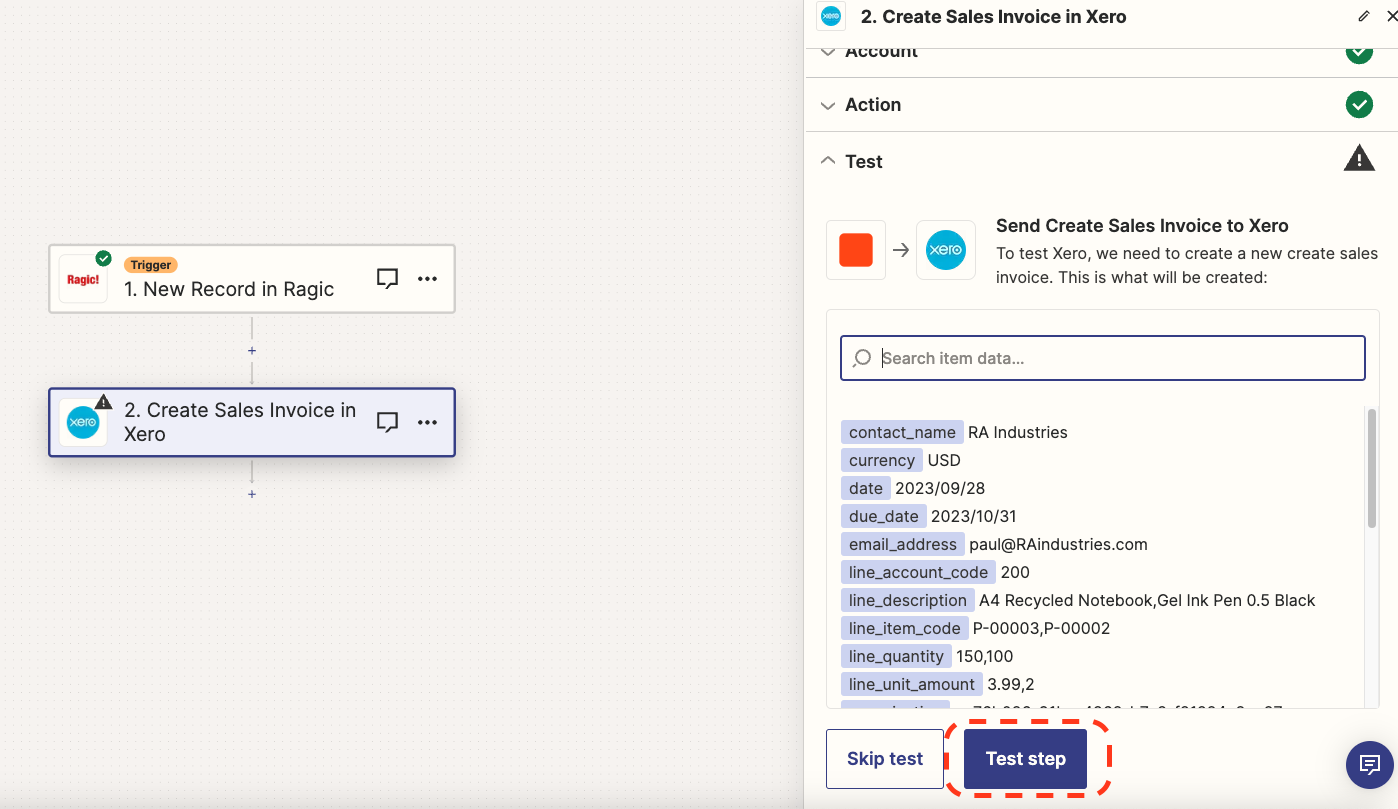
If the test is successful, Zapier will confirm the successful creation of the invoice with a notification. You can also see the entry you used for the test appeared as an invoice in Xero.
Next, just press "Publish" on Zapier, and your Zap will be officially completed and activated. In the future, when there is new data in the specified sheet, a corresponding invoice will be generated in Xero.

