 FAQ
FAQ
FAQ
FAQ
As the amount of rows in your subtable increases, you may notice that the loading time becomes longer. In addition to leveraging the Sheet Sections to reduce the number of rows loaded at once and improve speed, another alternative approach is to limit the loaded data rows through Subtable Default Filter.
When subtable data is added sequentially, for example:
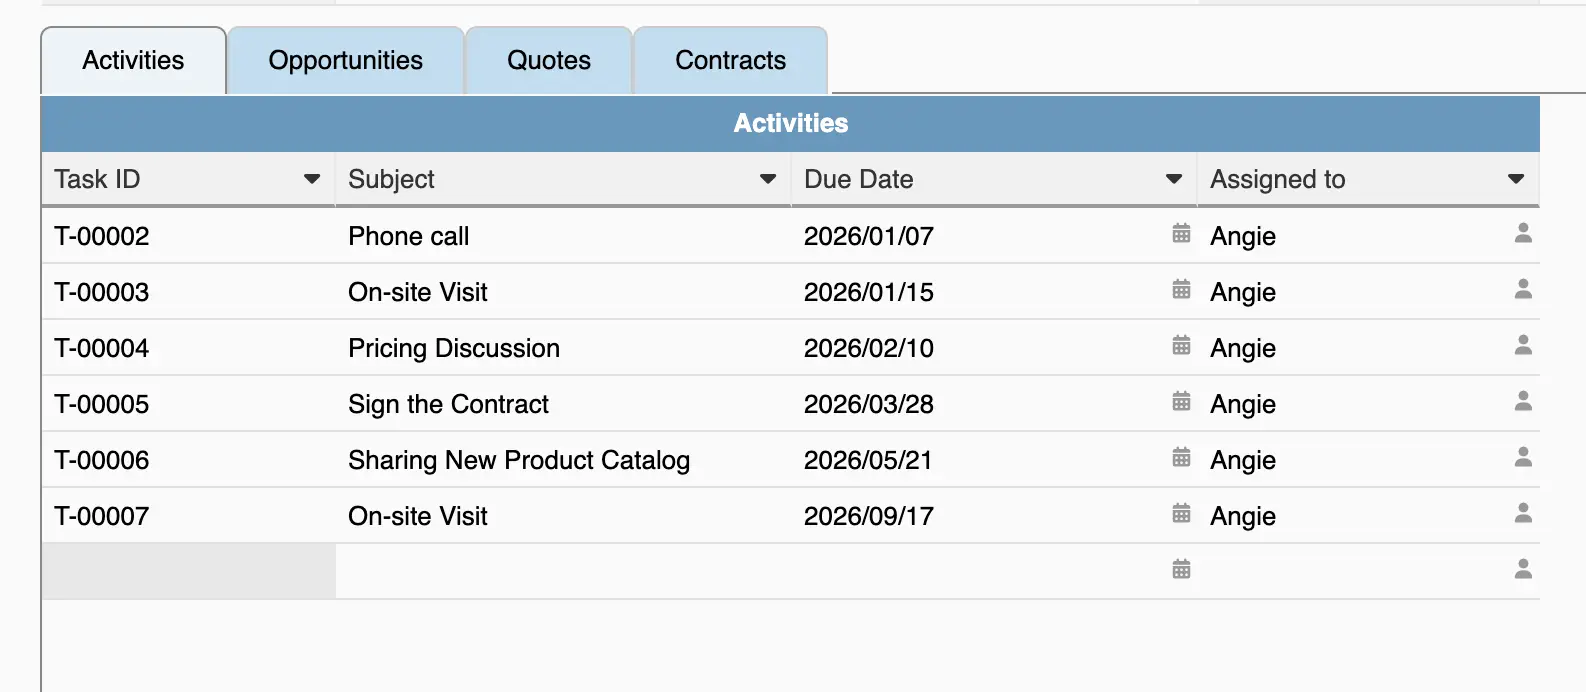
You can follow the steps below:
If you already have a serial number field in the subtable, you can skip this step. If there is no serial number field yet, you can add a numeric field type with $SEQ Default Values. After completing the settings, please save the design first and then execute Populate Empty Values to apply it to existing subtable rows.
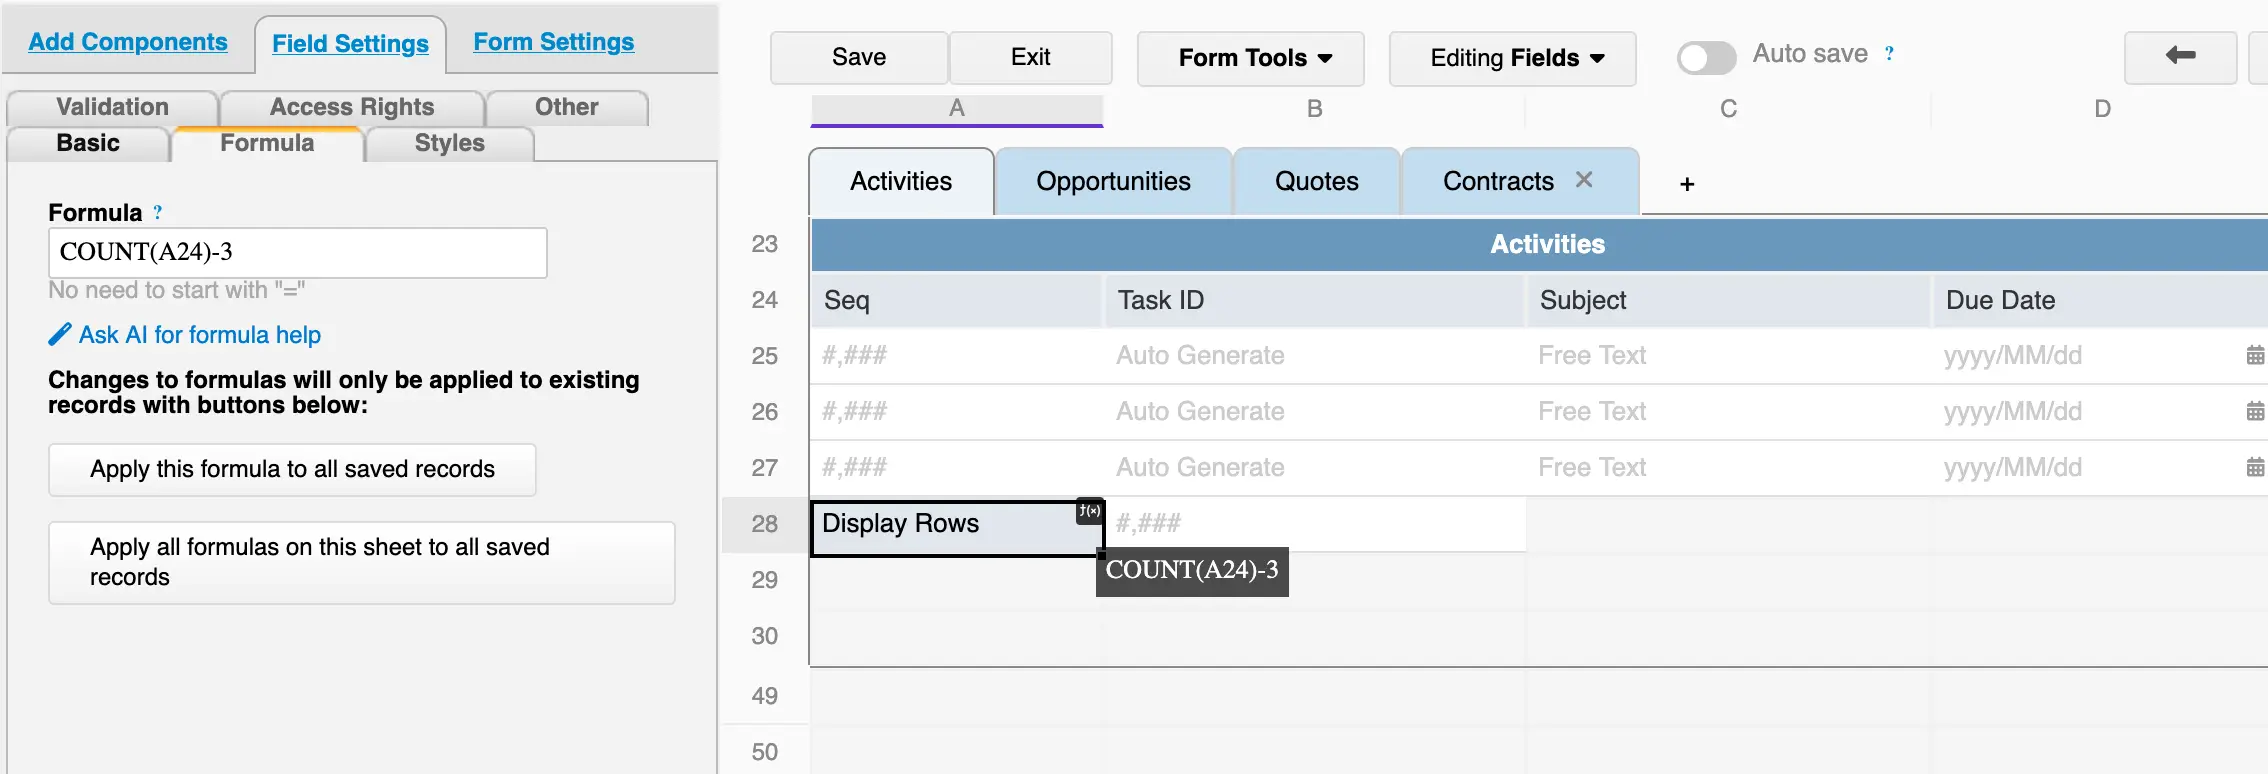
Add a "Display Rows" numeric field type with COUNT() formula to define how many rows should be displayed, for example:
COUNT(A24)-3
The above formula means displaying the latest 3 subtable rows. If you want to display the latest 5 rows, you can adjust it to COUNT(A24)-5.
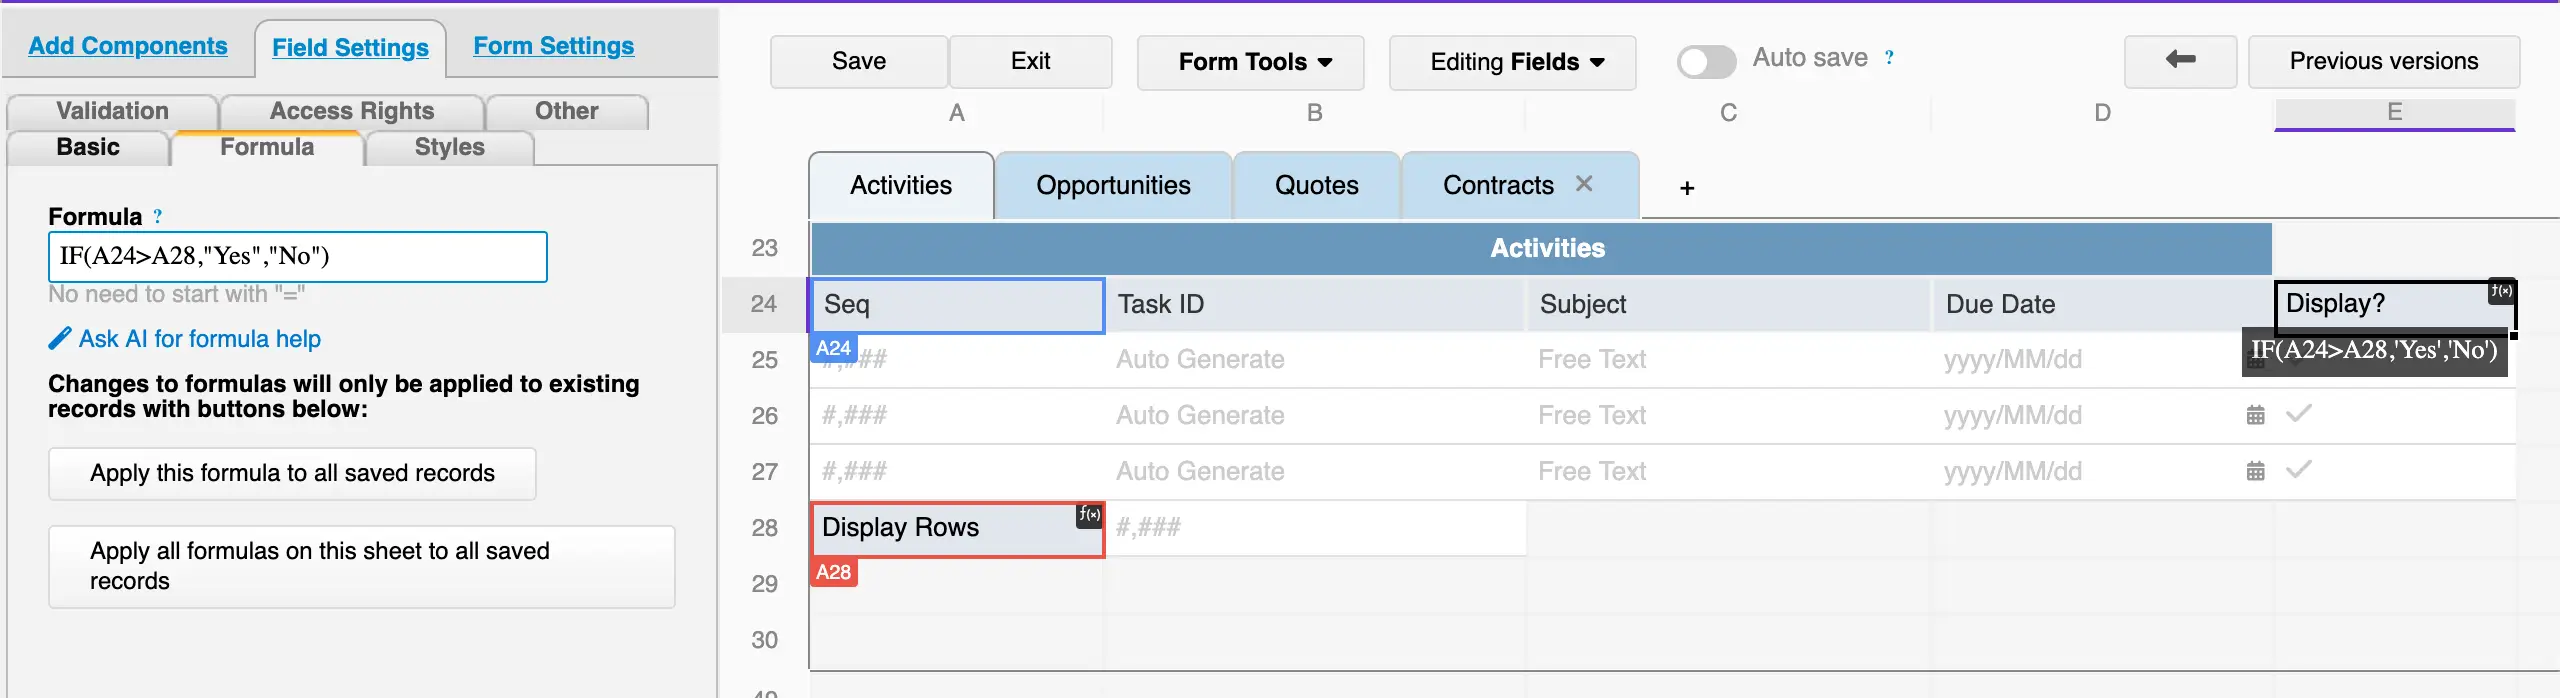
Add a "Display?" checkbox field with a conditional formula to determine whether the subtable row needs to be displayed, for example:
IF(A24>A28,"Yes","No")
It means when the serial number of the subtable row is greater than the "Display Rows" value, it will return "Yes"; otherwise, it will return "No".
On the front-end, set a filter for the "Display?" subtable field to "Yes" and save it as Default Filter.
When new rows are added in the future, the system will automatically recalculate the "Display?" field and refresh the filter.
When subtable data includes a date field, for example:
You can follow the steps below:
If you already have a date field in the subtable, you can skip this step. If there is no date field yet, you can add a date field type and, depending on your needs, use a Default Values for creation date or last modified date. After completing the settings, please save the design first and then execute Populate Empty Values to apply it to existing rows.
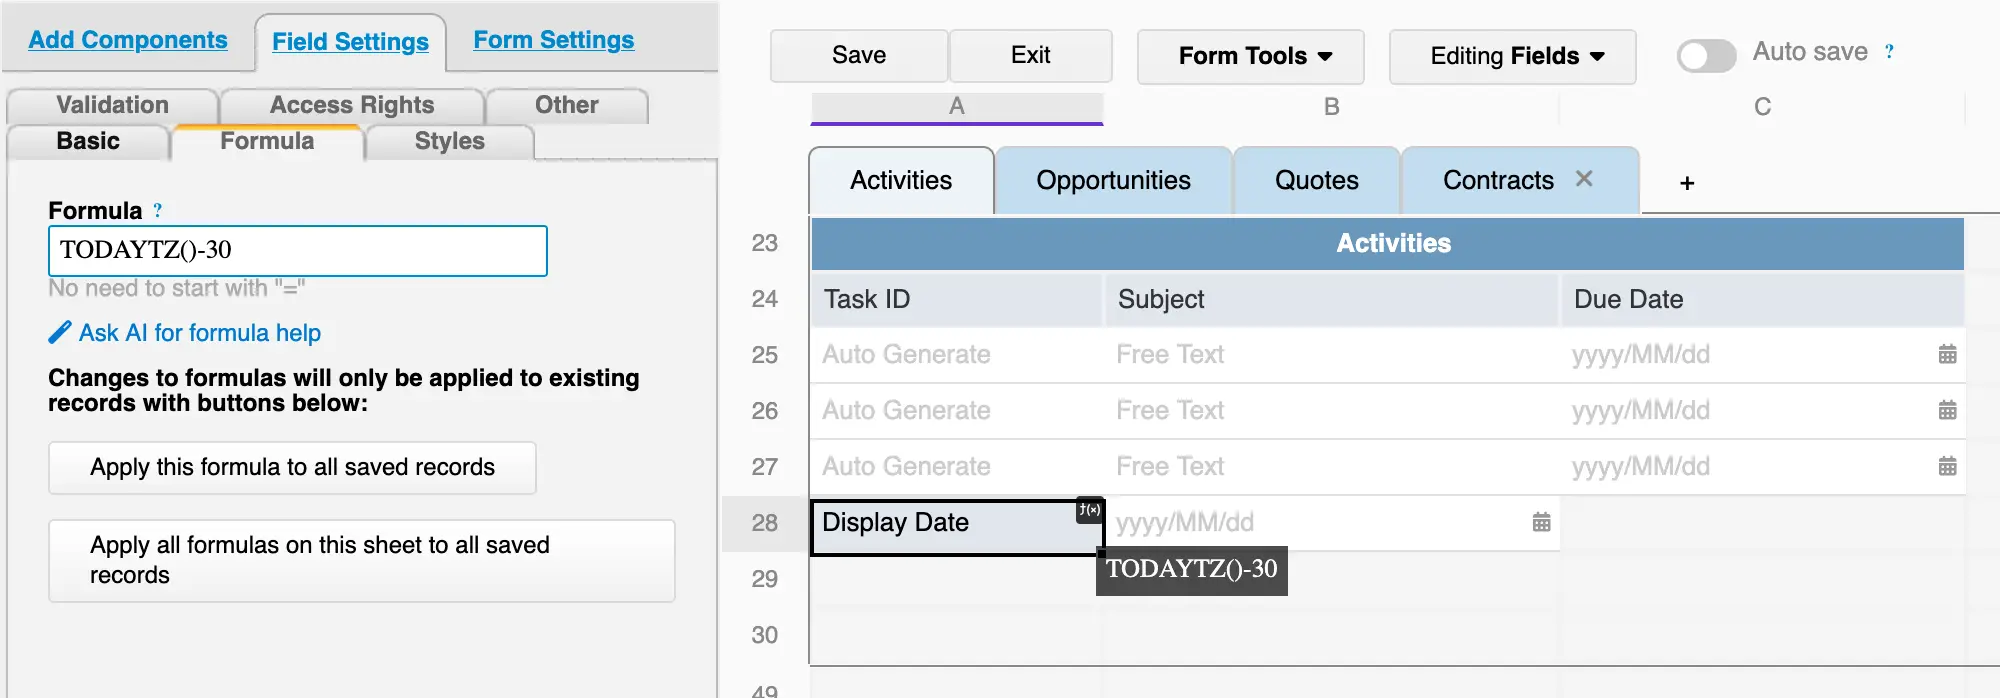
Add a "Display Date" date field type with the TODAYTZ() formula to calculate the desired range, for example:
TODAYTZ()-30
The above formula means displaying data rows within the "past 30 days". If you want to display the past 14 days, you can adjust it to TODAYTZ()-14.
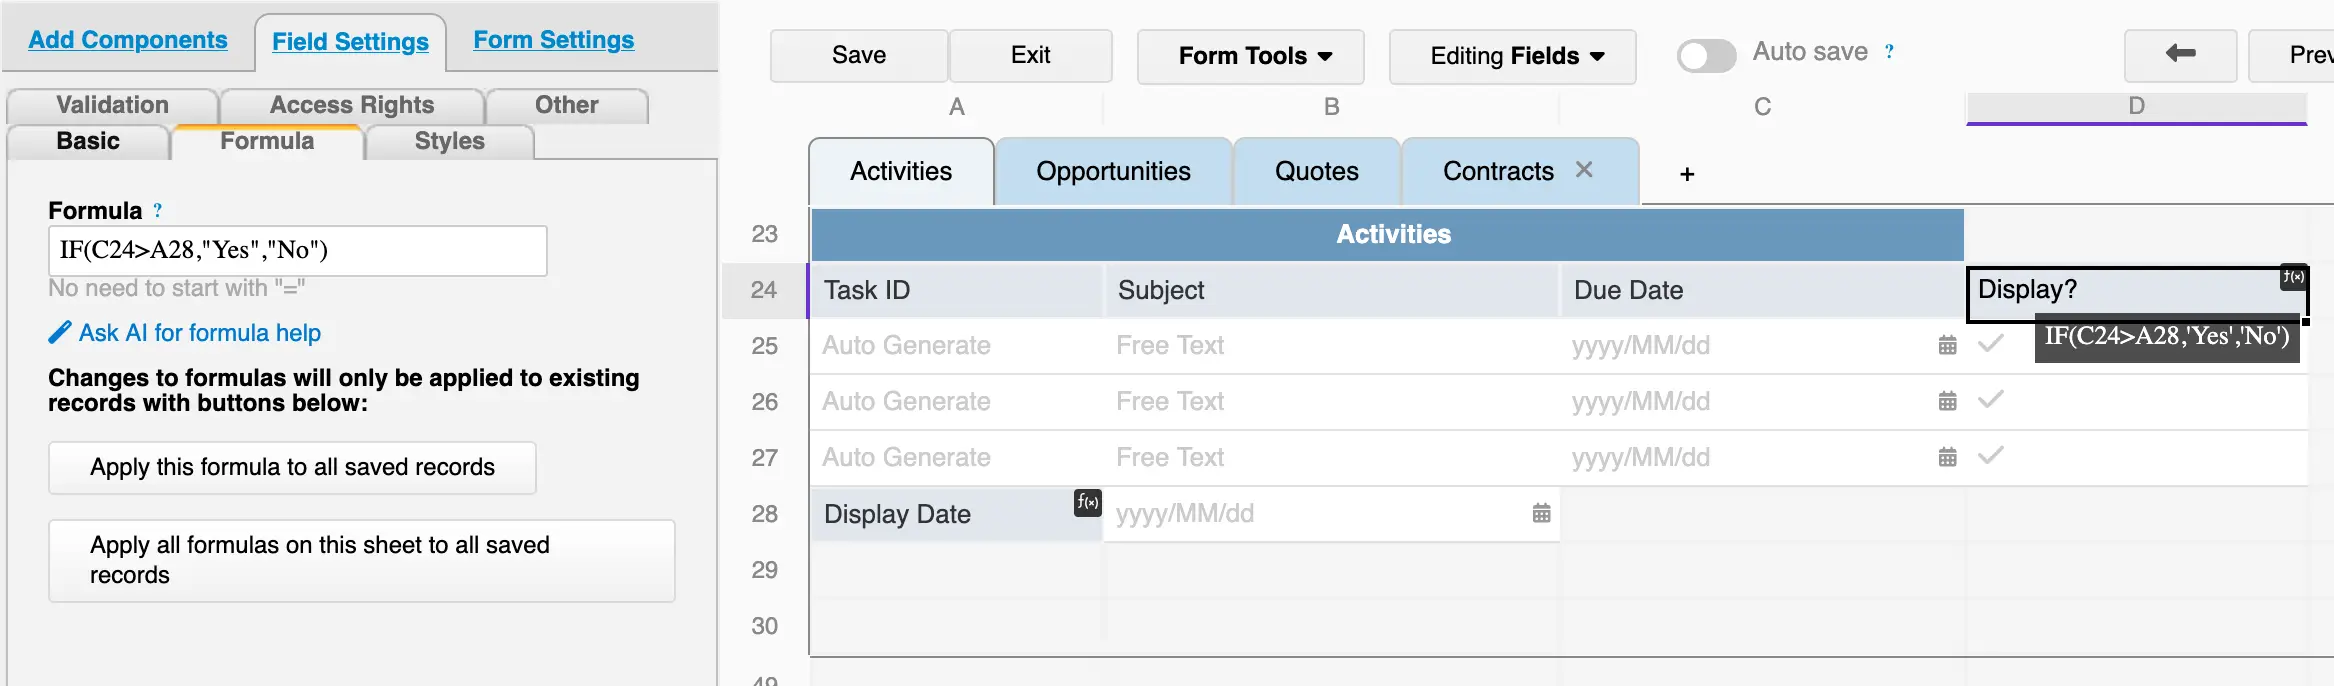
Add a "Display?" checkbox field with a conditional formula to determine whether the data row needs to be displayed, for example:
IF(C24>A28,"Yes","No")
It means when the "Due Date" of the subtable row is greater than the "Display Date" value, it will return "Yes"; otherwise, it will return "No".
On the front-end, set a filter for the "Display?" subtable field to "Yes" and save it as Default Filter.
In the future, the system will perform a daily recalculation to update the values in the "Display?" field and refresh the filter.
Note: The "Display?" subtable field will still work correctly if set to hidden. You can Hide this field if needed.
 Thank you for your valuable feedback!