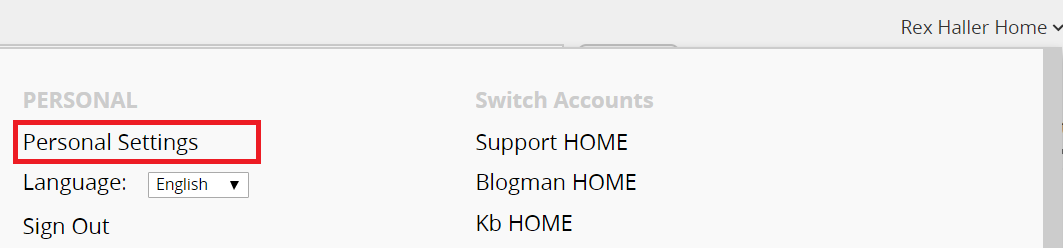
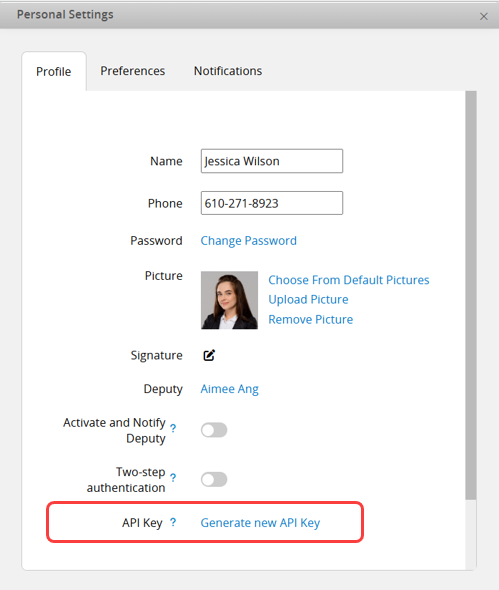
Click your_name Home in the top-right corner of the page to access Personal Settings. You can update your Profile, Preferences, and Notification settings.
You can configure the following settings under Profile:
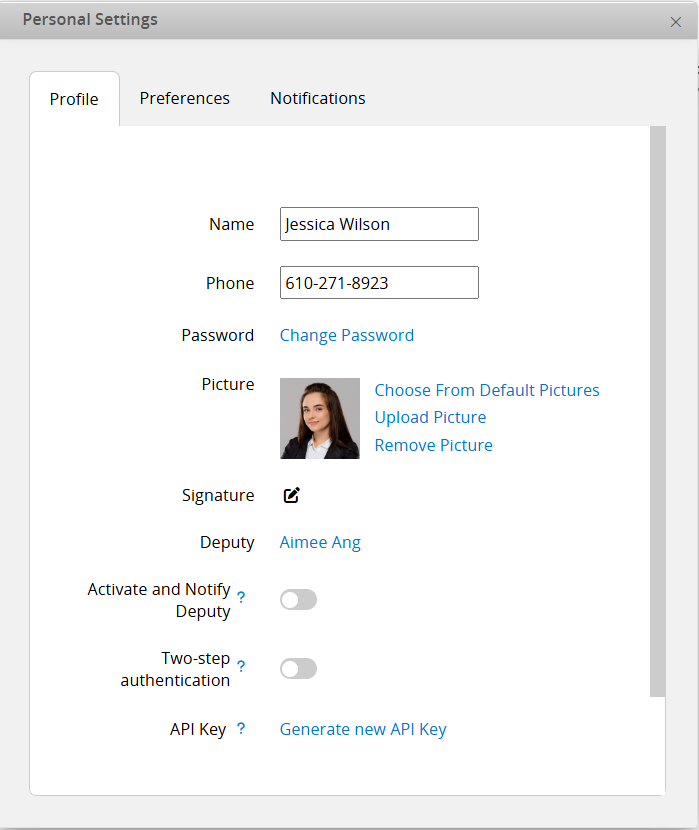
If no name is set, the database will display your email as your account name.
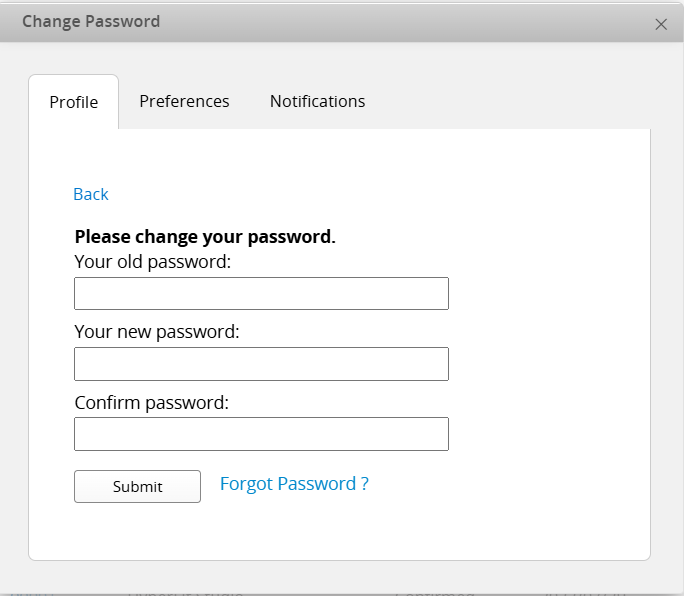
Click Change Password to update the password for logging into the database.
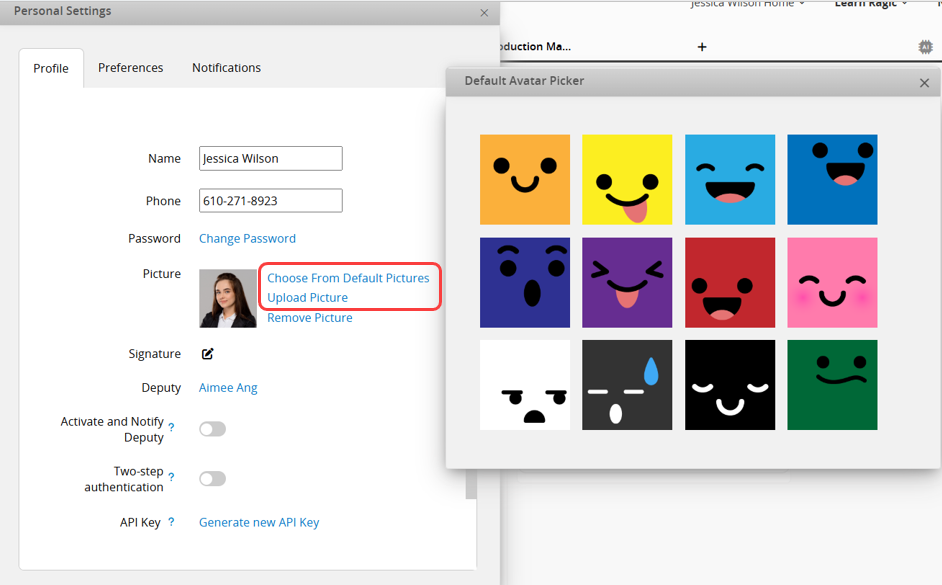
The uploaded picture will be your avatar in Ragic. You can also choose from the default pictures.
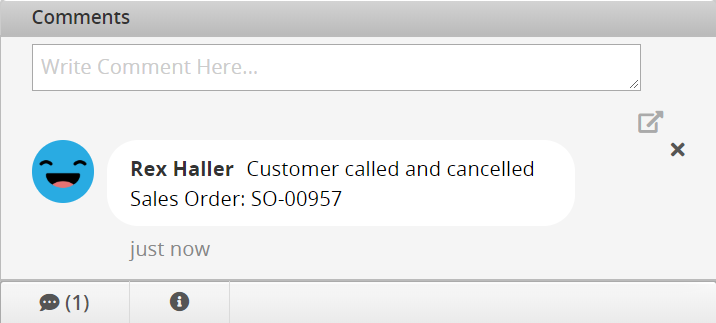
The uploaded picture will be displayed in Comments、Tasks、Notifications and Select User Fields.
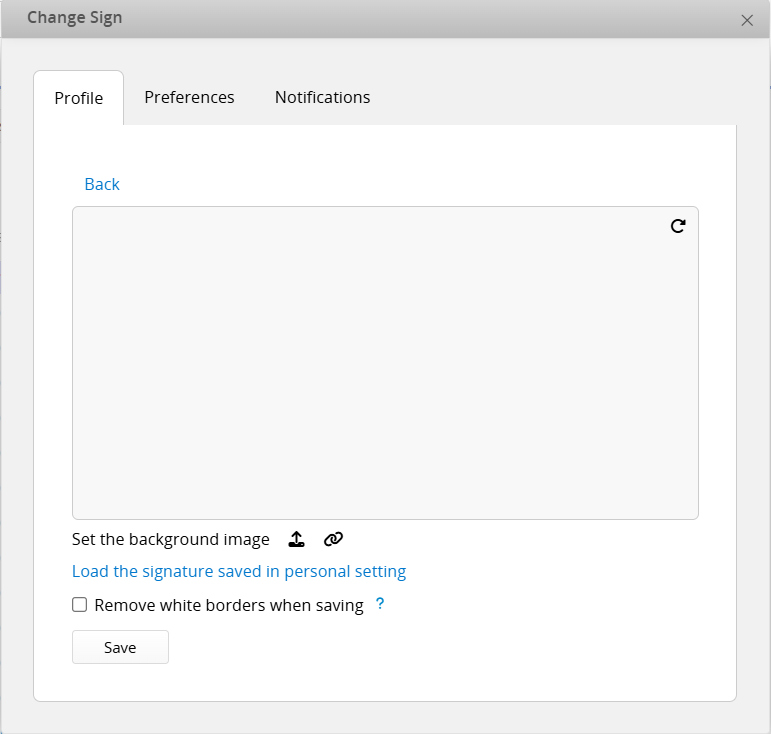
You can manually add a signature, upload an image file, or insert a link to the image URL. After completing this, you can check Remove white borders when saving. The system will remove the white borders and save the image in its original ratio.
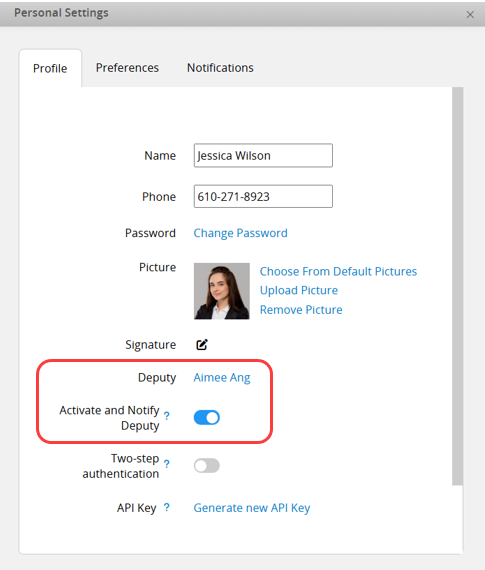
You can set up a deputy and enable the Activate and Notify Deputy options. This activates the deputy approval feature, ensuring the deputy receives approval notifications and preventing delays during your absence.
Other settings include enabling Two-step Authentication, generating a new API Key, and enabling LINE Notify.
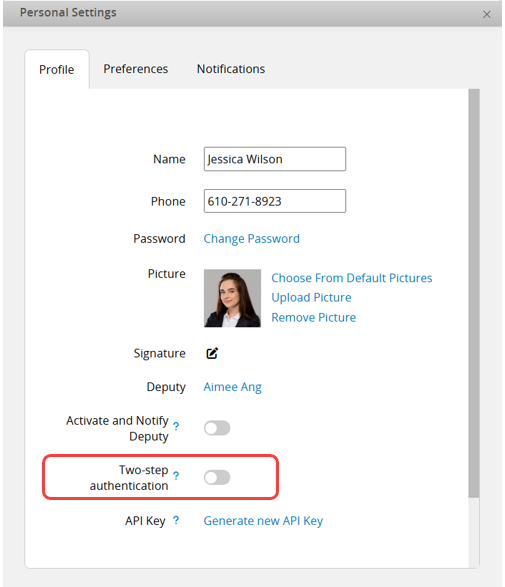
You can activate Two-step authentication to protect your account with both your password and your phone.
If overseas login is required, we recommend enabling 2-Step Authentication.
Note: The following steps are for the new authentication method. If you have previously set up two-step authentication, you will receive a notification message prompting you to change to the new authentication method. Please follow the steps below to make the transition.
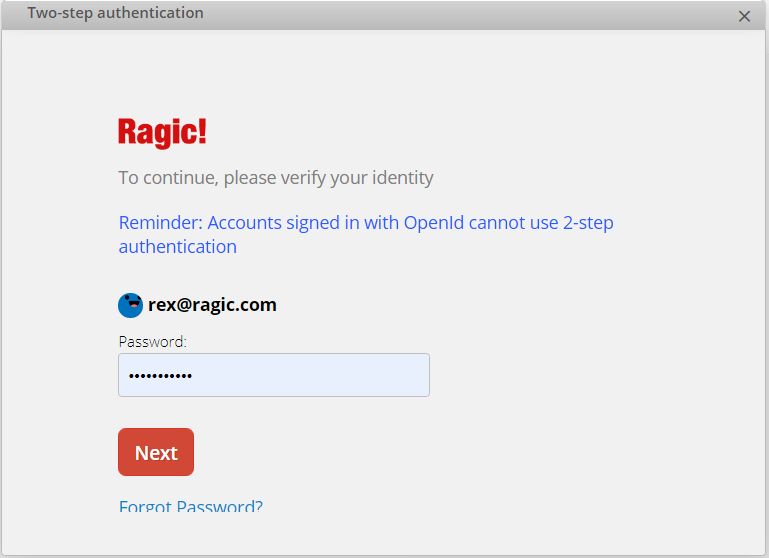
Step 1: Enter your password to confirm that you are the account owner.
Step 2: Choose the authentication method. The method can be adjusted through the Security Settings in the Company Settings.
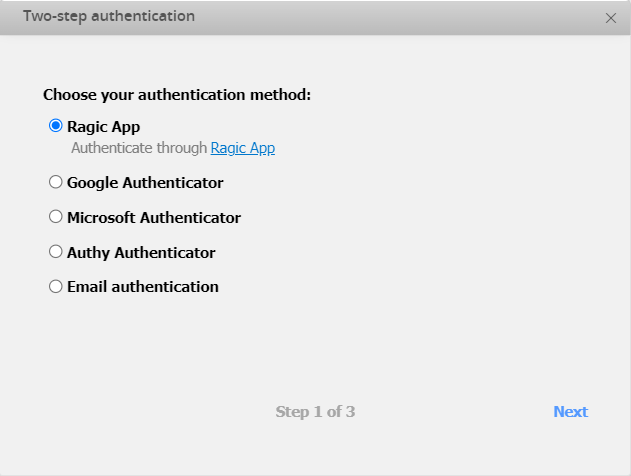
There are two categories of authentication methods: obtaining a time-based one-time password (TOTP) through the Ragic app or a third-party app and directly receiving authentication codes via email. Below are the details of each authentication method.
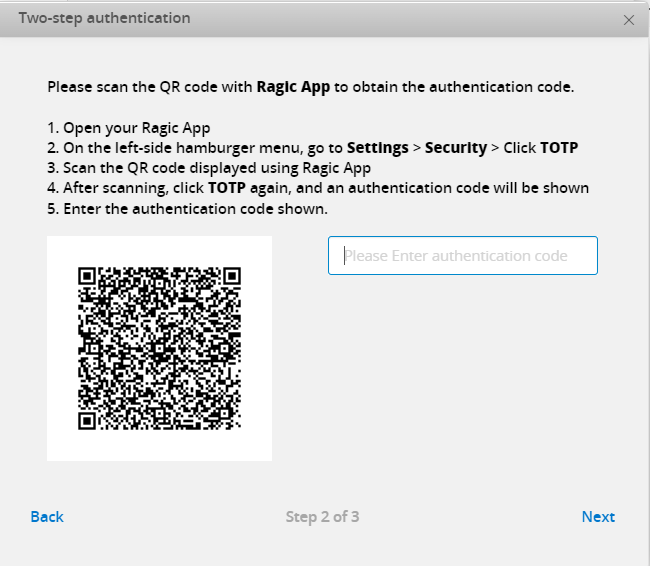
1. Ragic App: Use the Ragic App to obtain a time-based one-time password for authentication. Follow the steps to complete the setup.
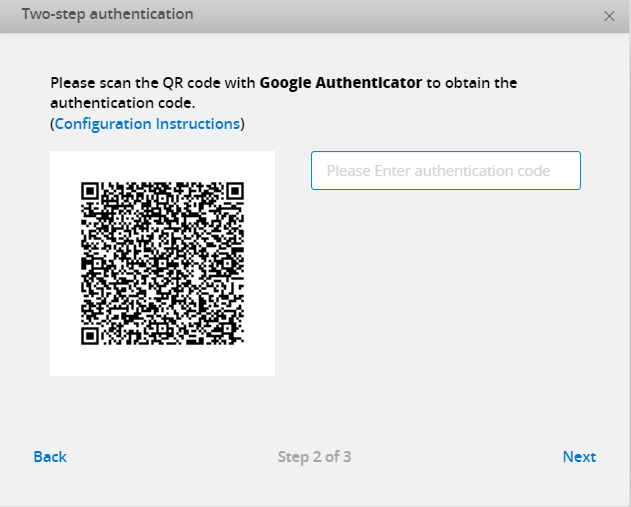
2. Google Authenticator: Install the Google Authenticator app on your mobile device. Scan the QR code to obtain and input the time-based one-time password to complete the setup. For details, please click "Configuration Instructions".
3. Microsoft Authenticator: Install the Microsoft Authenticator app on your mobile device. Scan the QR code to obtain and input the time-based one-time password to complete the setup. For details, please click "Configuration Instructions".

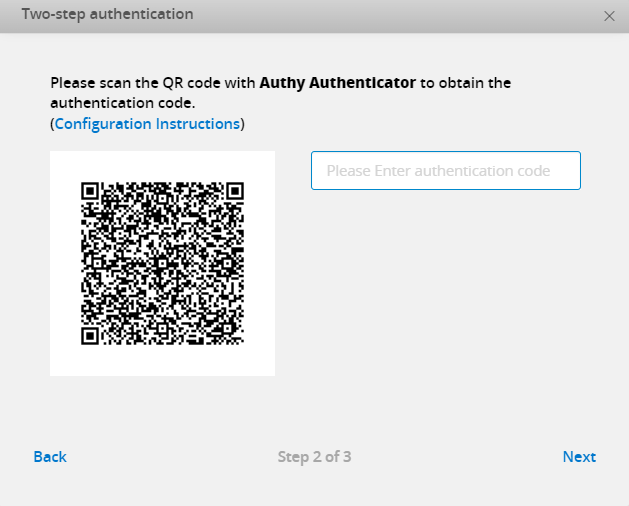
4. Authy Authenticator: Install the Authy Authenticator app on your mobile device. Scan the QR code to obtain and input the time-based one-time password to complete the setup. For details, please click "Configuration Instructions".
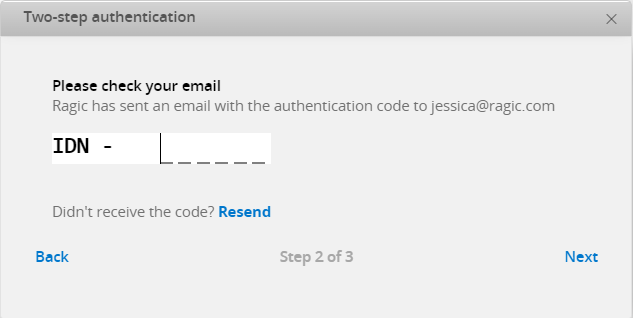
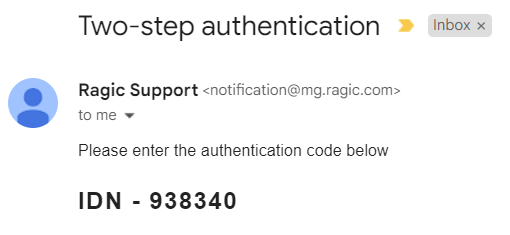
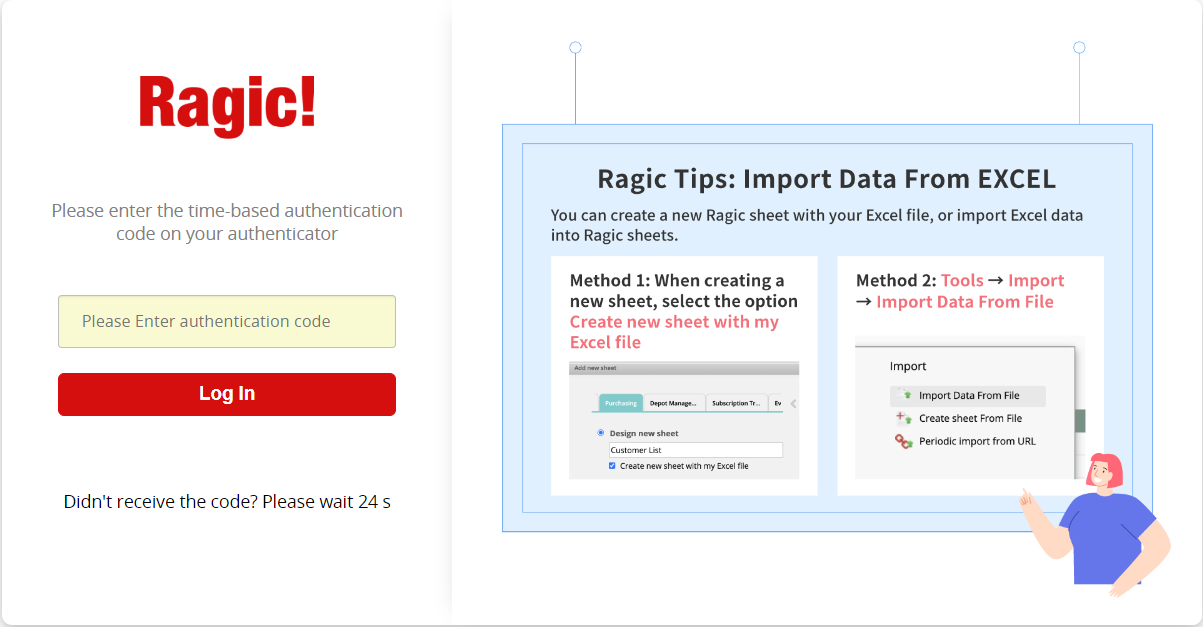
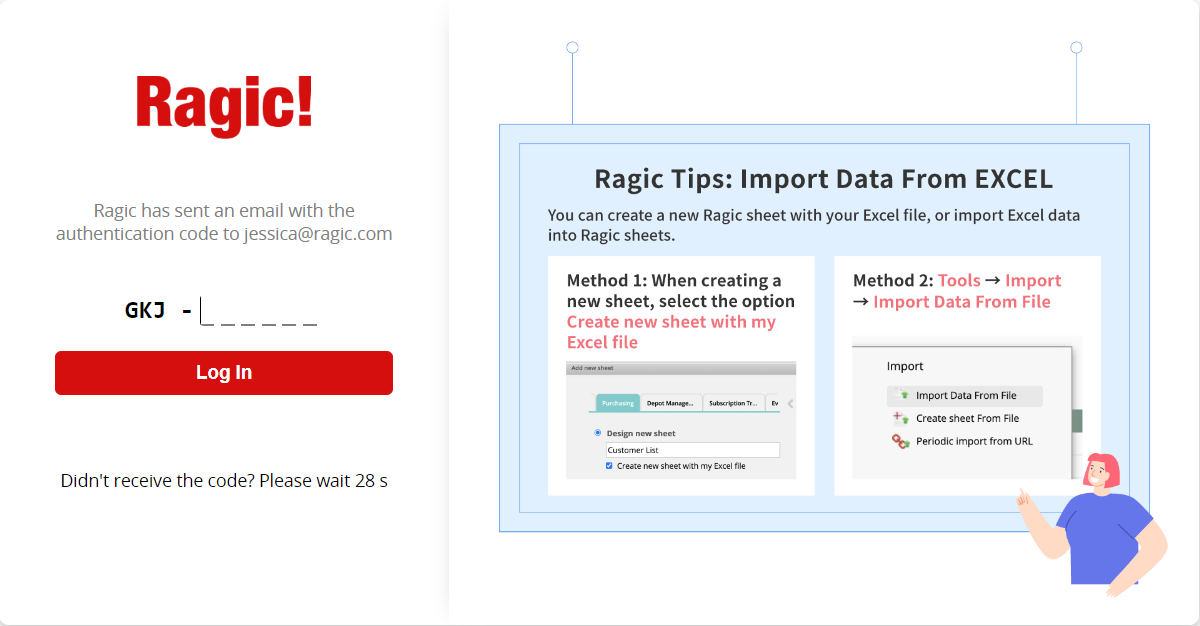
5. Email authentication: After clicking "Next," the authentication code will be sent to your email. Enter the code to complete the setup.
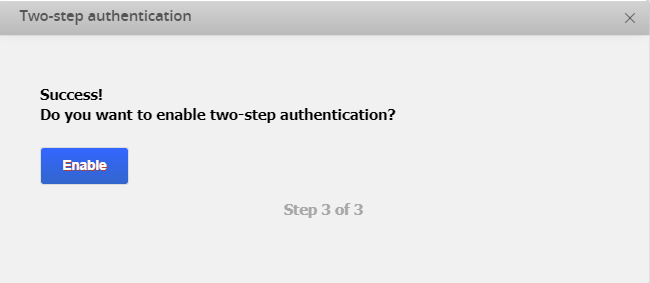
Step 3: Click "Enable" to complete all the steps.
Step 4: When logging into your account, you will be prompted to enter an authentication code according to the authentication method you have selected.
1. Obtain a time-based one-time password (TOTP) through the Ragic app or a third-party app.
2. Receive an authentication code via email.
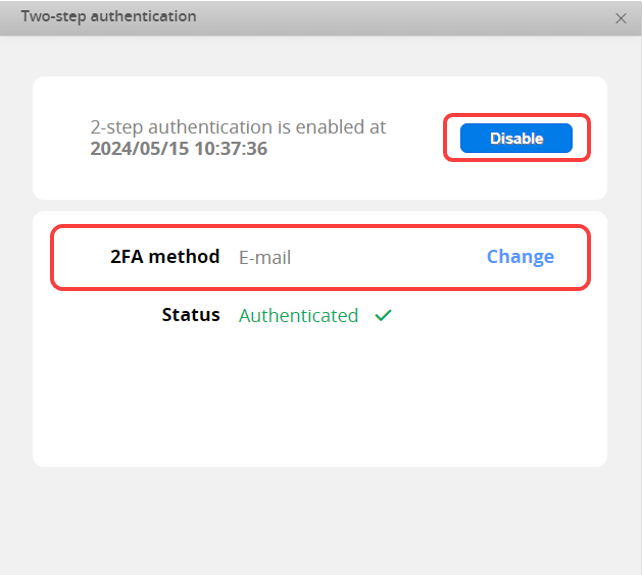
Step 5: Click on "Two-step authentication" again in your Personal Settings to view the status. You can also disable Two-step authentication or change the authentication method.

When the SYSAdmin integrates an API requiring access with your account permissions, your API Key is needed. In Profile, you can generate the API Key for the current user. Regenerating it will reset the previous key.
Note: If you need a fixed identity to obtain an API Key, you can create a Service Account to generate a dedicated API Key.
In Preferences, you can configure the execution methods for certain features in the database and sheets.
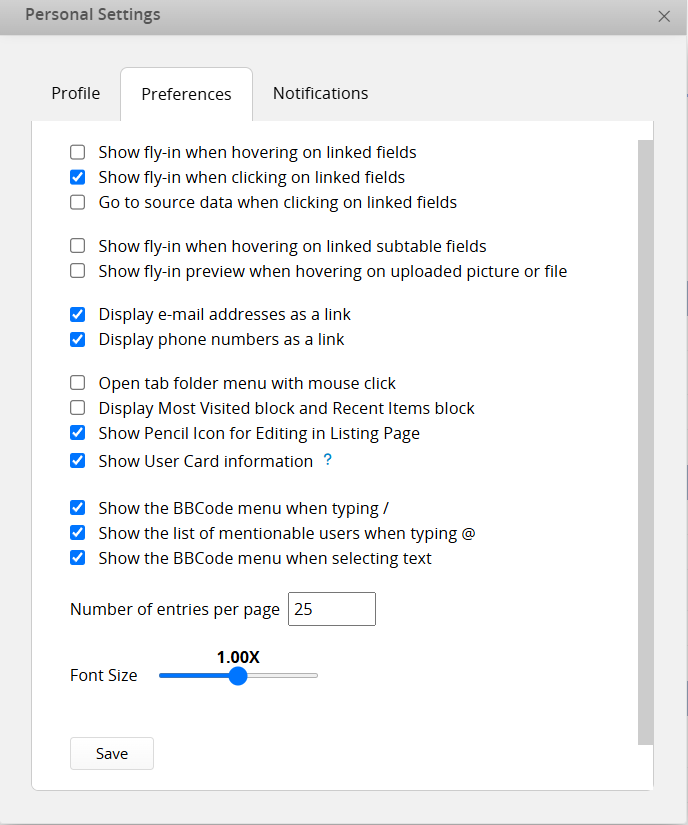
The default values and what these preference options mean are explained below:
| Preference | Default Value | Description |
|---|---|---|
| Show fly-in when hovering on linked fields | On | Display the right panel fly-in when hovered on "Linked" fields. |
| Show fly-in when clicking on linked fields | On | Display the right panel fly-in when clicking on "Linked" fields. |
| Go to source data when clicking on linked fields | Off | Open the source record in a new tab when clicking on "Linked" fields. You can only turn on either Show fly-in when clicking on linked fields or Go to source data when clicking on linked fields at the same time. |
| Show fly-in when hovering on linked subtable fields | On | Display the right panel fly-in when hovered on "Linked" fields in Subtables. This includes Subtable that generates a new sheet and Reference Subtables (Show References From Existing Sheets). |
| Show fly-in preview when hovering on uploaded picture or file | On | Display an image or file preview for Image Upload fields or File Upload fields when hovered on an existing uploaded image or file. |
| Display e-mail addresses as a link | On | Display E-mail fields as links, and behaves according to how the user has configured their browser setting for e-mail addresses. |
| Display phone numbers as a link | On | Display Phone fields as links, and behaves according to how the user has configured their browser setting for phone links. |
| Open tab folder menu with mouse click | Off | Toggle the setting for tab menus to display sheet names when hovered or clicked. |
| Display Most Visited block and Recent Items block | Off | Display recently used sheets and records in the left side panel. |
| Show Pencil Icon for Editing in Listing Page | On | Display Pencil Icon in Listing Page for quick access to Edit Multiple Entries. |
| Show User Card information | On | Display the User Card when viewing user data. Since the User Card is accessible only for Internal Users. External Users cannot view this information, regardless of the setting. |
| Show the BBCode menu when typing / | On | Display the BBCode menu when typing /. |
| Show the list of mentionable users when typing @ | On | Display the user selection menu when typing @. |
| Show the BBCode menu when selecting text | On | Display the BBCode menu when selecting text. |
| Number of entries per page | 25 | Global setting for the number of entries displayed on listing pages. This can be configured for individual sheets with this method. |
| Font Size | 1.00X | Setting the font size of the data in the form. |
Note: You can also turn off all the fly-ins by clicking the gear icon in the right panel. For detailed information, please refer to this article.
 Thank you for your valuable feedback!
