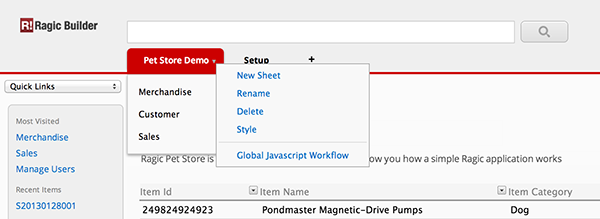
You can access the context menu of a tab or sheet by right clicking on it, or left clicking on the arrow icon that appears when you hover on the tab or sheet name.
Choosing "Delete" will delete the tab or the sheet.
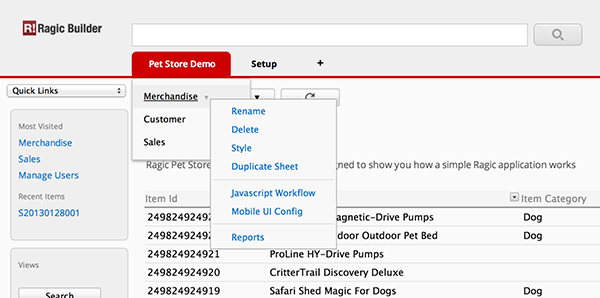
To delete a report, you can right click on the report name to access the context menu and choose "Delete".
If the system stop you from deleting a sheet, please refer to this document.
If you acccidentally deleted an application tab or sheet and would like to recover it, you can check to see if it's under the Recycle Bin of your Account Setup.
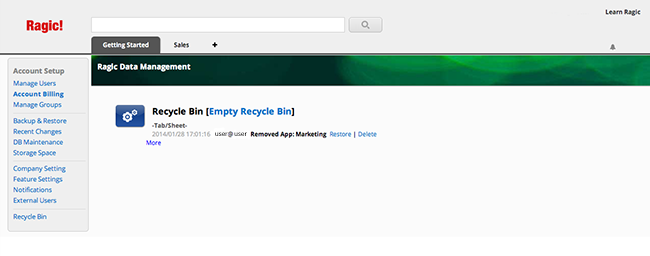
If you cannot find your deleted sheet or tab, you can contact Ragic Support at support@ragic.com to help you restore a backup.
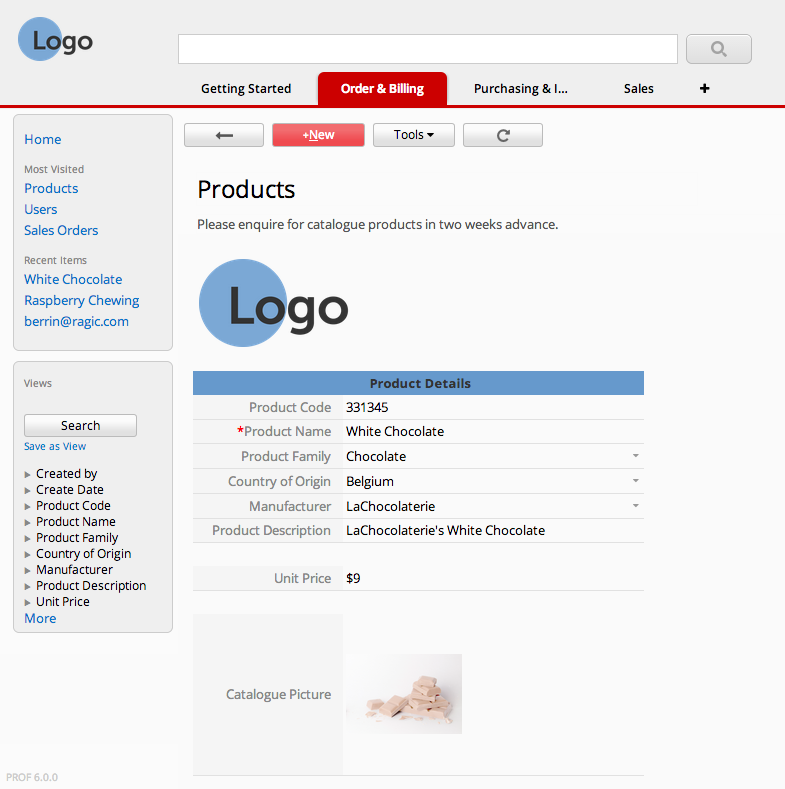
1. Add your company logo
It's always a great idea to customize Ragic to fit your company's look & feel. If you are using Ragic's professional or on-premise plan, you can replace the Ragic logo in the top-left to your company's logo. (if you're using a different plan, check the next tip!)
Go to your Company Setting under your Account Setup. You can upload your company logo on this page so that it'll show up on every page.
![]()
2. Add images to your form design
Adding a header or footer on paper or on digital forms usually works great to establish your corporate identity. Same goes for banners and your logo. The design elements you add here will be displayed in the printer-friendly version as well.
To add a default image that will always display on all your forms, simply add a static text field with an HTML image tag containing a link to your image. Learn how to do this by following the simple instructions here.
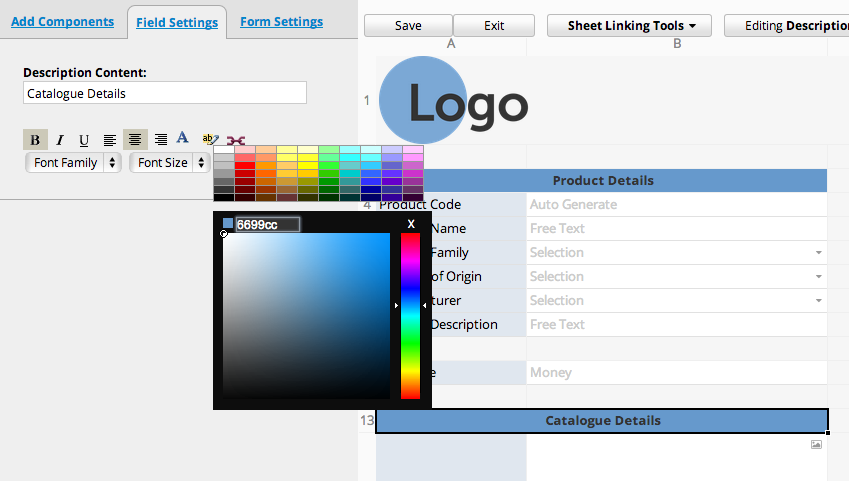
3. Mix and match your colors
You can change the style of static text fields as well as the headers of regular fields to fit your company's corporate identity. Whether the colors you choose match your logo or your website's color scheme, editing the colors will add a sense of integrity to your overall design.
4. Make the columns fit just right.
Whether it's your listing page or form page, having overset text is pretty unseemly. To avoid this, you can drag the edges of the column header from the design mode to fit your field header, or the width of your field values.

Additionally, you can change the field header text from the design mode of your listing page. The changes made for what is displayed on the listing page will not reflect to the form page, and vice versa.
5. What about the rows?
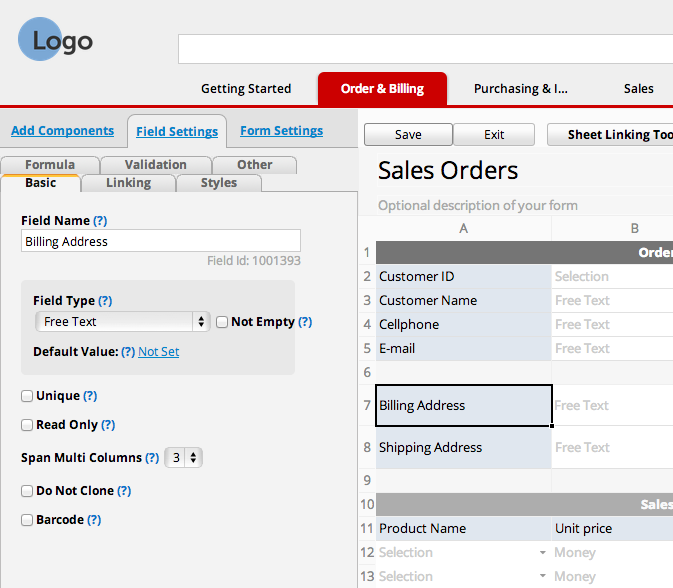
If you'd like to keep everything on one line, you can have a field span multiple columns from the Basic tab while designing your form page.
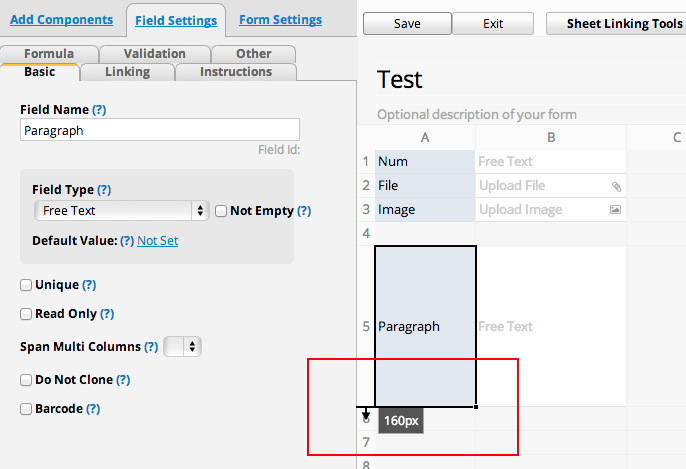
If you'd rather have a paragraph-like field that would expand as you enter more data, you can resize the height of the row, just like editing the width of the columns in the design mode.
6. Add some space
It's always a good idea to leave some white space for better readability, like how you'd leave a margin when composing a text document.
I've discovered that the best way for this in Ragic is to leave an occasional empty column (for me a 50-px width looks great) between fields in the same row in the form page.
7. Keep your listing page clean.
One of the best features that comes with using Ragic is the powerful search engine — you can search for values that aren't displayed on the listing page with any of the search tools.
You can also click on individual entries to go to the form page and view the details of each entry.
This means that you don't have to display most of the fields on your listing page, save the important data. You can choose which fields are displayed as columns in the listing page from the design mode.
before:
after:
8. Be consistent.
However you wish to design your forms, make sure that the design of your forms are consistent with each other to avoid confusion.
This knowledge base entry was originally posted in our blog.
Linking fields between different sheets is one of Ragic’s key features!
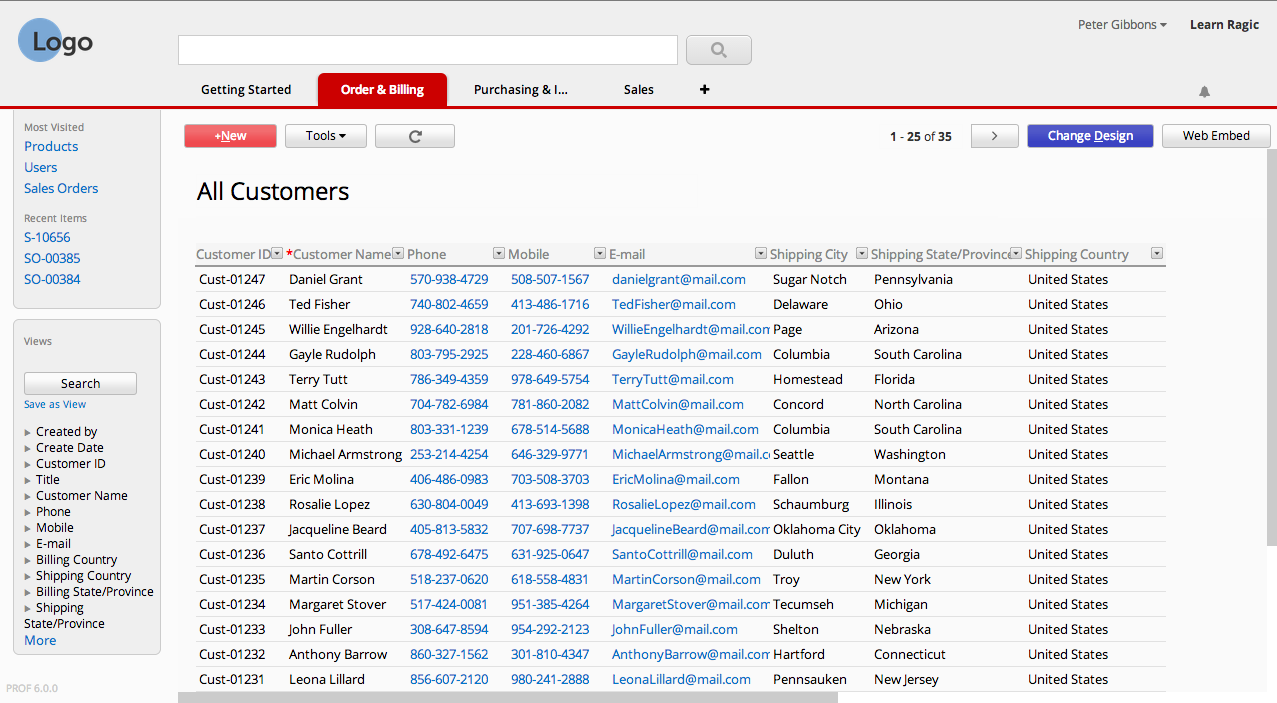
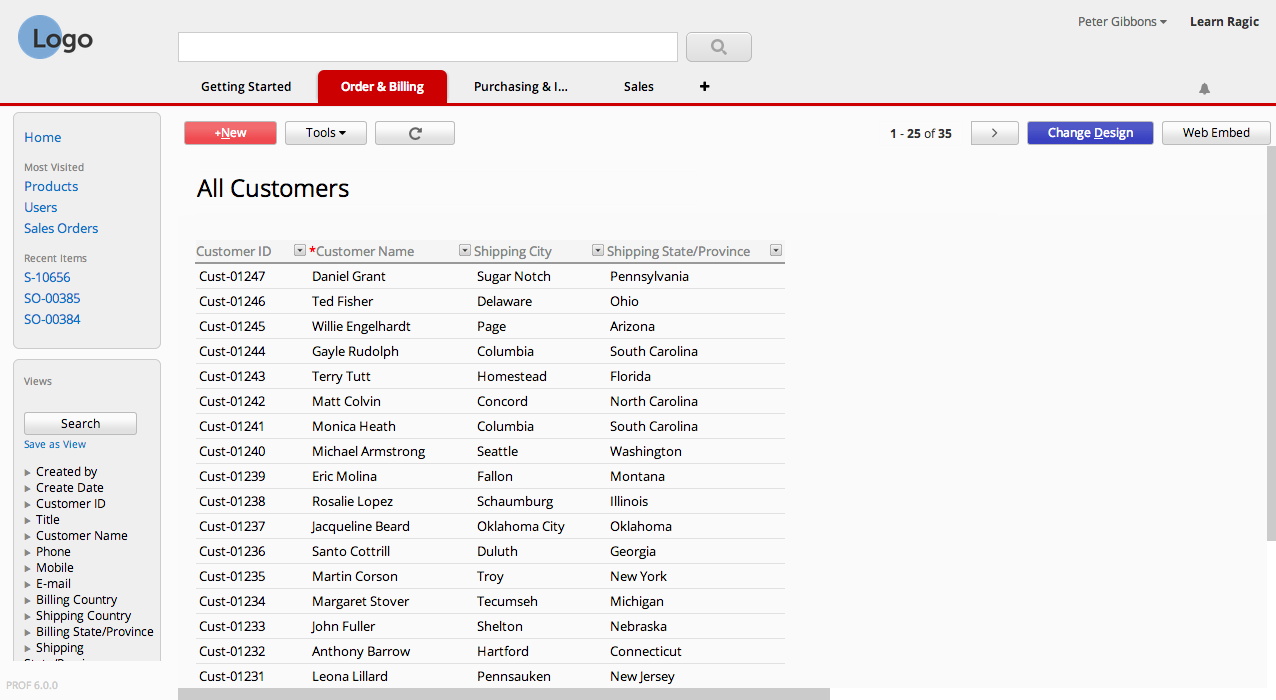
Before linking sheets, let’s use the "Orders" and "Customers" sheets as examples to introduce Linked Fields and Loaded Fields.
1. Linked Fields: If an "Orders" sheet includes a "Customer" field for selecting a customer when creating an order, and the data source for this field comes from the "Customers" sheet, it is a Linked Field.
The "Customer" field contains customer IDs, which correspond to the Unique Value field in the "Customers" sheet. A Linked Field must connect to another sheet’s Unique Value field, just like the "Customer" field in the "Orders" sheet links to the "Customer ID" in the "Customers" sheet.
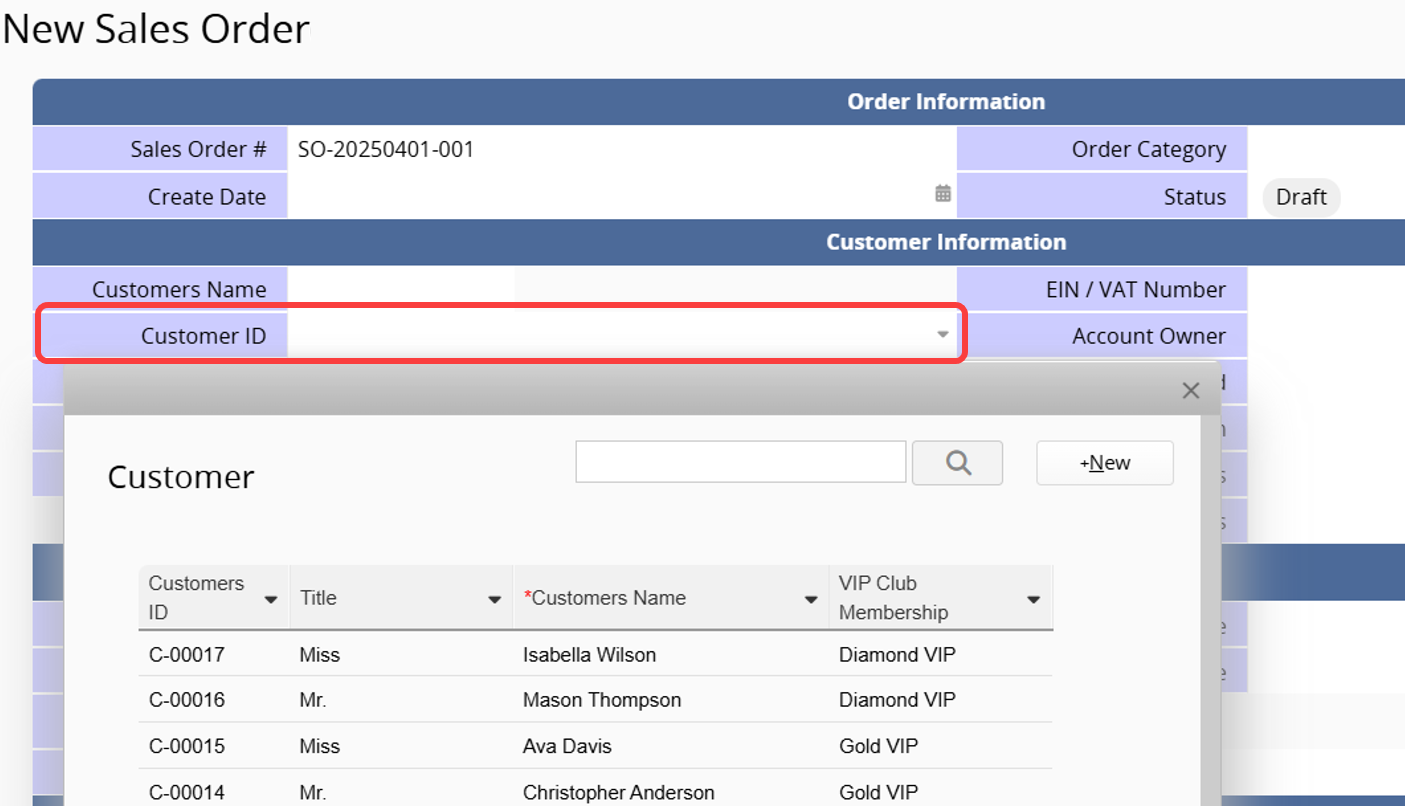
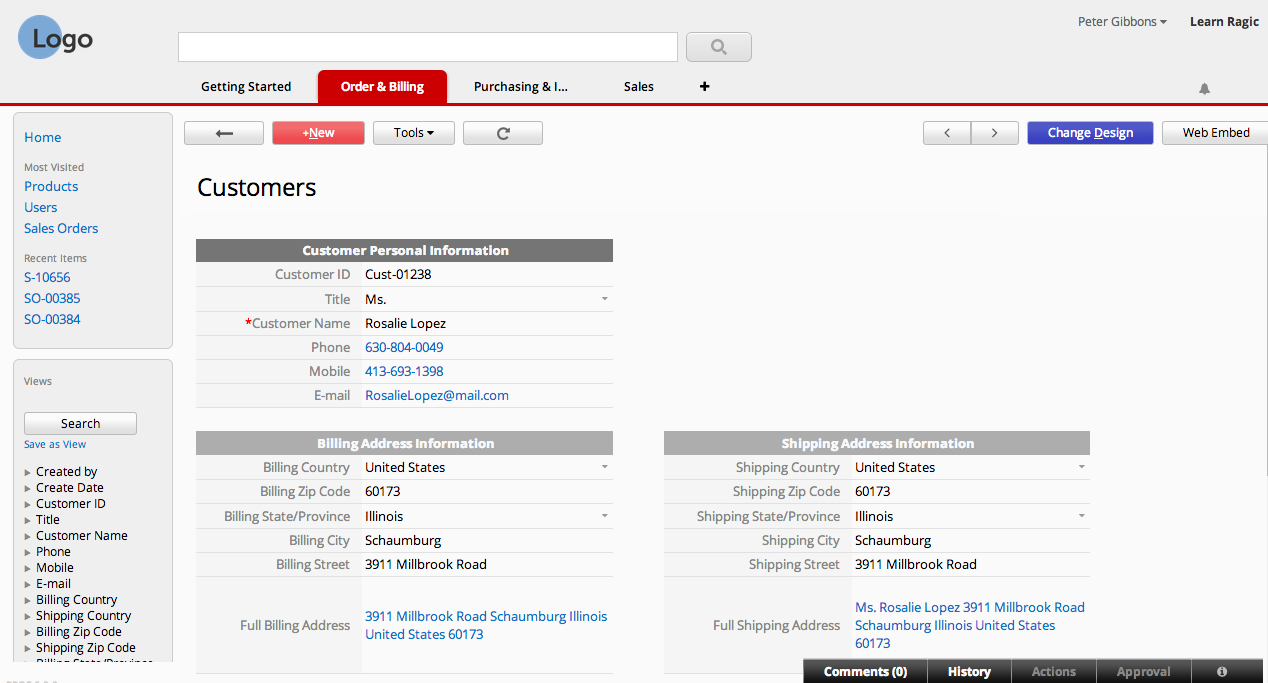
2. Loaded Fields: When a user selects a customer ID in the "Customer" field of the "Orders" sheet, Ragic can automatically populate related information from the "Customers" sheet, such as the customer’s name, phone number, and address.
This significantly reduces data entry time and helps prevent manual input errors.
Understand the concepts of Linked Fields and Loaded Fields, and now you can easily set up form links through Link Manager!
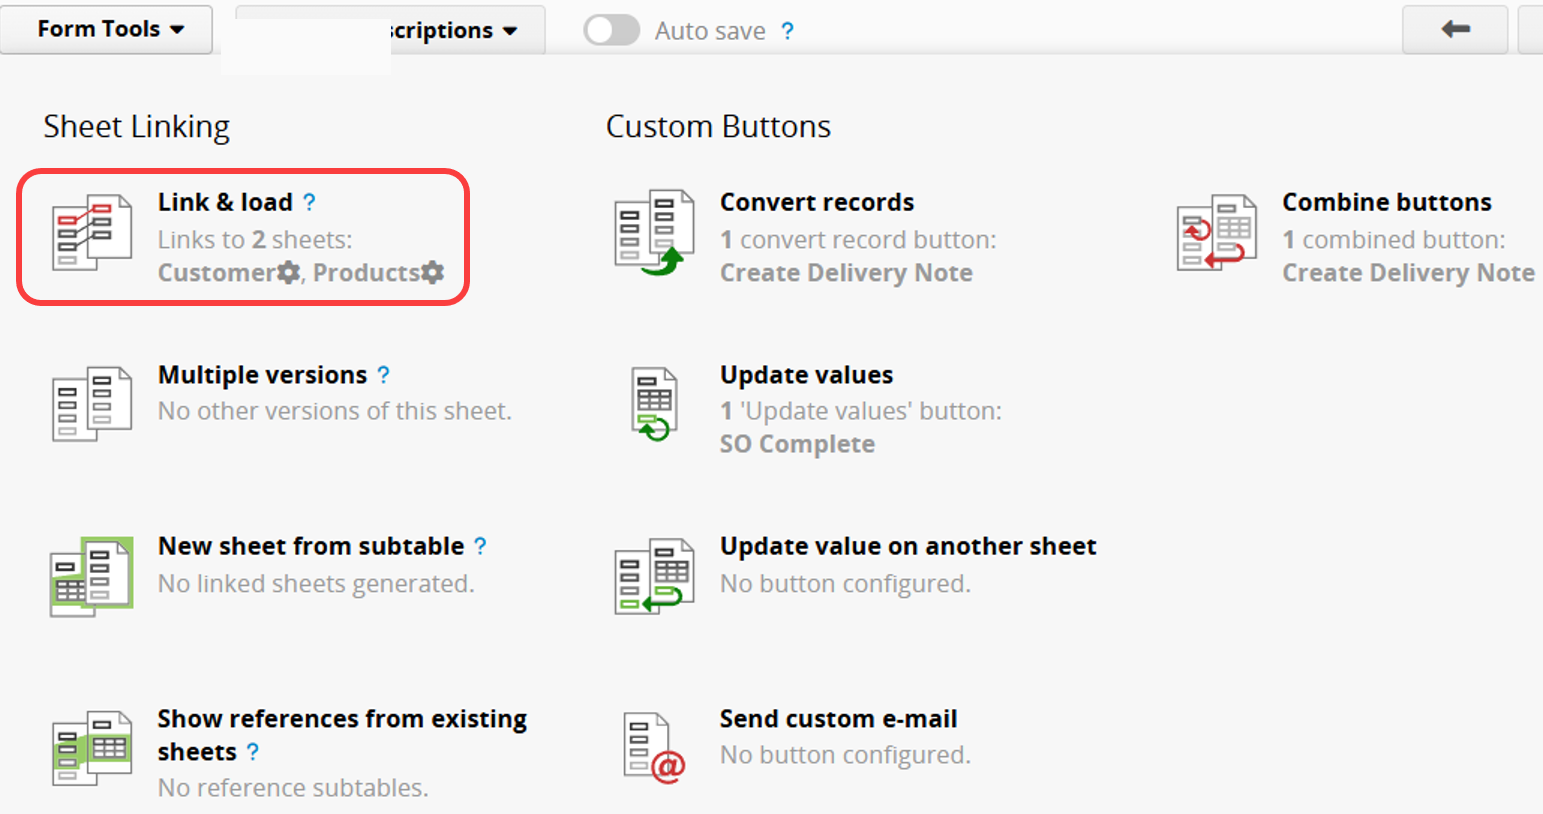
For more information on sheet linking, please refer to the Link and Load documentation.
Ragic has a convenient import wizard for users to import from their existing data from Excel or CSV files. To import from your files to Ragic, you can go to the listing page that you would like to import your data to, and choose Import Data From File under Tools. There will be a step-by-step wizard to guide you through the field mapping process as well as other configurations for the data to import correctly.
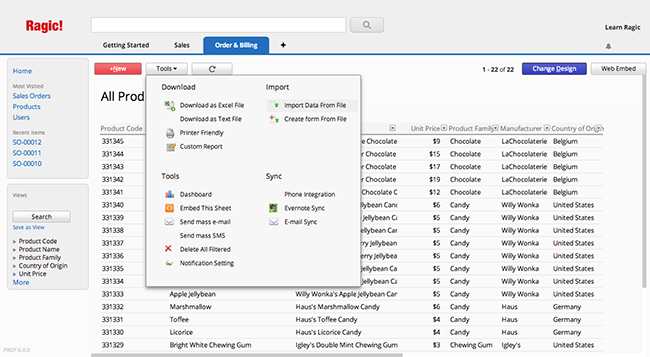
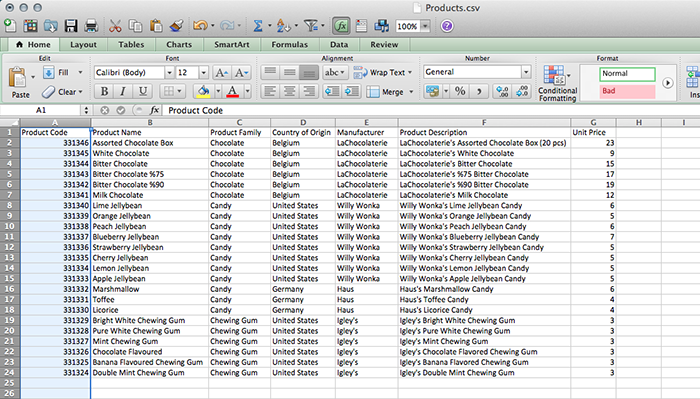
For Ragic to map your information correctly to entries, you will need to have a unique identification that we call key field, such as "Product ID" for products, or "Customer No." for your customers. To make your database easier to use, let the first column of your import data be this type of key field.
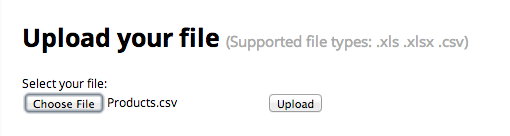
Upload your file. Ragic supports .xls .xlsx and .csv files. We recommend that you save your file as .csv for the best performance.
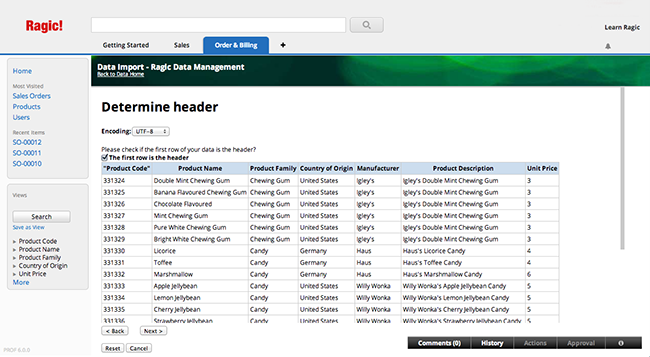
Determine if your first row is the header. If so, Ragic will automatically determine how the data in this row will be mapped to your fields for the next step.
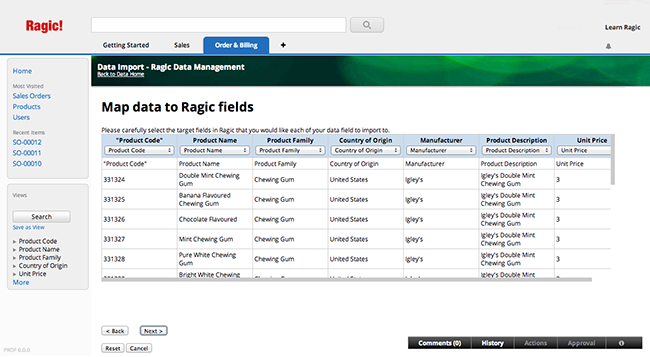
Check to see if all the target fields are correct. This is especially important if you have similar names for two seperate fields. You can also choose to ignore columns of data that you do not want to import. Note that the target field values should also be in the correct formatting, such as the date format. If you're importing into a "select user" field, you will need to have the user's e-mail that's used in Ragic instead of the username that you see to uniquely identify the person.
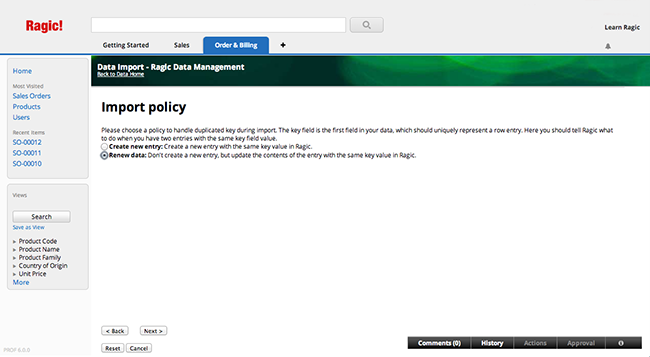
Choose the import policy to handle duplicated keys during your import. If you choose Create new entry, new entries will be created containing data with the same key values. If you choose Renew data, your existing data will be updated if you have entries with the same key value, and new entries will be created for the key values that aren't in your database. This type of import policy is especially useful when you are doing mass editing.
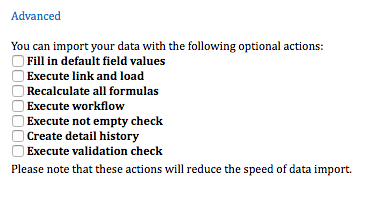
You can configure Advance Settings in Import Policy as well if necessary.
| Advanced Setting | Description |
|---|---|
| Fill in default field values | If you have a configured default value in your sheet, please check this box so that the field value will be updated or populated with the import. |
| Execute link and load | If there are sets of link and load configured on your sheet, please check this box to have the loaded fields auto-populated. Otherwise, the loaded fields will be left empty if the field values aren't included in your import file. |
| Recalculate all formulas | Recalculate all formulas during the import. |
| Execute work-flow | Execute work-flow, if any, in your sheet. |
| Execute not empty check | Check if there are field values configured with the "Not Empty" feature. If there is no field value, Ragic will skip that row during the import. |
| Create detail history | Show editing history in entry's information panel. |
| Execute validation check | Check if the field value meets the configured validation . If it doesn't, Ragic will skip that row during the import. |
If you're not importing into an existing Ragic sheet, you can also use the Excel or CSV file to create a new sheet as you import. Just choose "Create Form From Excel" in the "Tools" menu instead.
Ragic applications come with a variety of useful Website Plug-ins that could be embedded on your website, or sent as a separate link to others. These website plug-ins become available automatically as you create the sheets in your applications.
You can view our documentation on how to use the Web Embed Feature in Ragic for more information.
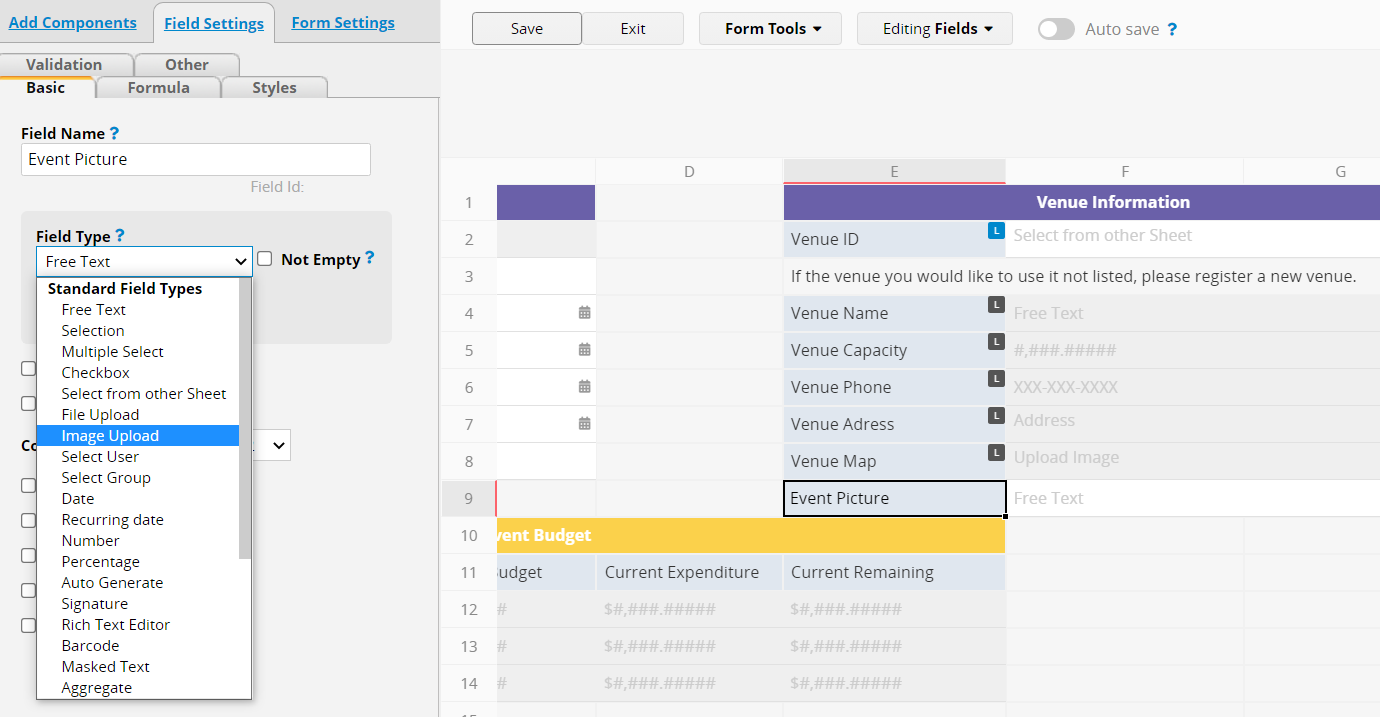
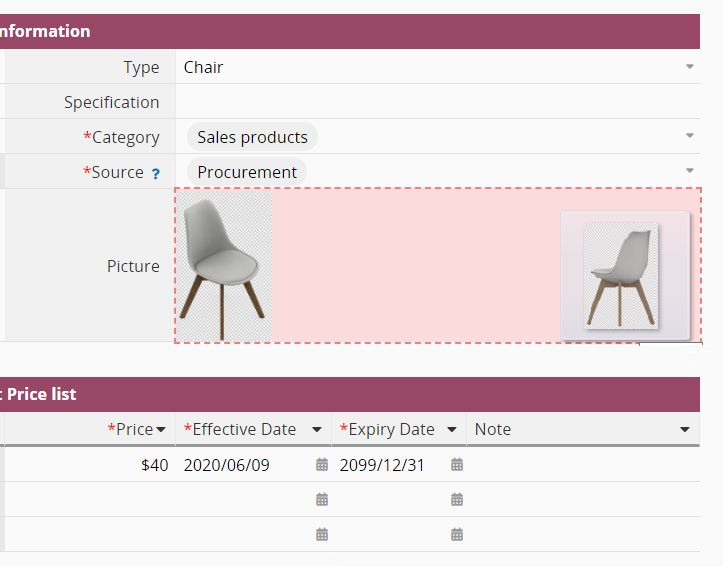
Yes, Ragic supports the upload of all types of files. In the Design Mode, choose the input type File Upload or Image Upload for the field.
Another way to do this is to simply drag and drop the File Upload or Image Upload components from the "add component" tab at the left.
To upload a file, users can find and select it from your computer or drag and drop it into the field.
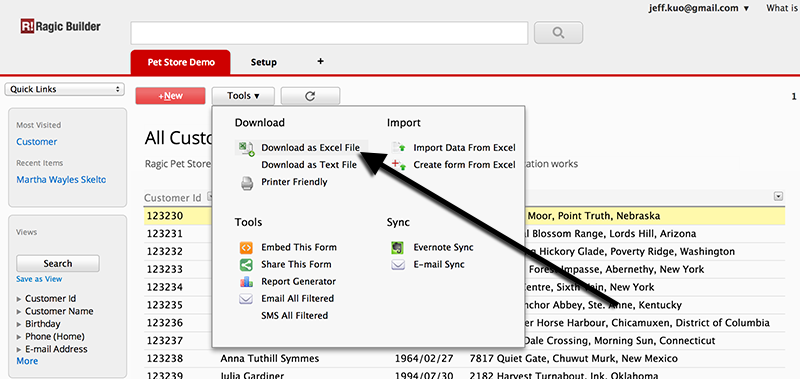
Yes, simply go to "Tools" and choose "Download as Excel File". For a printer friendly version, just choose "Printer Friendly" instead.
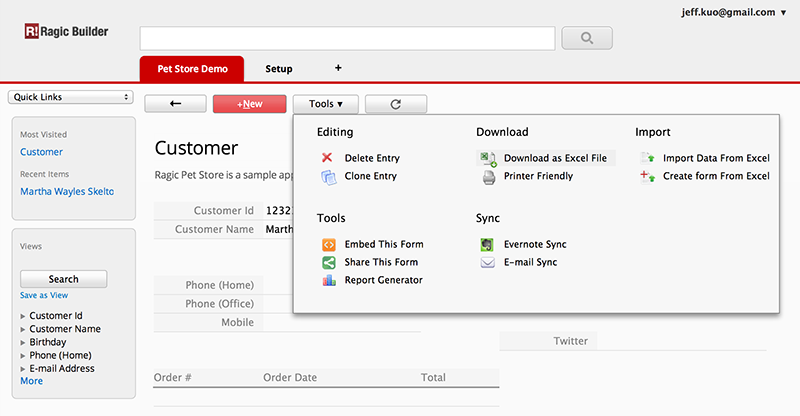
This works both on listing and form pages. If you would like to download from the listing page, Ragic can download all entries regardless of the paging. However please note that the Excel saved on the list page does not include the content of subtables within each form page. On the other hand, on the form page, it saves a single data record only, but including subtables.
This is very simple to do with Ragic if you know how to create forms in HTML. Suppose you want to create a form that saves entries in this sample pet store merchandise form.
1. Find the Field Id for each field that you would like to save in the HTML form. You can find them in the Design Mode when you focus on a field.
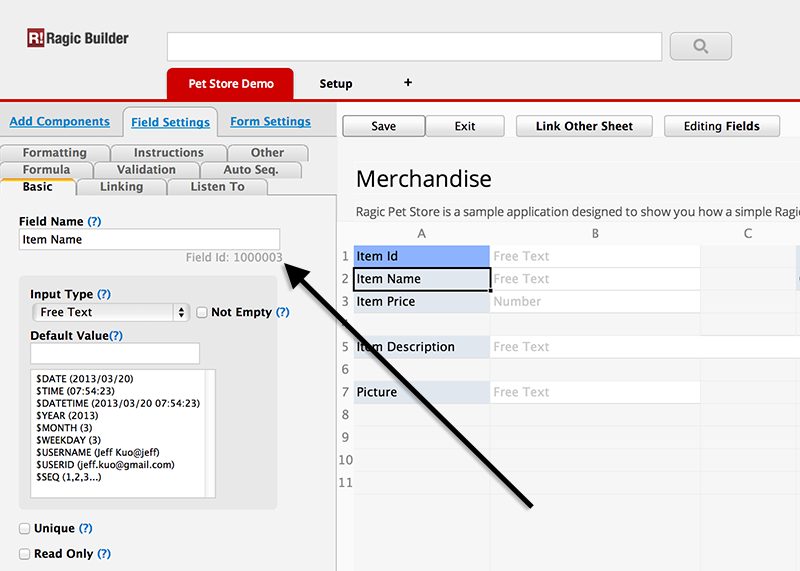
2. Create a form like this HTML sample, Your HTML form saves data to the same form URL, adding the query string parameter "api". Put down the field id as the parameter name for each field to be mapped on the Ragic form:
3. Make sure that the user has the correct access rights to enter data on this form.
Ragic servers are backed up daily automatically. But if you need an extra layer of protection, you can manually back up your data by going to the Backup & Restore section in your Account Setup page.
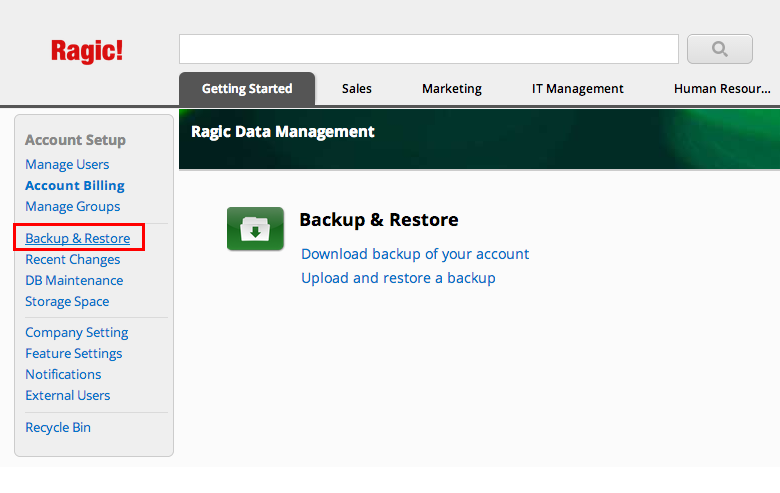
Choose Download backup of your account, and download the backup.

If you want to download your data in a format that is easier to read, you can also use the Download as Excel File or Download as Text File feature that could be accessed in the listing page of a form from Tools.
With the Ragic App, users can quickly add, edit, view, and approve records on their mobile devices, without opening a computer browser. This greatly improves daily operational convenience.
Ragic currently offers both Android App and iOS App versions:
Android App :

iOS App :

For more details on how to use the app and its features, please refer to the Ragic App Manual.
Note:
1. If you are unable to download the app via Google Play, you may also visit the Ragic website to register and log in to your account, then download the Android version via this APK download link.
2. In addition to the Ragic App, you can also access Ragic through a mobile browser.
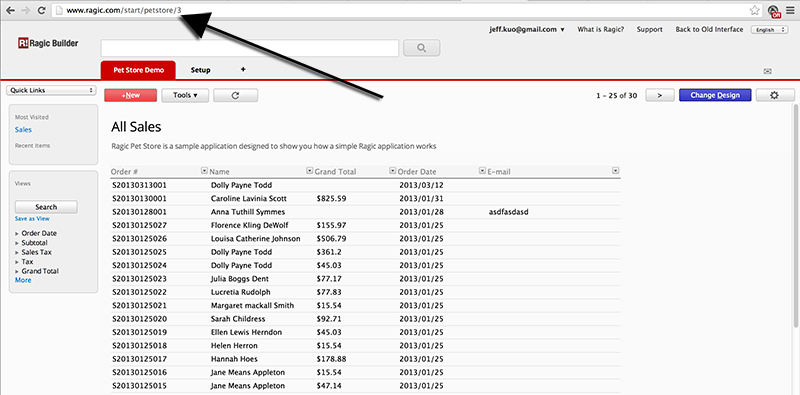
You can simply give out the URL of your database to other people for them to access. All accounts, sheets and entries have their unique URL, which is also the URL in the address bar of your browser.
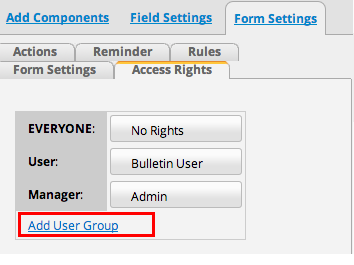
For other people to actually see your data, they must have the correct access rights to your sheet. You can change the access right settings on your sheet by going to the Design Mode. You will find the Access Rights tab under Form Settings.
All of the user groups in your account will be listed here, as well as an additional group Everyone, which represents everyone, including the users who haven't logged in, or individuals who are not a user in your account.
You can set the access rights for every group of users listed here. The access privileges that are being set is specified on the configuration interface. If a user is in multiple groups, they will access the form with the group that grants them the most privilege.
You can also add custom groups by clicking on "Add User Group", under the list of your user groups.
Remember to save the form design after you change the access right setting. You do not need to set this to both listing page and form page, the access right is applied to all pages of a sheet.
If a user still cannot see the data after you grant them the privilege, ask them to log out and log back in to refresh their access right settings.
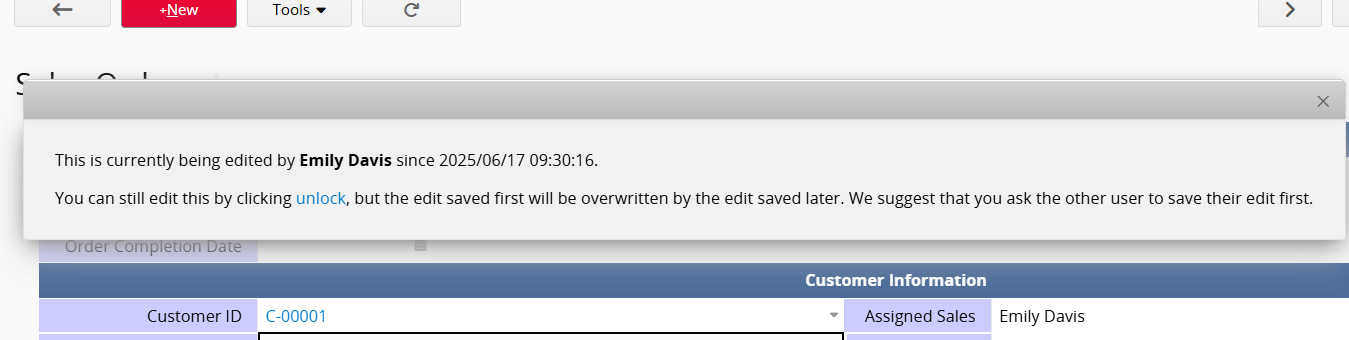
If "User A" is editing a record and "User B" attempts to edit the same record, the system will automatically lock the record and notify "User B" that "User A" is editing it. This prevents simultaneous editing, which could lead to data errors or loss.
If you're "User B" and need to edit the record, you can manually "unlock" it. However, the first saved record will be overwritten by the later one. It's recommended to ask "User A" to save the record first or exit the editing mode before proceeding.
Note: The system will lock the record for editing based on the same record in the Form Page (including edits from other sheets with Multiple Versions) or for all records edited at once on the current screen in the Listing Page.
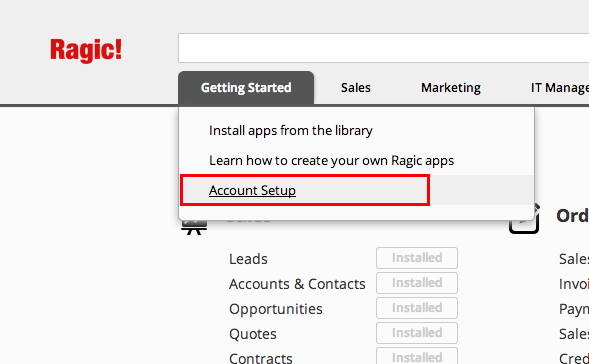
Manage your users from your Account Setup. Access the user management menu through the Start tab, or on the right side of your account homepage.

Choose Manage Users, which will show a list of all the users in your account.
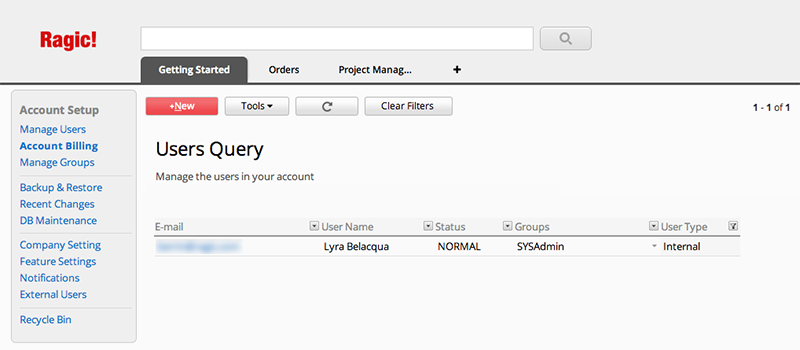
You can add a new user by clicking on the +New button and enter their user information.
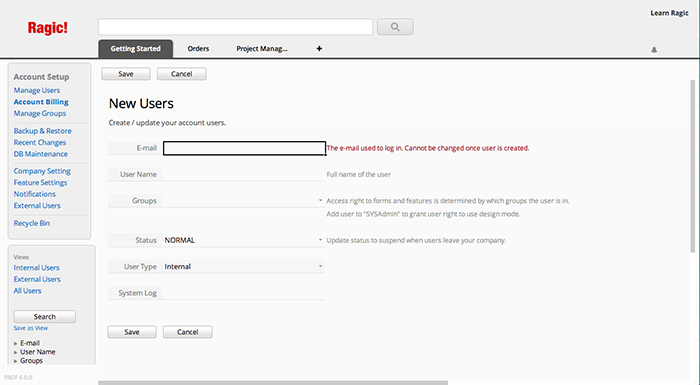
When the user information is saved, Ragic will automatically send an e-mail to the new user containing their temporary password to log in to the system. The user can then change their password when they log on to Ragic.
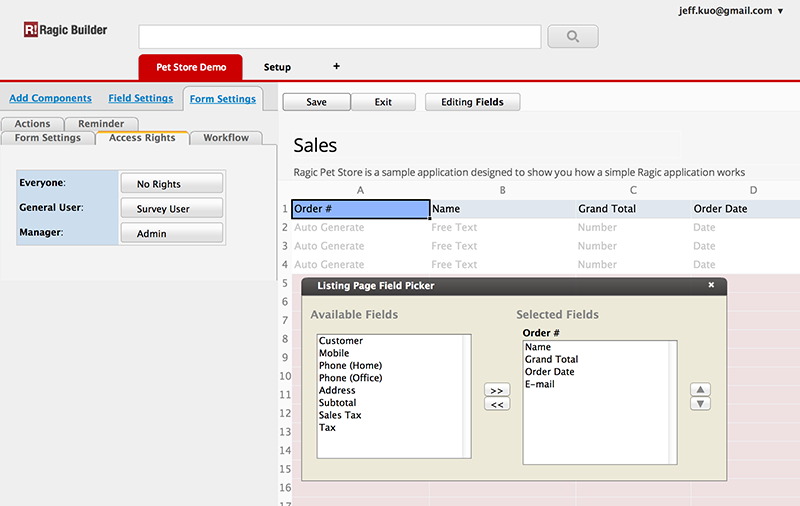
To make certain fields visible only to specific groups or users, such as displaying the "Product Cost" field in a "Product" sheet only to the Accounting department, there are two ways to achieve this. Choose the option that best fits your needs below.
1. Field Level Access Rights: Set access for individual fields. For example, the "Sales" group can view and edit all records in the "Product" sheet, but the "Product Cost" field will be hidden based on access settings.
2. Multiple Versions: Create different versions of the same sheet to show or hide specific fields and customize the layout for each version. For instance, you can create one version of the "Product" sheet for the "Sales" group and another for the "Accounting" group.
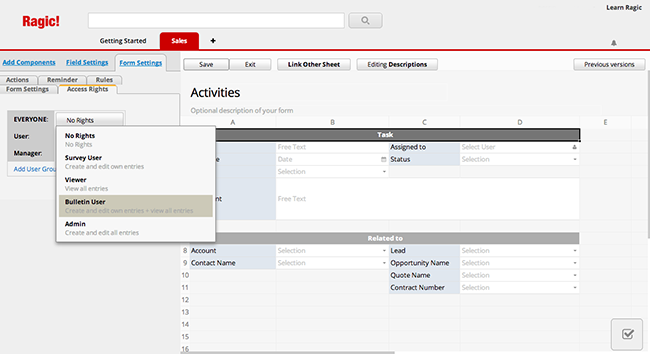
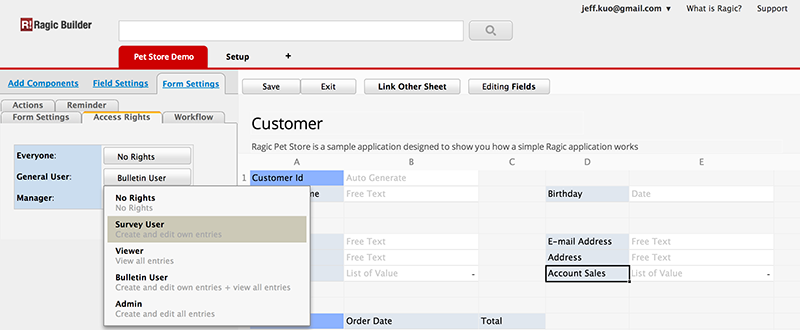
Yes, By setting up different users to play different roles in each sheets. If a user's role is Survey User, he can only see the entries that he is the owner of, and if a user's role is Bulletin User, he can see all the entries, but can only edit the entries that he is owner of.
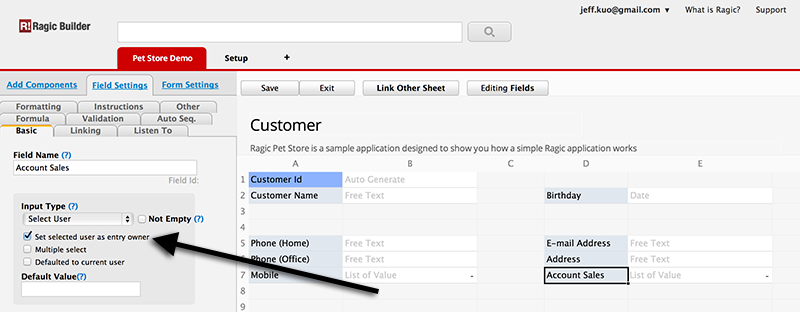
By default, a user is owner to only entries that he created, but by changing the input type for one of the fields in the form to Select User or Select Group and choose Set selected user as entry owner, owner of the entry can be added as the entry is created or edited. You can also change the owner of a field to a group, this way all the users in the group will be able to see or edit the entry as the privilege is assigned to them when this field is set.
Please check our documentation on access rights for more information.
If these users are external to your company, you can choose from the following options based on your needs, without paying for additional user licenses:
1. For frequent access to the database, you can add them as External Users. There’s no extra cost for unlimited external users, but their permissions and access features will be restricted. For more details, refer to this documentation.
2. For users who only need to view or modify certain records occasionally, you can use the following features:
(1) Temporary Login for Guest Users: Send a record link via Email, allowing users to view and edit the record through the link temporarily.
(2) Sheet Embedding: You can embed the sheet on your website or send a link, allowing users without an account to access and view the records through the embedded page. Some website plug-ins require setting the sheet access rights for the EVERYONE group.
(3) Share This Sheet: Similar to sheet embedding, you can share the sheet with users without accounts to view or edit it. This feature requires setting the sheet access rights for the EVERYONE group.
(4) Share Records: Share specific records with non-account users via Share This Entry, Share This Entry With WhatsApp, or Email This Entry, granting temporary view or edit access to the shared record.
The main differences between the Lite and Professional Plans are as follows:
1. The Lite Plan is limited to 5 Custom Sheets (including self-designed sheets and modified Free Templates), while the Professional Plan has no limit.
2. The Professional Plan supports the on-premises option, whereas the Lite version does not.
The Professional Plan offers more comprehensive features and is the most popular choice among businesses. However, if you only need a few Custom Sheets or if Free Templates meet your requirements, the Lite Plan may be a suitable option.
For more detailed information, please refer to the Pricing Page.
About starting subscription, please refer to this page.
Yes, you can change your plan anytime you want from your Account Setup page under Account Billing.
In Ragic's Paid Plan, there is no limit to the storage of the data itself. However, in many situations, users may utilize File Upload fields, Image Upload fields, or attachments in Comments to store files related to the record, such as uploading invoices, product images, and attached files. These methods contribute to the Upload File Storage.
Please refer to the following image for the Upload File Storage provided in each plan:

The Upload File Storage is shared among all users. For example, if you subscribe to a Professional Plan for 5 users, the storage space for the database would be 30 GB x 5 = 150 GB altogether.
On the Backup and Restore page, you can see the current usage of Upload File Storage.
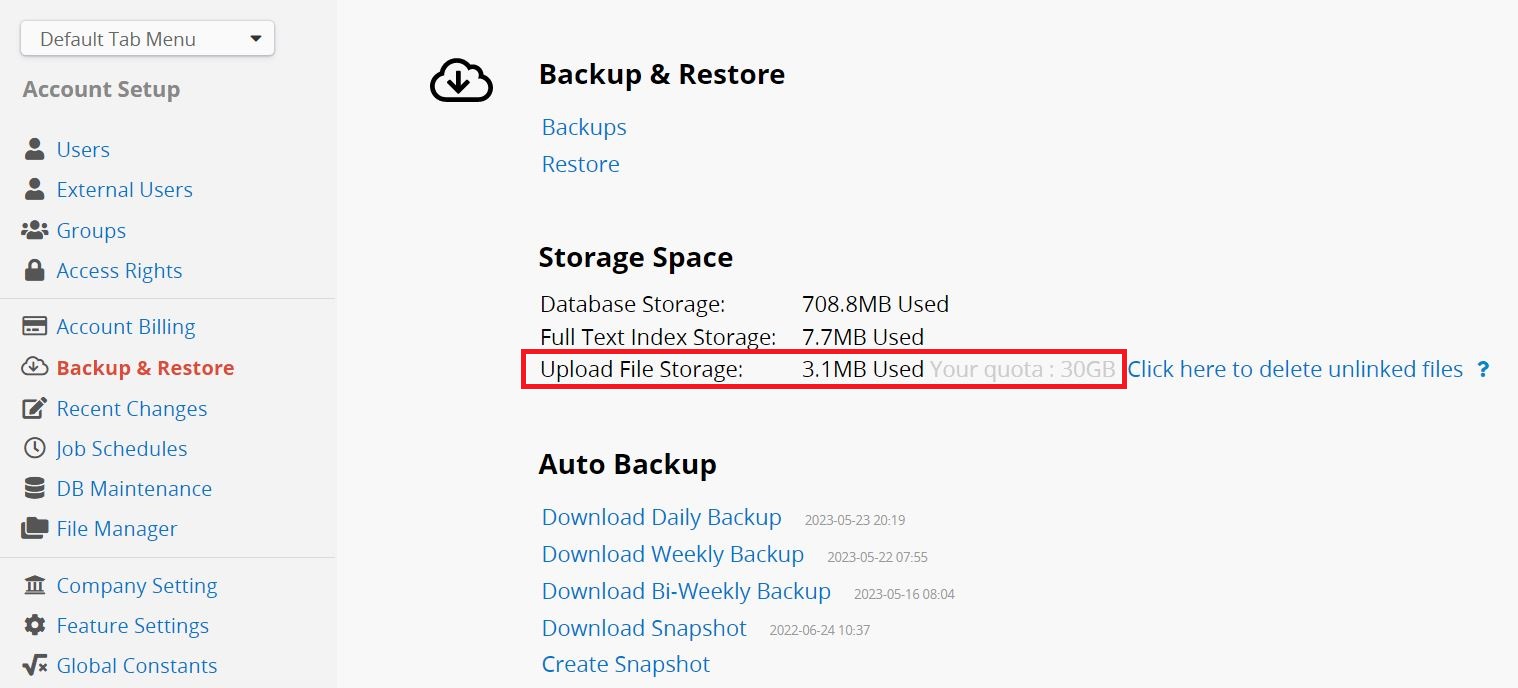
When you upload a file that exceeds your storage limit, it will not affect your database subscription. However, Ragic will prompt you with a warning if you attempt to upload more files.
You can remove unnecessary files from your sheets or File Manager, or delete unlinked files from the Backup and Restore page to free up space. Alternatively, you can upgrade your subscription (manual payment users, see here) to increase storage capacity or purchase additional user licenses.
Ragic is pronounced like magic, and the word Ragic was merged from rapid and magic.
Ragic is offered in English, Traditional Chinese, and Simplified Chinese. While you can design your apps in any language you want, Ragic gives you the opportunity to translate the user interface into your own language so that it would be easier for your users to navigate.
To translate Ragic into your own language, navigate to Start Tab > Account Setup > UI Translations
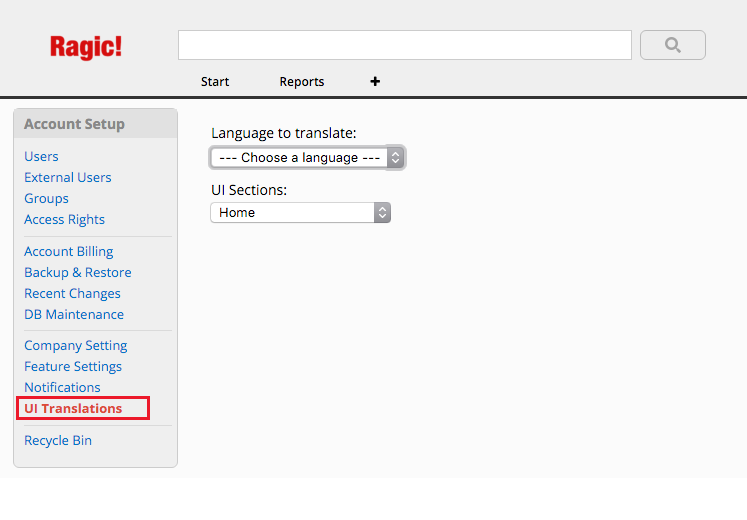
Pick the language you would like to translate Ragic into under Language to translate. The UI Sections are the sections to translate.
You'll see the names of the classes Ragic uses to identify where your text goes in blue. Do not edit this blue text.
The green text is where you'll be editing into the language you are translating to. After editing the text, click Save above the translation window.
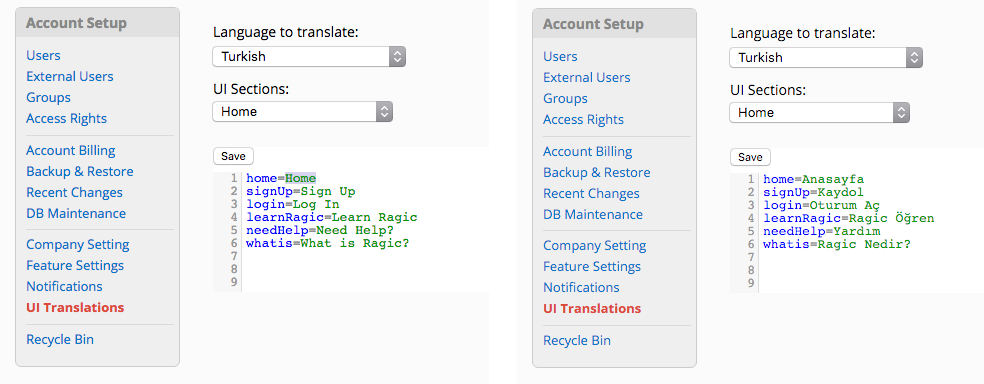
After you're done with a few sections, you'll start noticing that your saved translations are automatically being displayed in the Ragic menus where your UI sections were pointed at.

You can keep translating to your own language. Users in your account will be able to see these translations and interact with Ragic in the language you're translating to.