Are you already using Ragic to manage PSI but can’t get around to doing the same for your finances? Have you tried to build it yourself but ran into a wall? Well worry no more! The integrated Accounting Template is finally online! This article will take you through setting up and using the accounting template step by step!
If you don’t have a Ragic account, click here to sign up and install the "Accounting (Integrate with PSI)" template. This entire process is free, and we will not charge you without your consent.
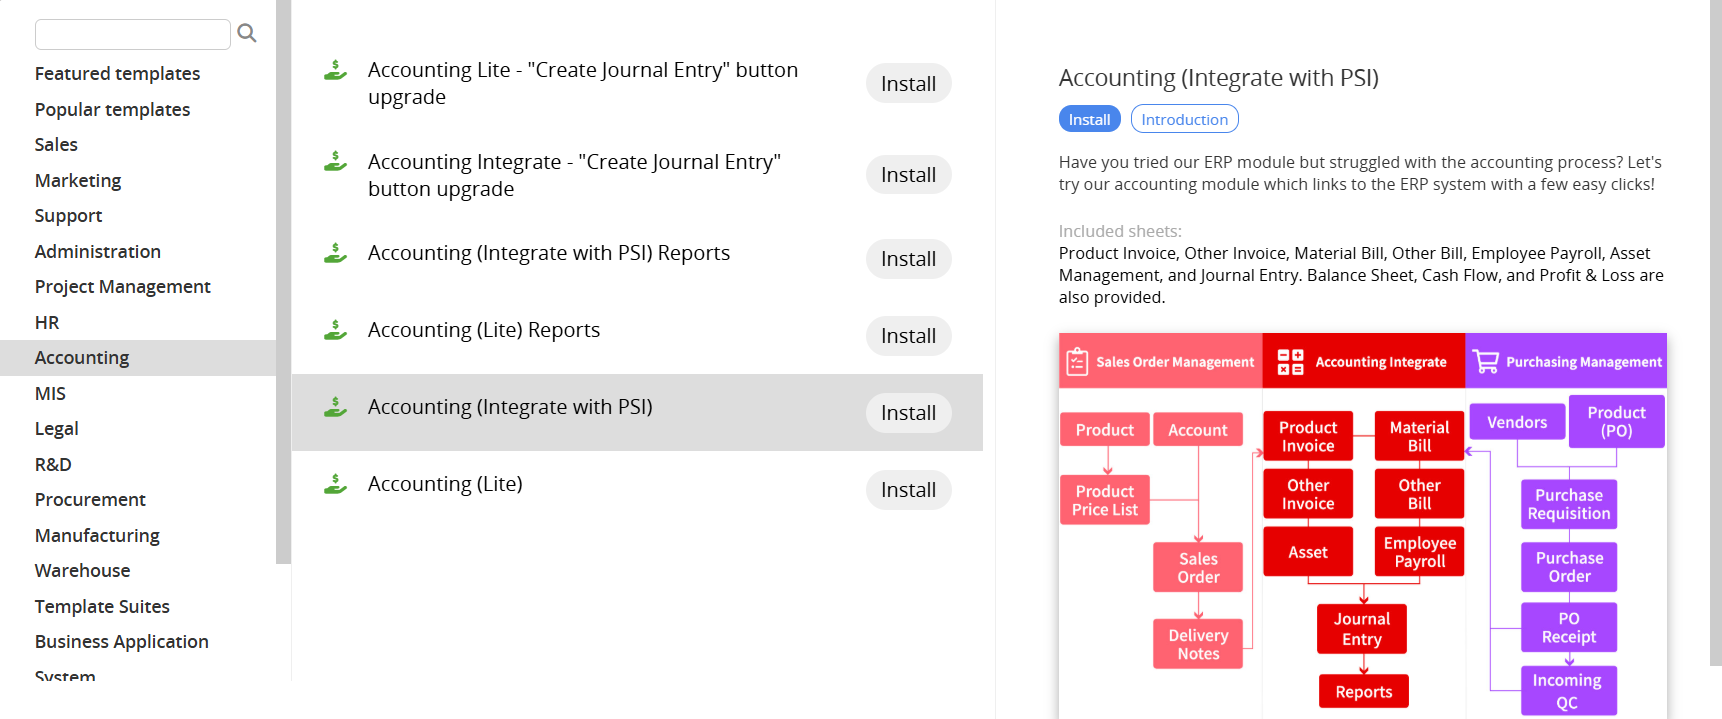
If you are already a Ragic user, you can find the "Accounting (Integrate with PSI)" template under the "Accounting" category in Install Templates and click "Install" to download it.
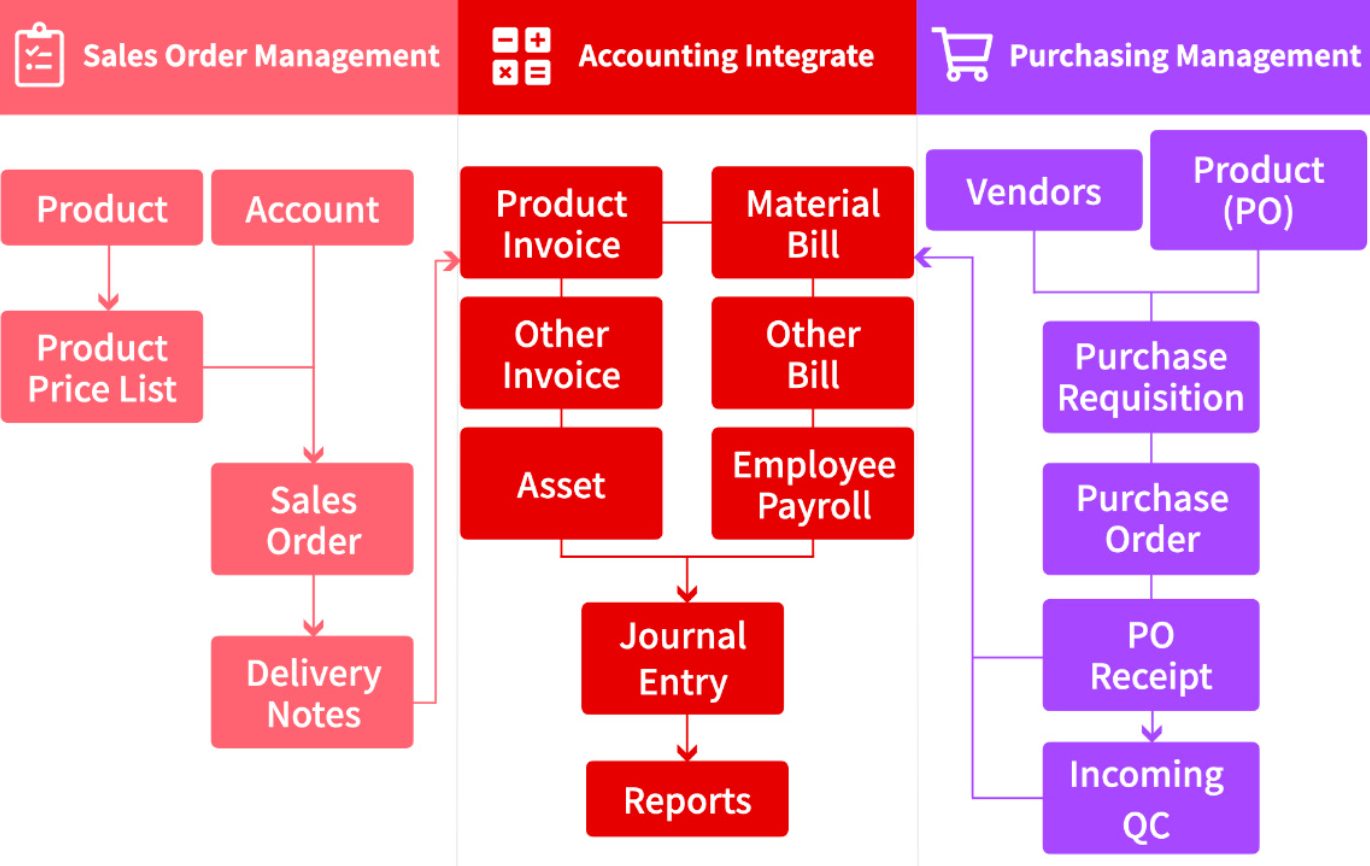
First, a simple explanation of how the "Accounting (Integrate with PSI)" relates to the "PSI" template ("Sales Order Management", "Inventory Management", and "Purchasing"). The "Accounting (Integrate with PSI)" template is divided into three major parts:
1. Basic information, which includes "Employee Payroll" and "Asset Management" sheets in the figure below. We recommend that you compile the latest data and import it into the database.
2. Bills and Invoices, which include "Product Invoice", "Other Invoice", "Material Bill", and "Other Bill" sheets. Of the above, "Product Invoice" and "Material Bill" sheets can be created through the Convert Records Action Button from the "Delivery Note" sheet under the "Sales Order Management" tab, and the "PO Receipt" sheet under the "Purchasing" tab, respectively.
3. Accounting: which includes the "Journal Entry" sheet and accounting "Reports".
The following description is based on the above division. If you find that your company doesn’t require such a complex tool to manage, you can also think about using the "Accounting (Lite)" template.
To better manage information such as assets and employee payroll, the first step is to enter the existing information into the system. We'll walk you through in a minute. If you already have a complete list, you can also consider directly importing data from your files.
Since different companies have different ways of calculating payroll items such as salary bonuses and overtime pay, there's no universal formula available that works in every situation. Therefore, the "Employee Payroll" sheet only records the amount paid in the Subtable.
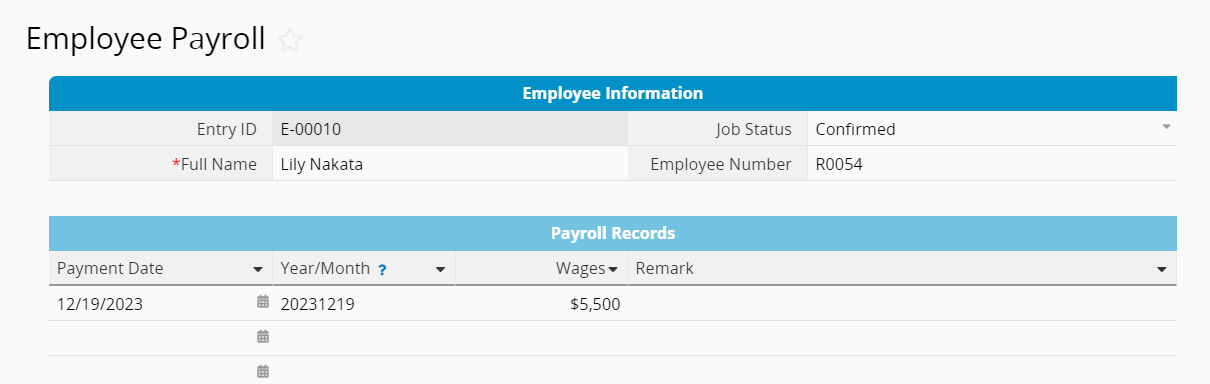
To facilitate management in the future, we recommend filling in the "Payment Date" field in the YYYY/MM format, e.g., 2018/07 for July 2018. (The payroll information entered here still needs to be entered in the “Journal Entry” sheet manually.)
Aside from regular product/service transactions, does your company purchase fixed assets and need to calculate depreciation?
If so, you can record such information in the "Asset Management" sheet and enter the depreciation data at regular intervals:
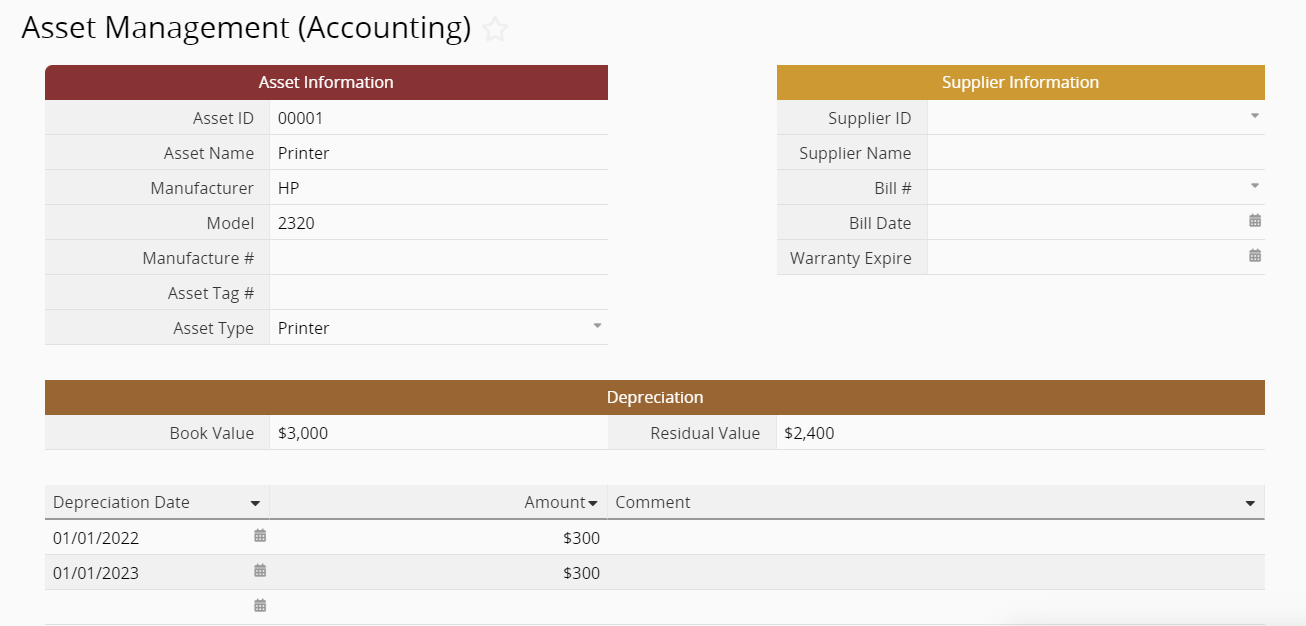
In the future, when you need to look up the value of a specific asset, you'll have it all in one place! (The depreciation information entered here still needs to be entered in the "Journal Entry" sheet manually.)
After entering the "Basic Information", the second part is about "Bills and Invoices".
"Invoices" in the integrated template can be subdivided into "Product Invoice" and "Other Invoice".
Product Invoice
The source of a "Product Invoices" entry is a "Delivery Note" entry in the "Sales Order Management" template. In other words, these are invoices generated from selling products. Select any "Delivery Note" entry and click on the "Create Product Invoice" Convert Records Action Button in the bottom right corner.
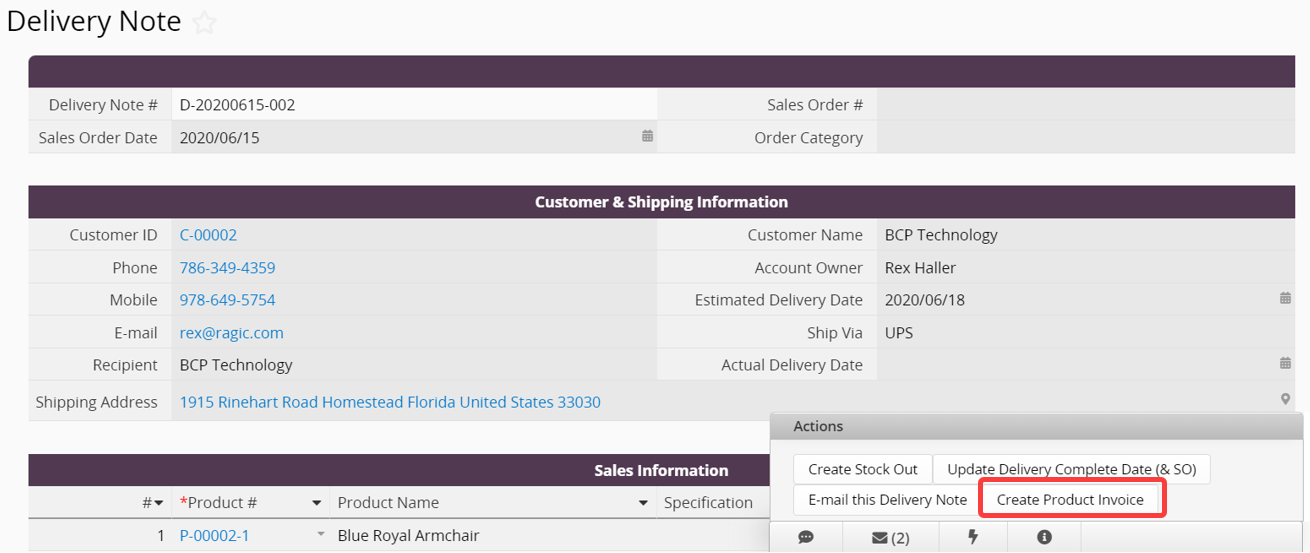
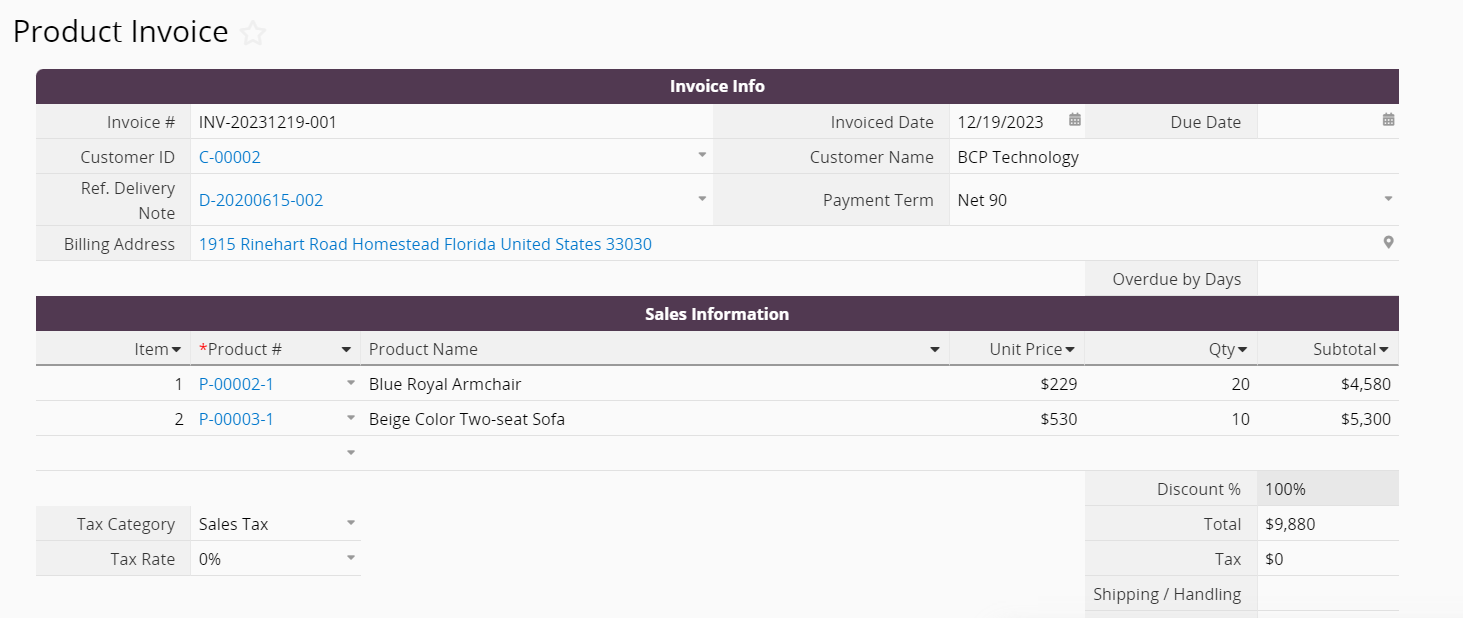
Once that’s done, the system will automatically generate a "Product Invoice" entry based on the information in the "Delivery Note" entry.
Other Invoice
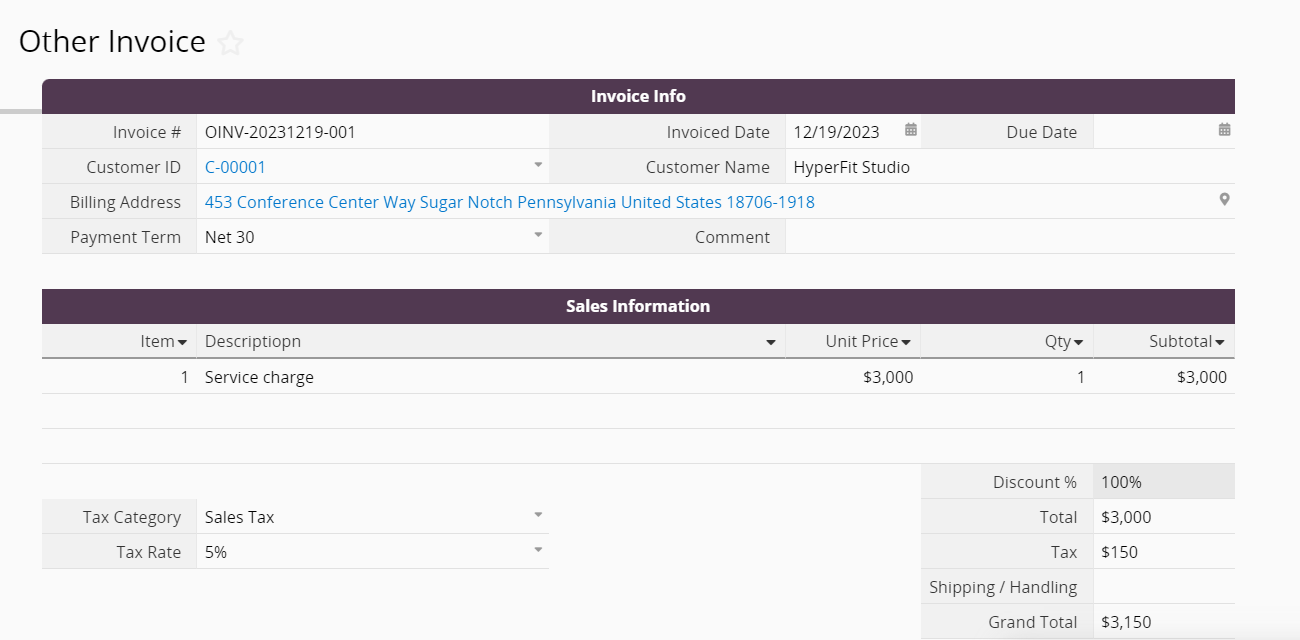
The other type of invoice is not generated from selling products, but rather from offering special services or selling equipment. These are not invoices generated in the regular sales process, so they are collected in the "Other Invoice" sheet.
In this sheet, click on the +New button on the top left to create a new entry. When editing the record, you can select an existing customer from the "Accounts" in the "Sales Order Management" template, then enter the details relating to the sale.
Payment Management in Invoice
Scroll down to the bottom of both "Invoice" sheets to see the payment information fields.
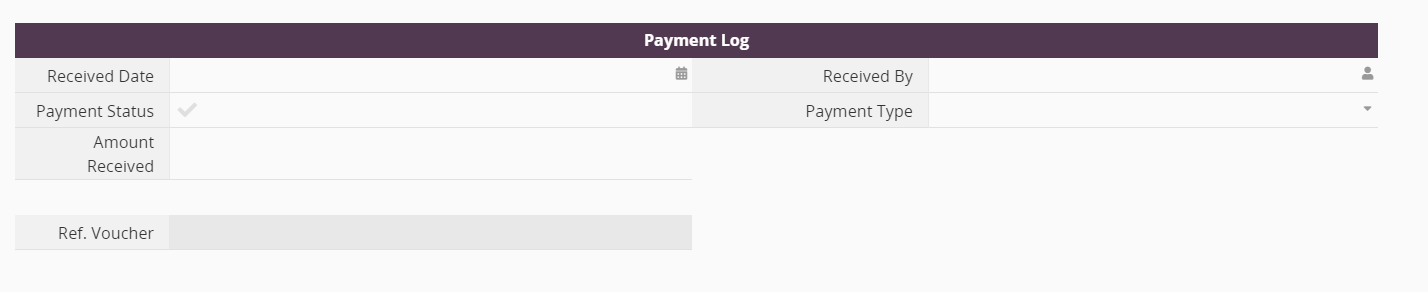
When payment has been received from the customer, you can directly record information such as the payment date and who received it. Cash, check, or wire transfer are available as options for payment type. The system will display different fields depending on the type of payment method you have selected.
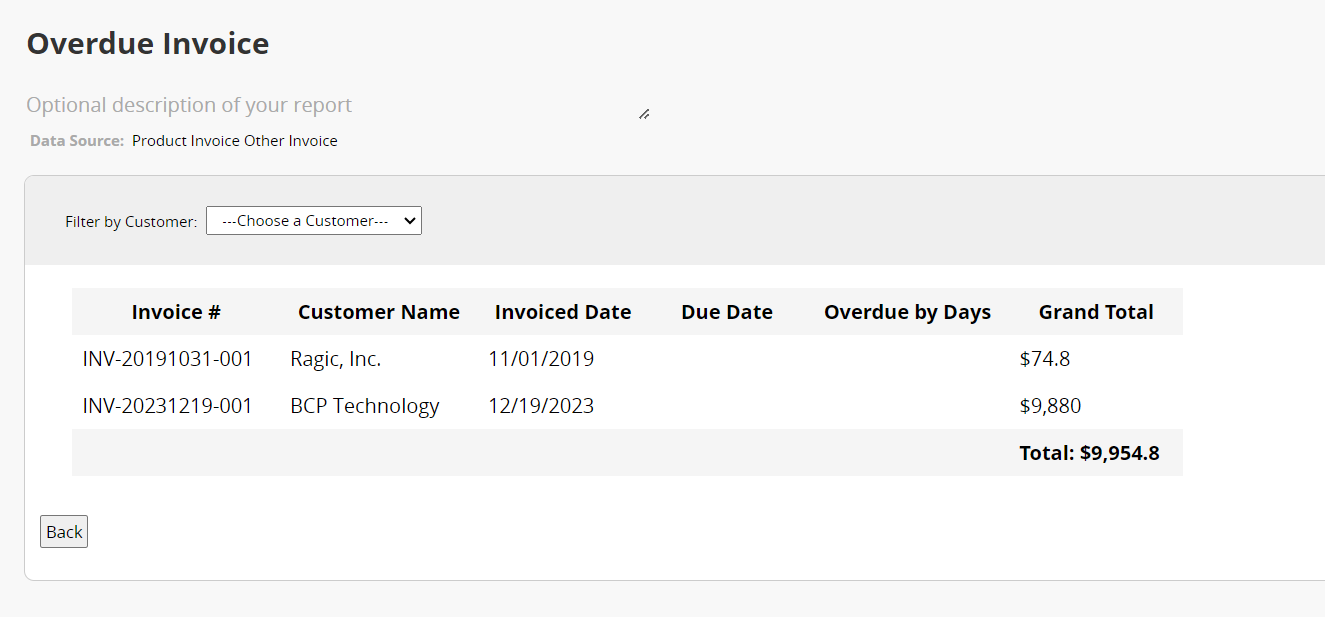
If you want to find invoices with outstanding payments, you can use the “Overdue Invoice” report in the "Report" tab to locate them.
Bills in the integrated template can be subdivided into "Material Bill" and "Other Bill".
Material Bill
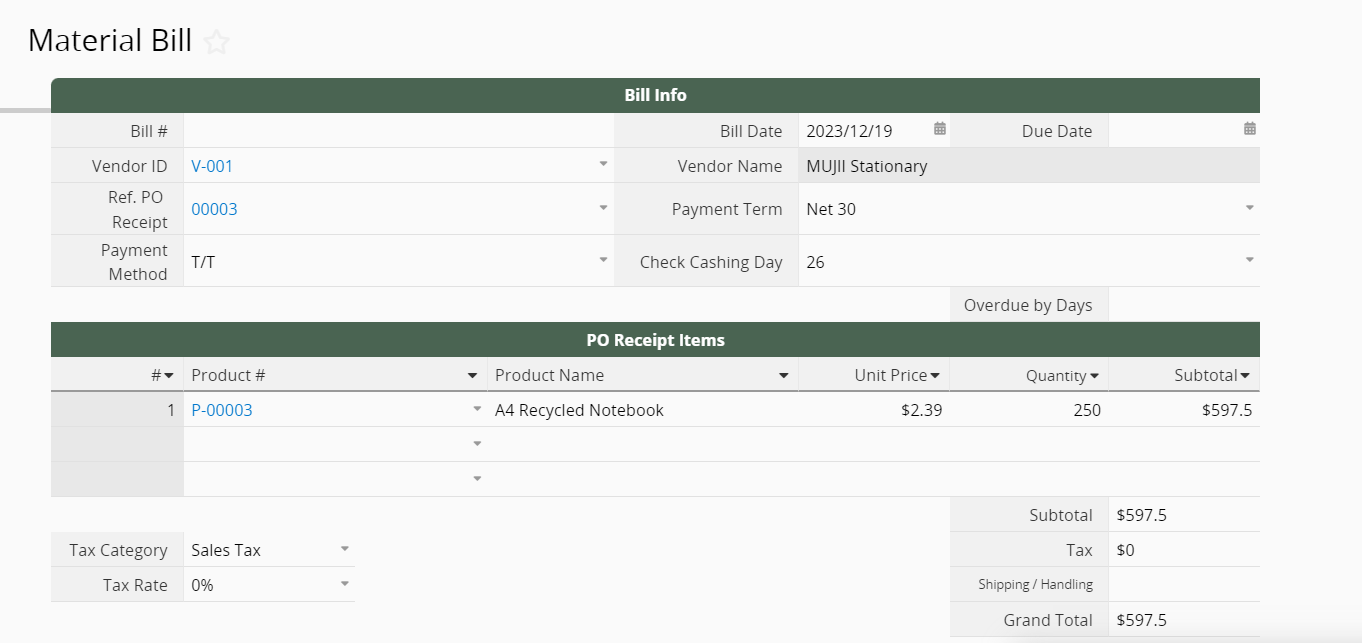
The source of a "Material Bill" entry is a "PO Receipt" entry from the "Purchasing" template. These are bills generated when purchasing products or materials. Select any "PO Receipt" entry in the "Purchasing" template and click on the "Create Material Bill" Convert Records Action Button in the bottom right corner.

Once that’s done, the system will automatically generate a "Material Bill" entry based on the information in the "PO Receipt" entry.
Other Bill
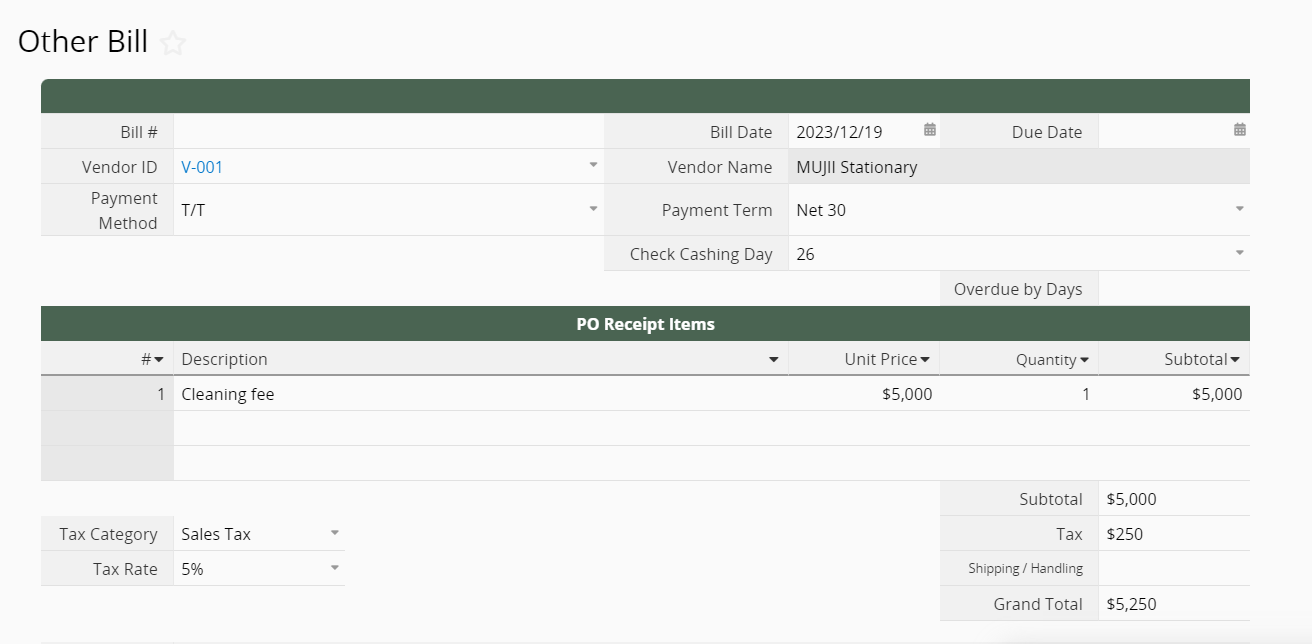
The other type of bill is not generated from purchasing products or materials, but rather from expenses arising from special services such as cleaning fees or equipment repair fees. These are not bills generated in the regular purchasing process, so they are collected in the "Other Bill".
In this sheet, click on the +New button on the top left to create a new entry. When editing the record, you can select an existing customer from the "Vendors" sheet in the "Purchasing" template, then enter the details relating to the purchase.
Payment Management for Bills
The payment management process for bills is very similar to that for invoices. In the lower part of both "Bill" sheets, there's also a section for managing payment information.
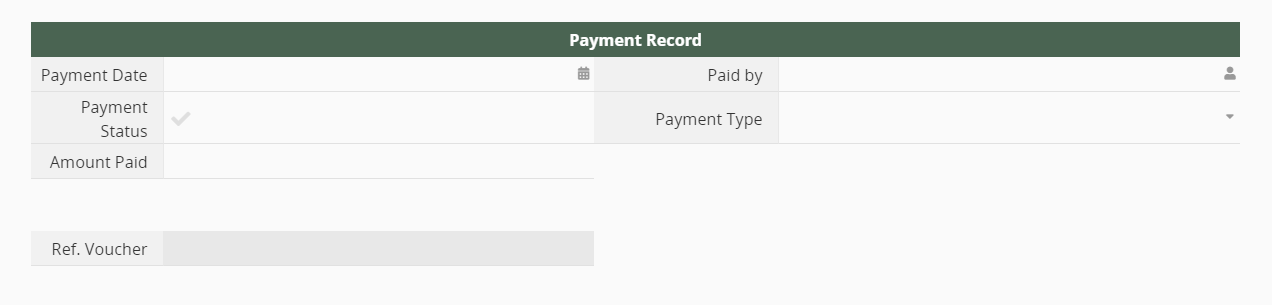
When you have confirmed payment for the bill, you can directly record information such as the payment date and who processed it. Cash, check, or wire transfer are available as options for the payment type. The system will display different fields depending on the type of payment method you have selected.
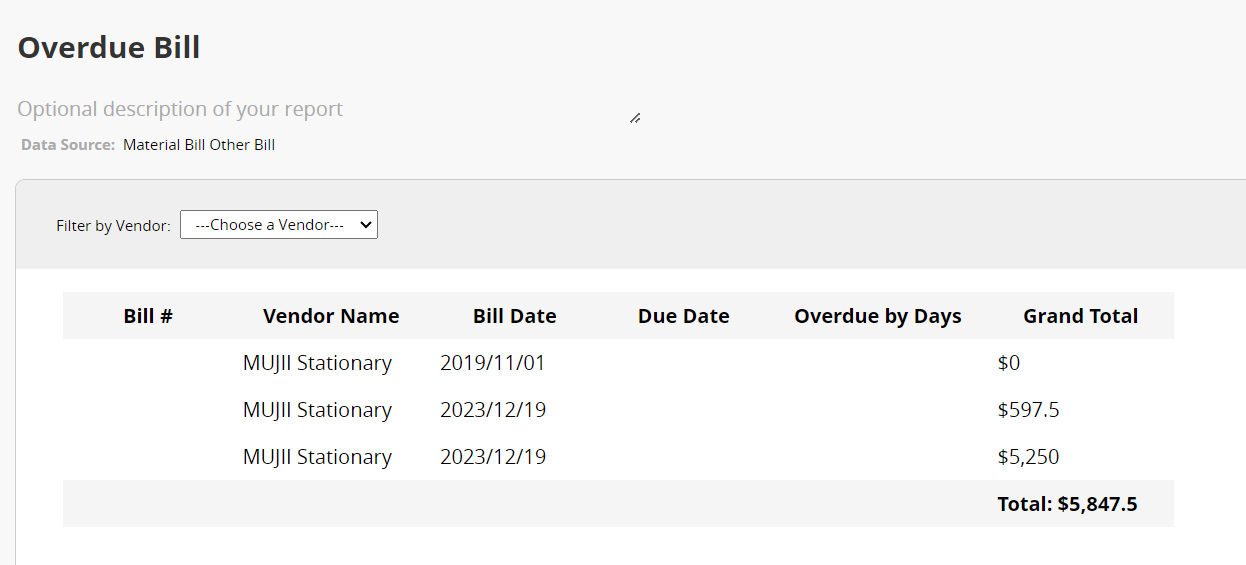
If you want to find bills with outstanding payments, you can use the "Overdue Bill" report in the "Report" tab to locate them.
Currently, the most commonly used accounting titles are provided by default.
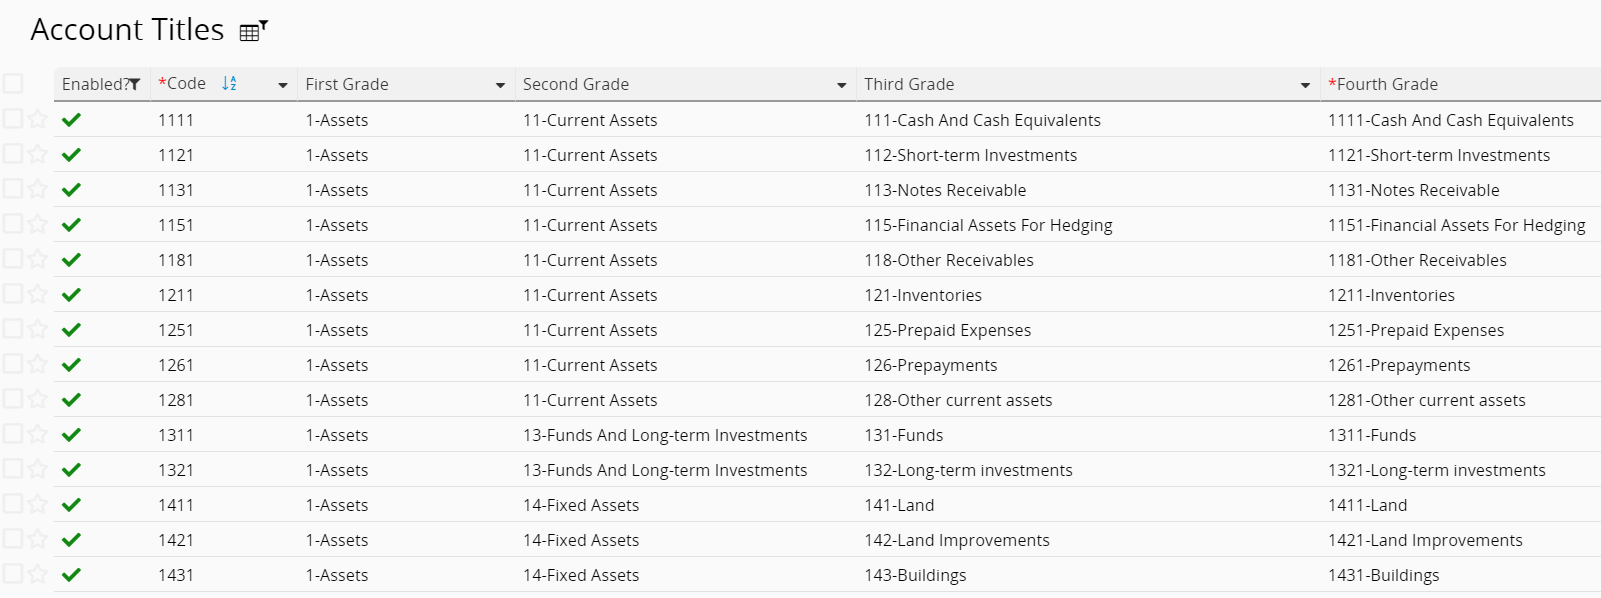
If you don't need all of these titles when writing your accounting statements, you can uncheck the "Enabled?" field, and it will no longer show up when you are creating journal entries. That's time saved from sifting through titles! Conversely, if there are titles you commonly use that are not listed, you can add them manually. Please refer to this article.
When adding new account titles, please follow the format:
xxxx-account title
For example,
1111-Cash And Cash Equivalents
Please note that when you manually add a new account title, you must select the first, second, and third-grade code according to the system default, as this affects the generation of accounting reports later on. You should only set the fourth-grade titles yourself.
You can create entries for common journal entries here, with appropriate credit or debit titles. Then, you'll be able to select from these entries when creating invoices or bills. For example:

If the company needs to create financial statements, it can be done by completing the records in the "Journal Entry" sheet of the template. The template provides two ways of creating journal entries:
Method 1: Manually log in the journal entry
First, select the appropriate accounting title and type in the debit or credit amount. 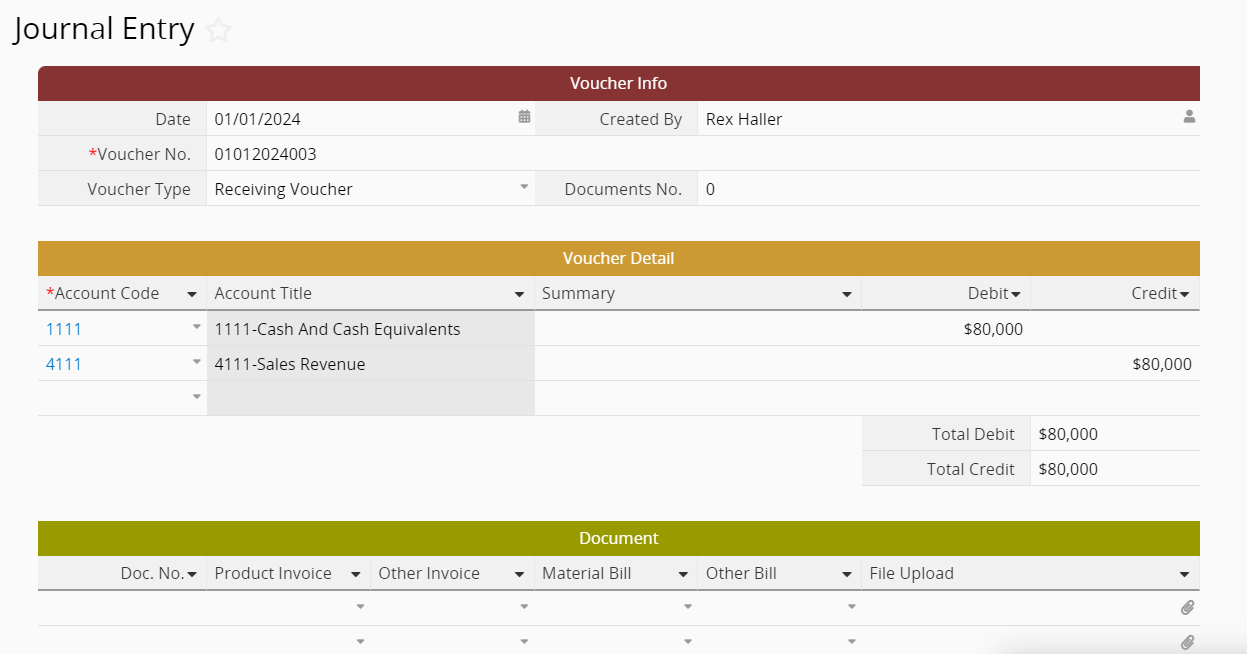
Then, select "Product Invoice", "Other Invoice", "Material Bill", "Other Bill", or upload associated documents. You only need to fill in one field for each row in the Subtable. Note that the pop-up window only lists the bills or invoices without a voucher number. If the bill or invoice you are looking for has already been referenced in other vouchers, you have to click the Clear Filter button at the top to find the documents that have already been referenced.
Method 2: Create via "Create Journal Entry" Action Button
In any entries of the invoices or bills, you can fill in the "Journal Name" field and click on the "Create Journal Entry" button to create a journal entry ":

If you don’t have the button mentioned above on your sheet, please refer to this article.
These two sheets were generated for data linking purposes. To avoid overwriting by accident, everything here is set to Read Only by default! If you need to add or remove data, go to the "Journal Entries" sheet. If you don't want users other than SYSAdmin to see these two sheets, you can turn off the Access Rights for all user groups for the two sheets, just don't delete them!
If you need to modify the template to create a system tailored to your needs, please refer to this article first. The following are some suggestions:
If any sheets need to be reviewed by a manager before the process can continue, you can consider adding an Approval Flow.
If your organization has a rather complex way of calculating compensation, we recommend trying New Sheet from Subtable to create a new sheet from"Employee Payroll". You can perform the detailed calculations for the compensation in the new sheet, then display the final result in "Employee Payroll" to keep it clean, concise, and free of clutter.
If you're worried about missing bill deadlines, you can consider setting a Reminder for the due date. Once you have the reminder set up, the system will automatically email you a notification according to your settings.
Any suggestions for the "Accounting (Integrate with PSI)" template? Shoot us an email at support@ragic.com! We'd love to hear from you.
 Thank you for your valuable feedback!
