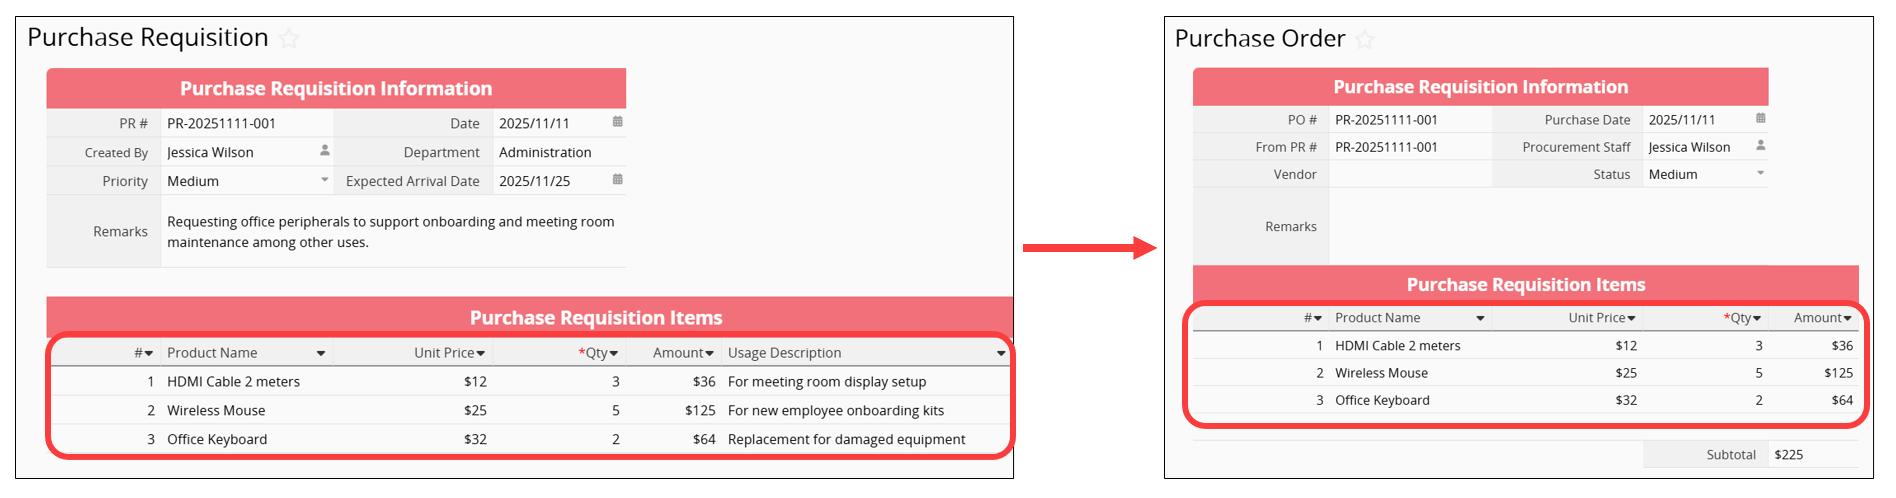
If your company or organization requires a Purchase Requisition to be submitted before creating a Purchase Order, Ragic’s Convert Records function is well suited for supporting this workflow. By adding a Convert Records Action Button to the "Purchase Requisition" sheet, you can copy item details, estimated amounts, requested quantities, and other fields directly into the "Purchase Order" sheet with a single click, removing the need for duplicate data entry.
The simplest setup is to convert a single "Purchase Requisition" into a single "Purchase Order" by mapping the required fields.
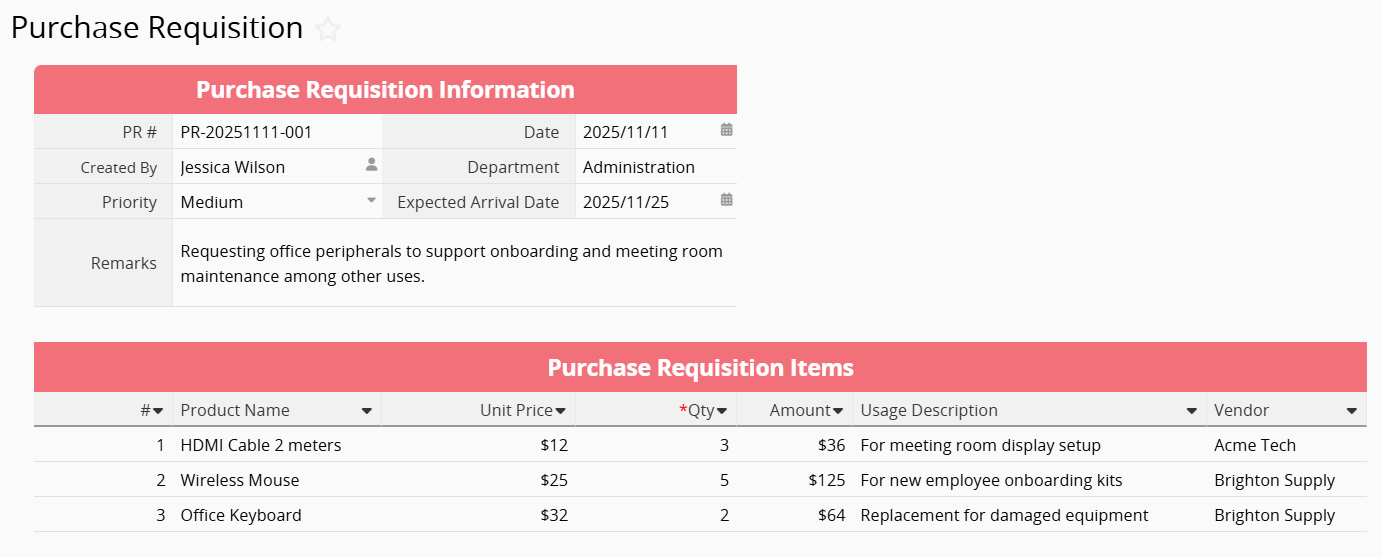
However, you may sometimes need to split a requisition into multiple purchase orders. For example, if a "Purchase Requisition" contains three line items, two belonging to Vendor A and one to Vendor B, the purchasing staff must issue separate "Purchase Orders" for each vendor. In this case, the requisition needs to be split into one "Purchase Order" for Vendor A and another for Vendor B.
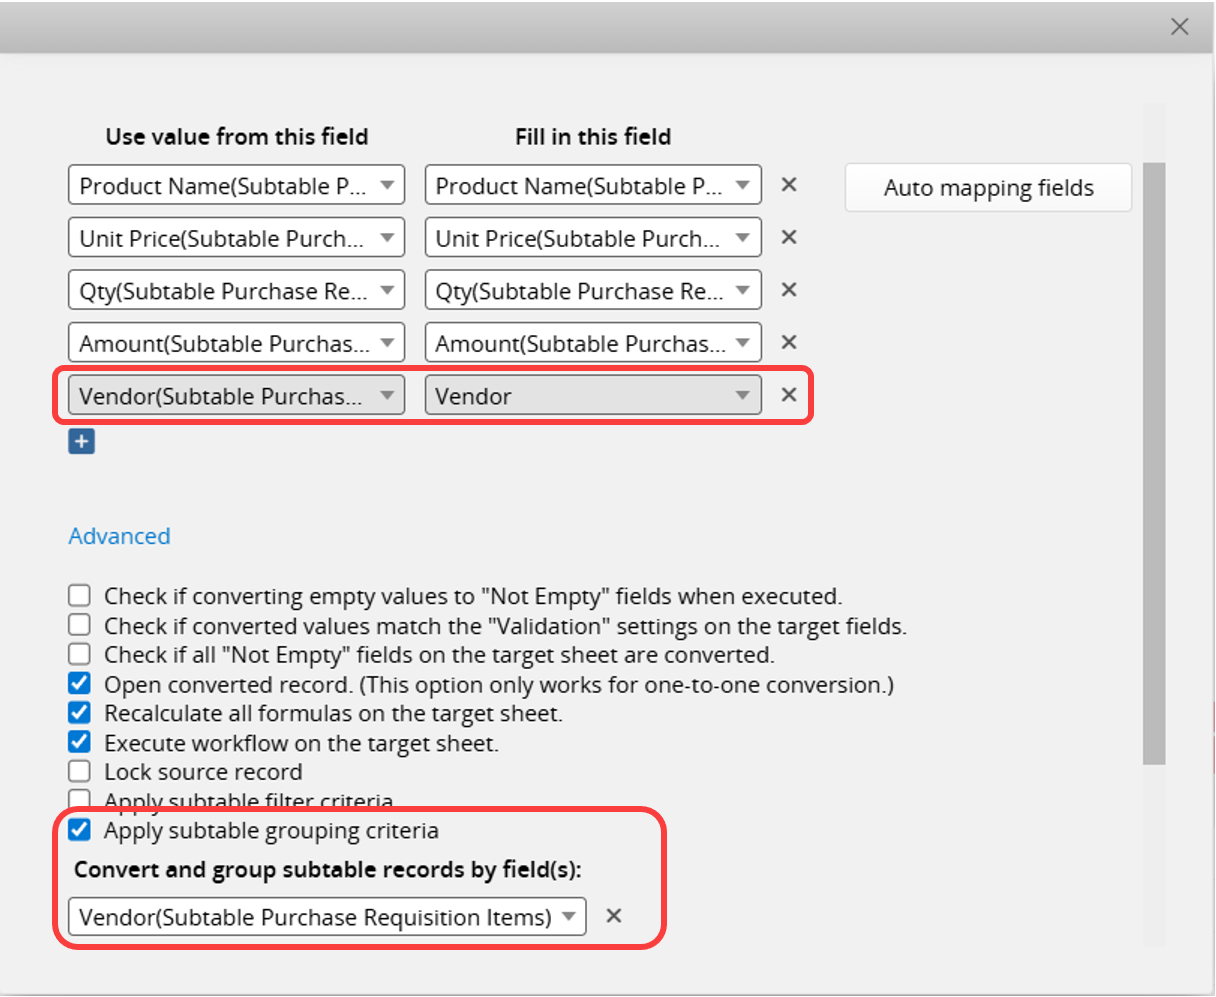
You can achieve this by checking the Apply Subtable Grouping Criteria option in the Advanced Settings of Convert Records.
For example, in the "Purchase Requisition" below, one line item is assigned to "Acme Tech", while the other two are assigned to "Brighton Supply".
When configuring the Convert Records Action Button, click the Advanced Settings and Apply Subtable Grouping Criteria based on the "Vendor" field.
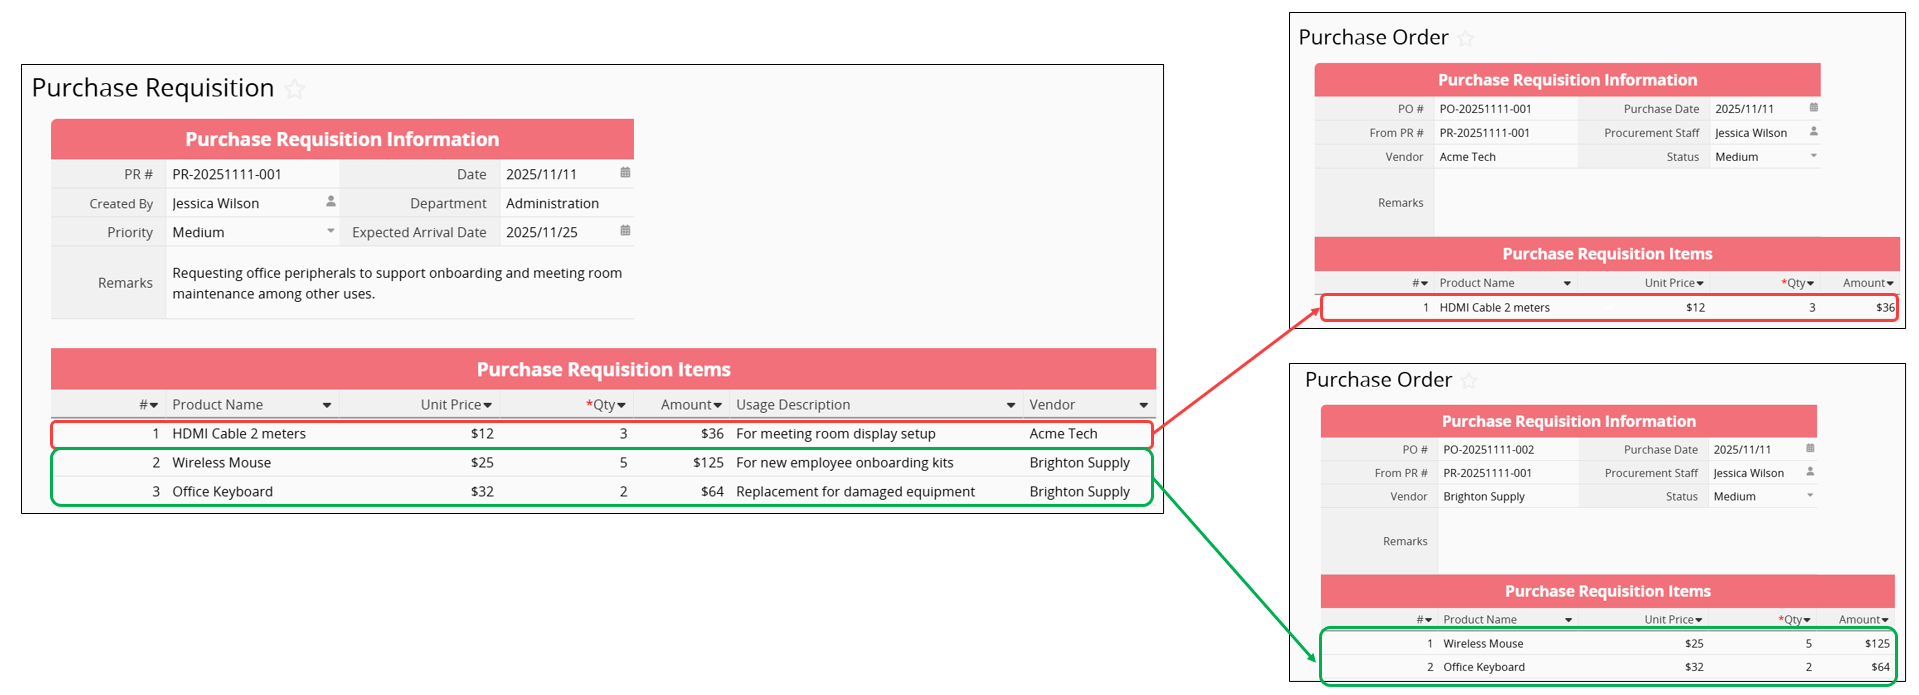
The system will then generate two "Purchase Orders", each grouped by vendor.
If you have installed the "Purchasing" template, its default workflow "converts one Purchase Requisition into one Purchase Order", and it does not include a predefined setting for splitting "Purchase Orders" by vendor.
If you want to modify the template design to keep the original structure of the "Purchasing" template while changing the "Purchase Requisition to Purchase Order" process so that "Purchase Orders" are split by vendor, you only need to update the "Create PO" Action Button. Since both sheets already include "Vendor" fields, adjusting the settings is straightforward.
Go to Design Mode on the Form Page > Form Tools > Convert Records > Create PO, configure the settings as shown, and then click "Update this button" to apply the changes.
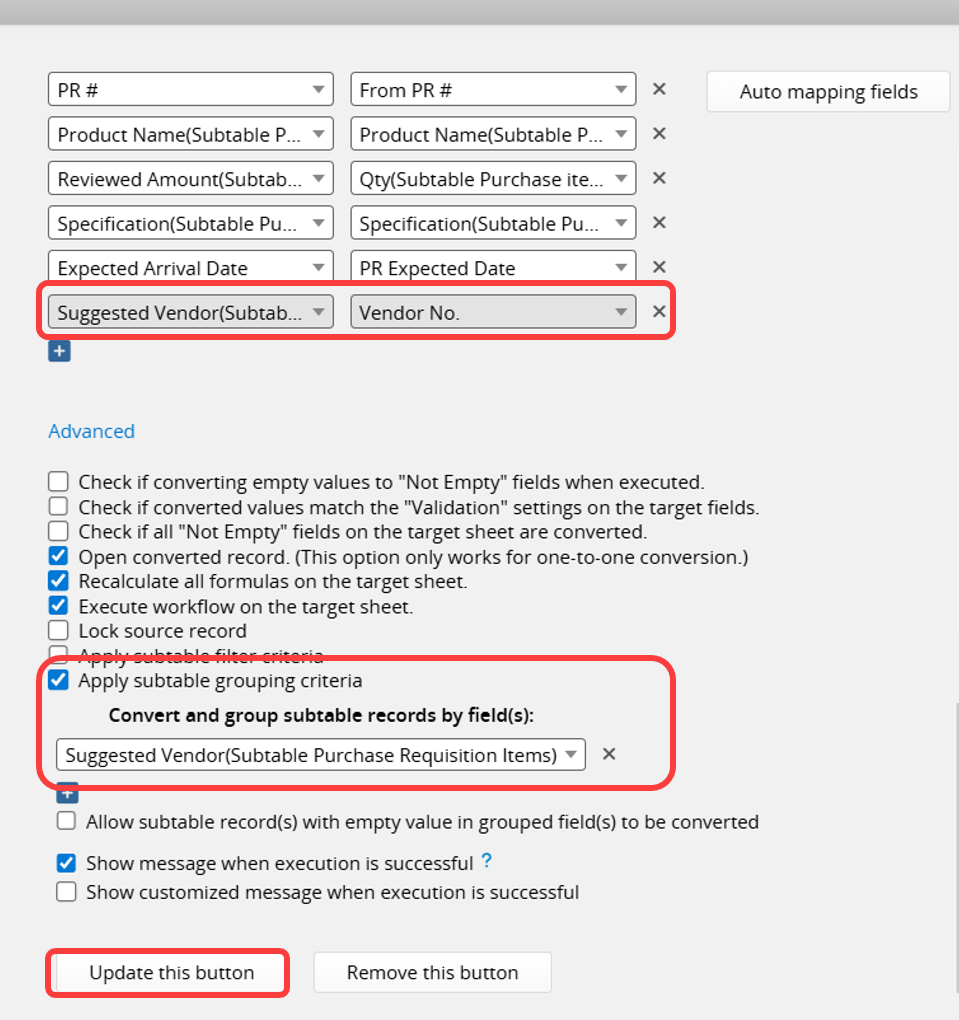
Note: In the template, the "Suggested Vendor" field on the "Purchase Requisition" requires selecting the "Vendor No.", so it must be mapped to "Vendor No." rather than "Vendor Name". Once the "Vendor No. " is converted, the existing Linked and Loaded fields on the "Purchase Order" will automatically populate the vendor name, contact details, and other related information.
 Thank you for your valuable feedback!
