Interested in making your Machine Maintenance Logs more efficient? Consider integrating QR codes into your Ragic Machine Management System.
This automation can enhance your factory management workflow, saving time and ensuring data accuracy. Here are the steps to add barcodes to your Machine Management System:
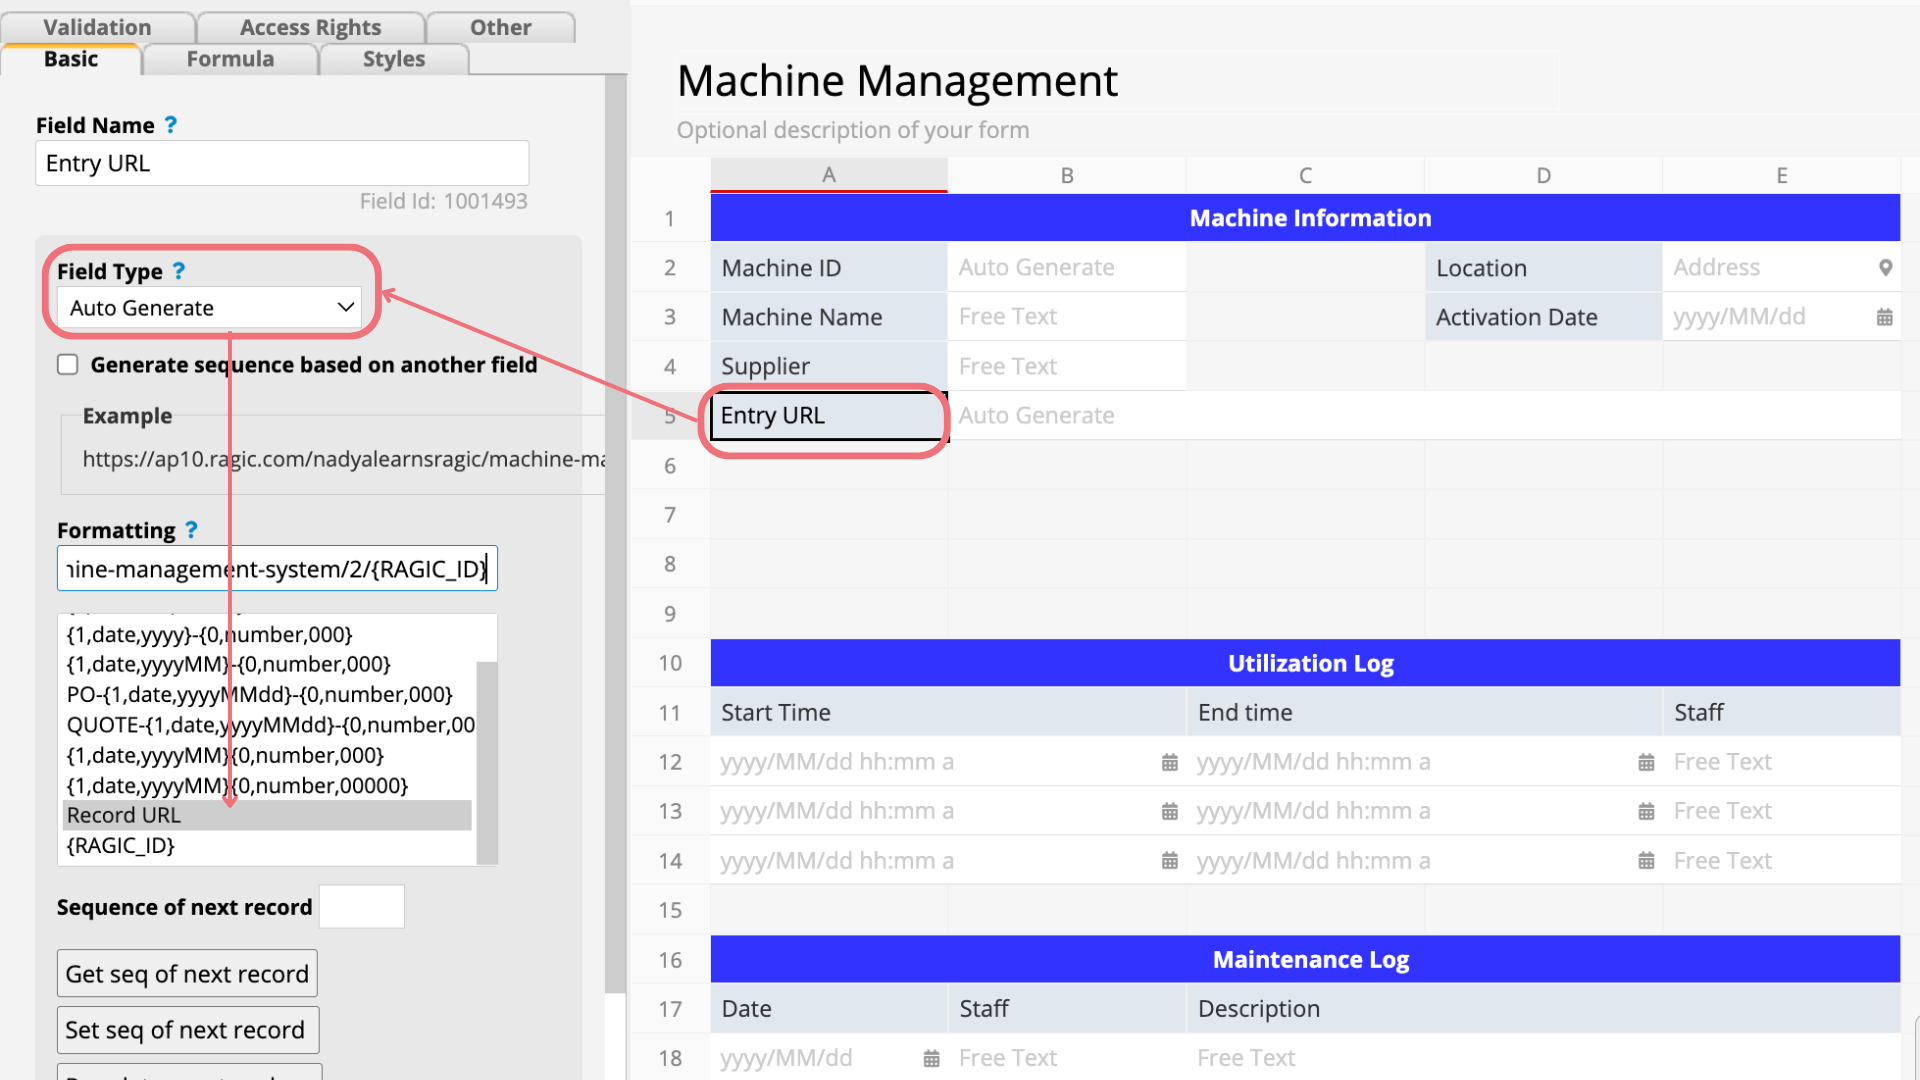
Let's say, in this case, we are trying to access the "Machine Management" Sheet when scanning the barcode. To do this, create a field in this sheet to generate the URL for the corresponding record automatically.
If necessary, you can choose to hide this field.
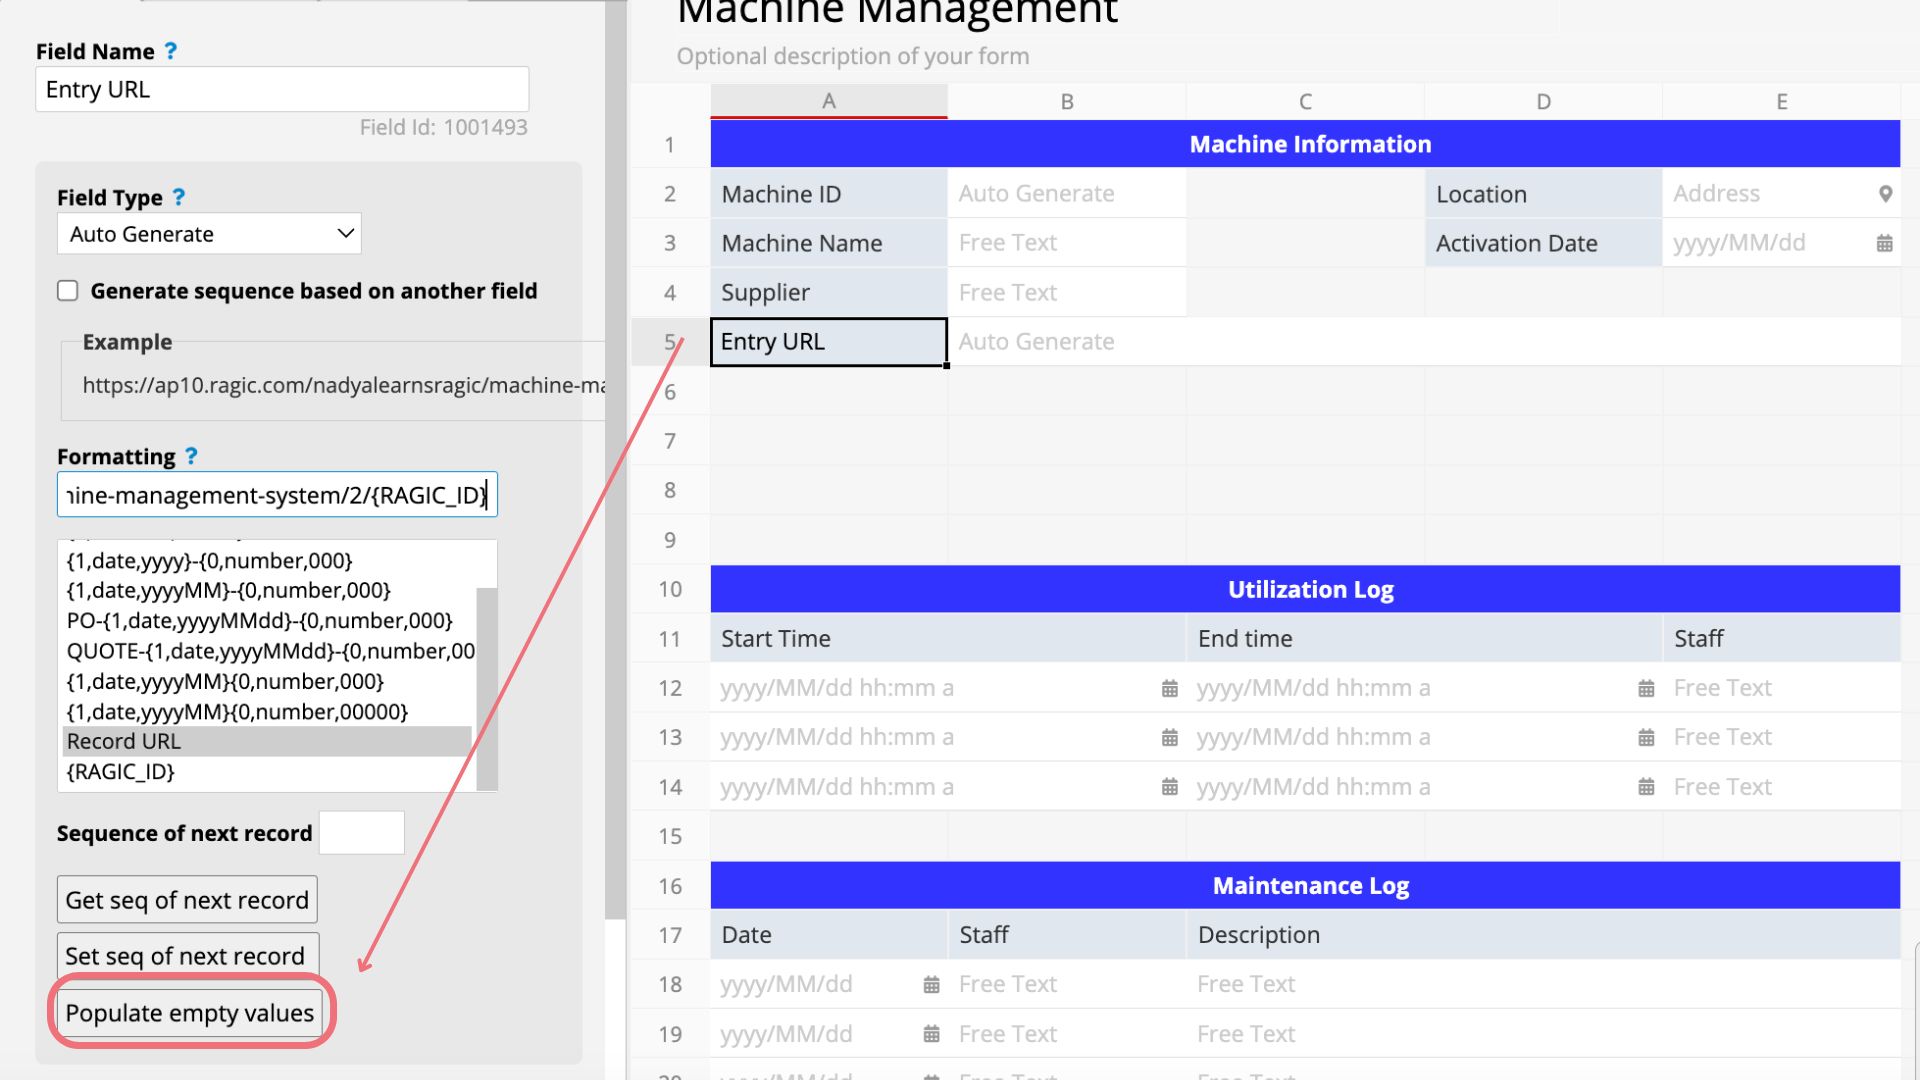
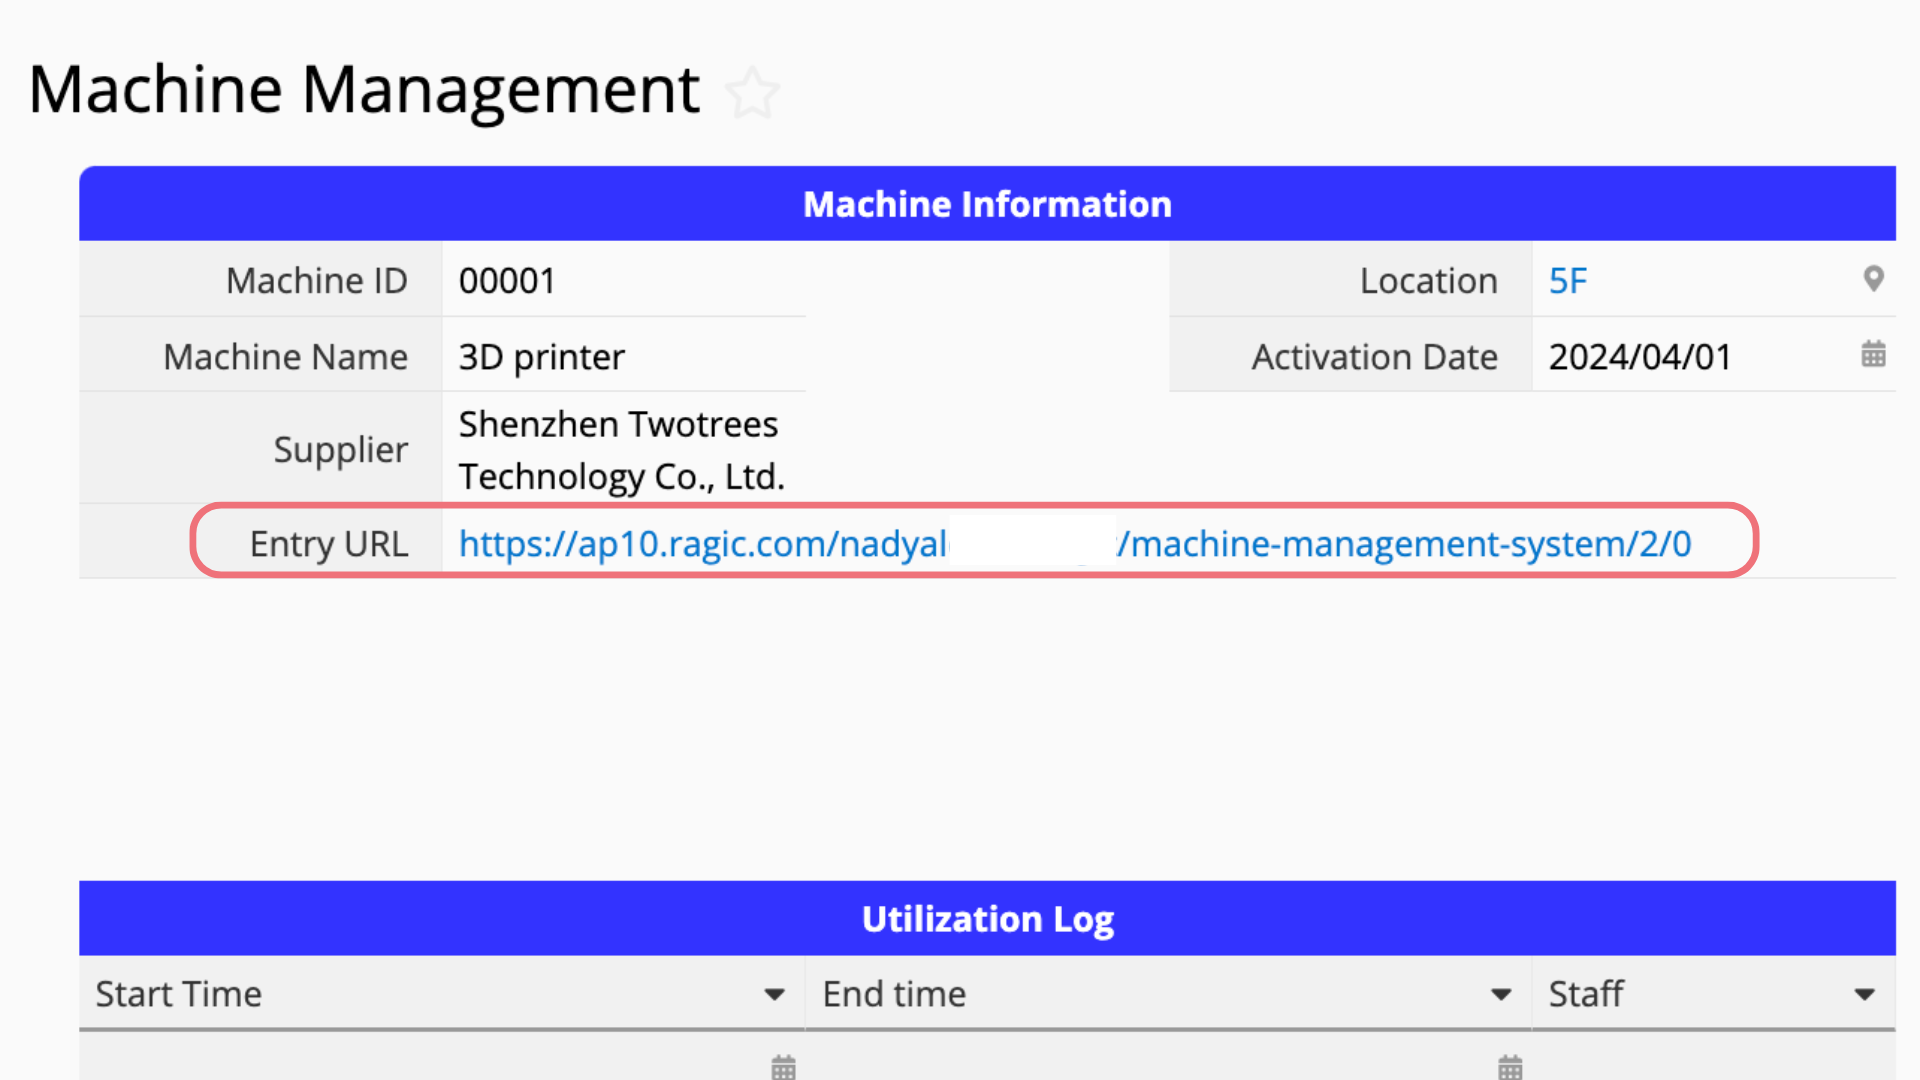
After executing the Populate empty values command, if you return to the sheet, you'll notice that the field is automatically filled in with the URL link.
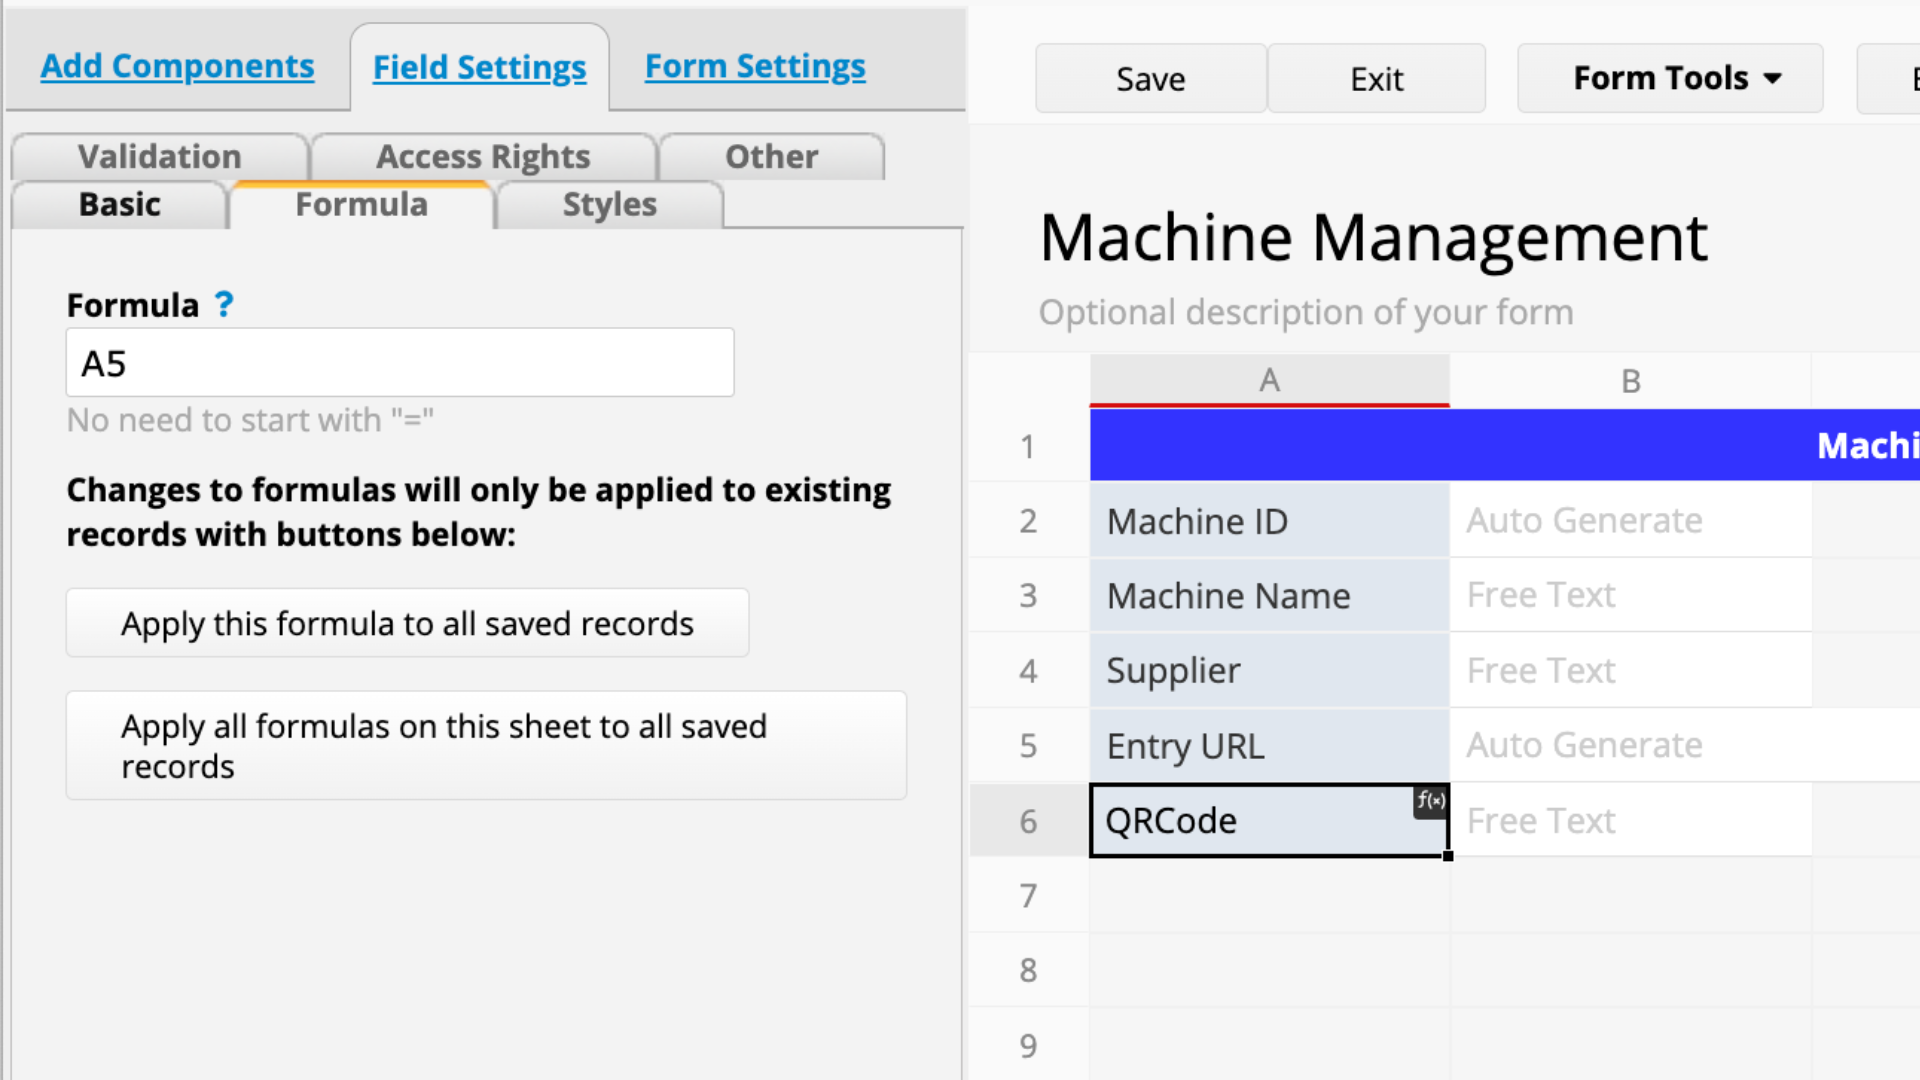
Create a Barcode field and select QR Code as the barcode type. Then, apply the formula to refer back to the entry URL, in this case, "A5".
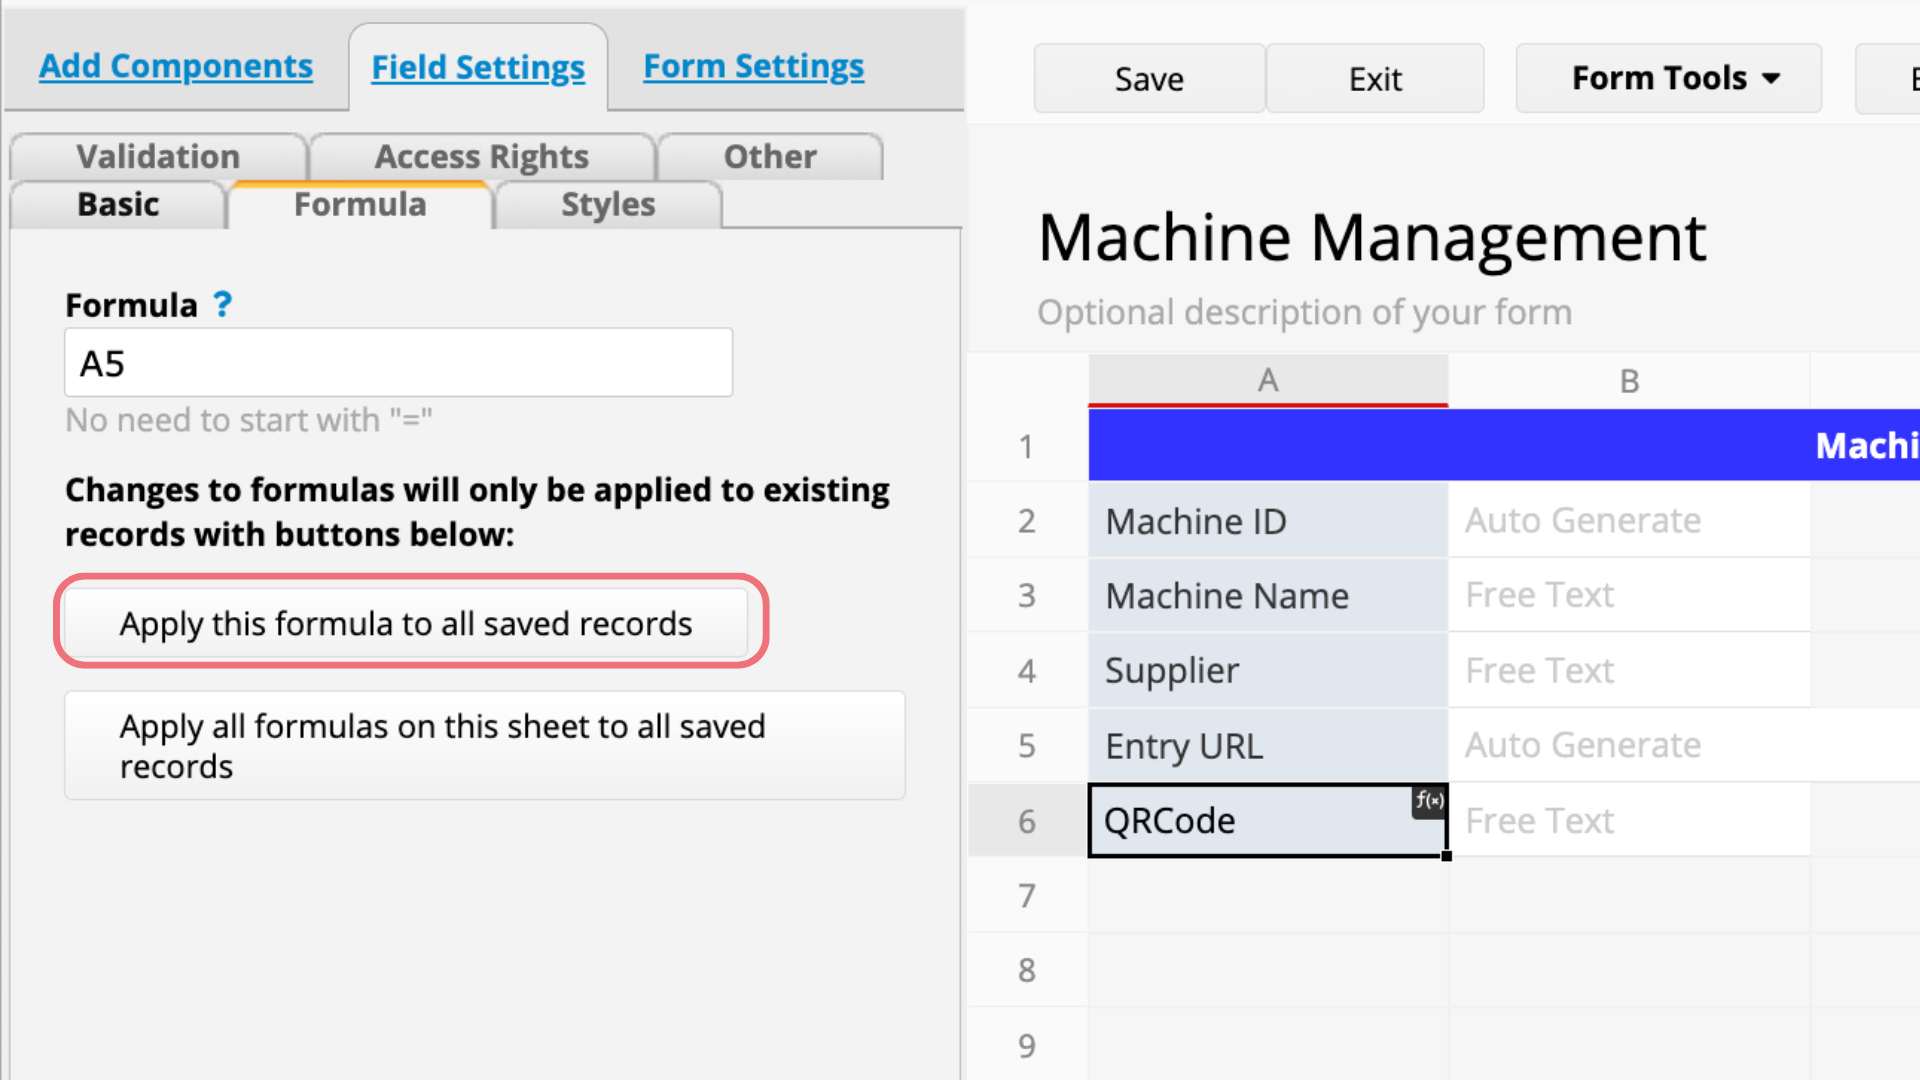
Once this formula recalculation is completed, when you return to the sheet, you will see that the QR code is populated in the Barcode field.
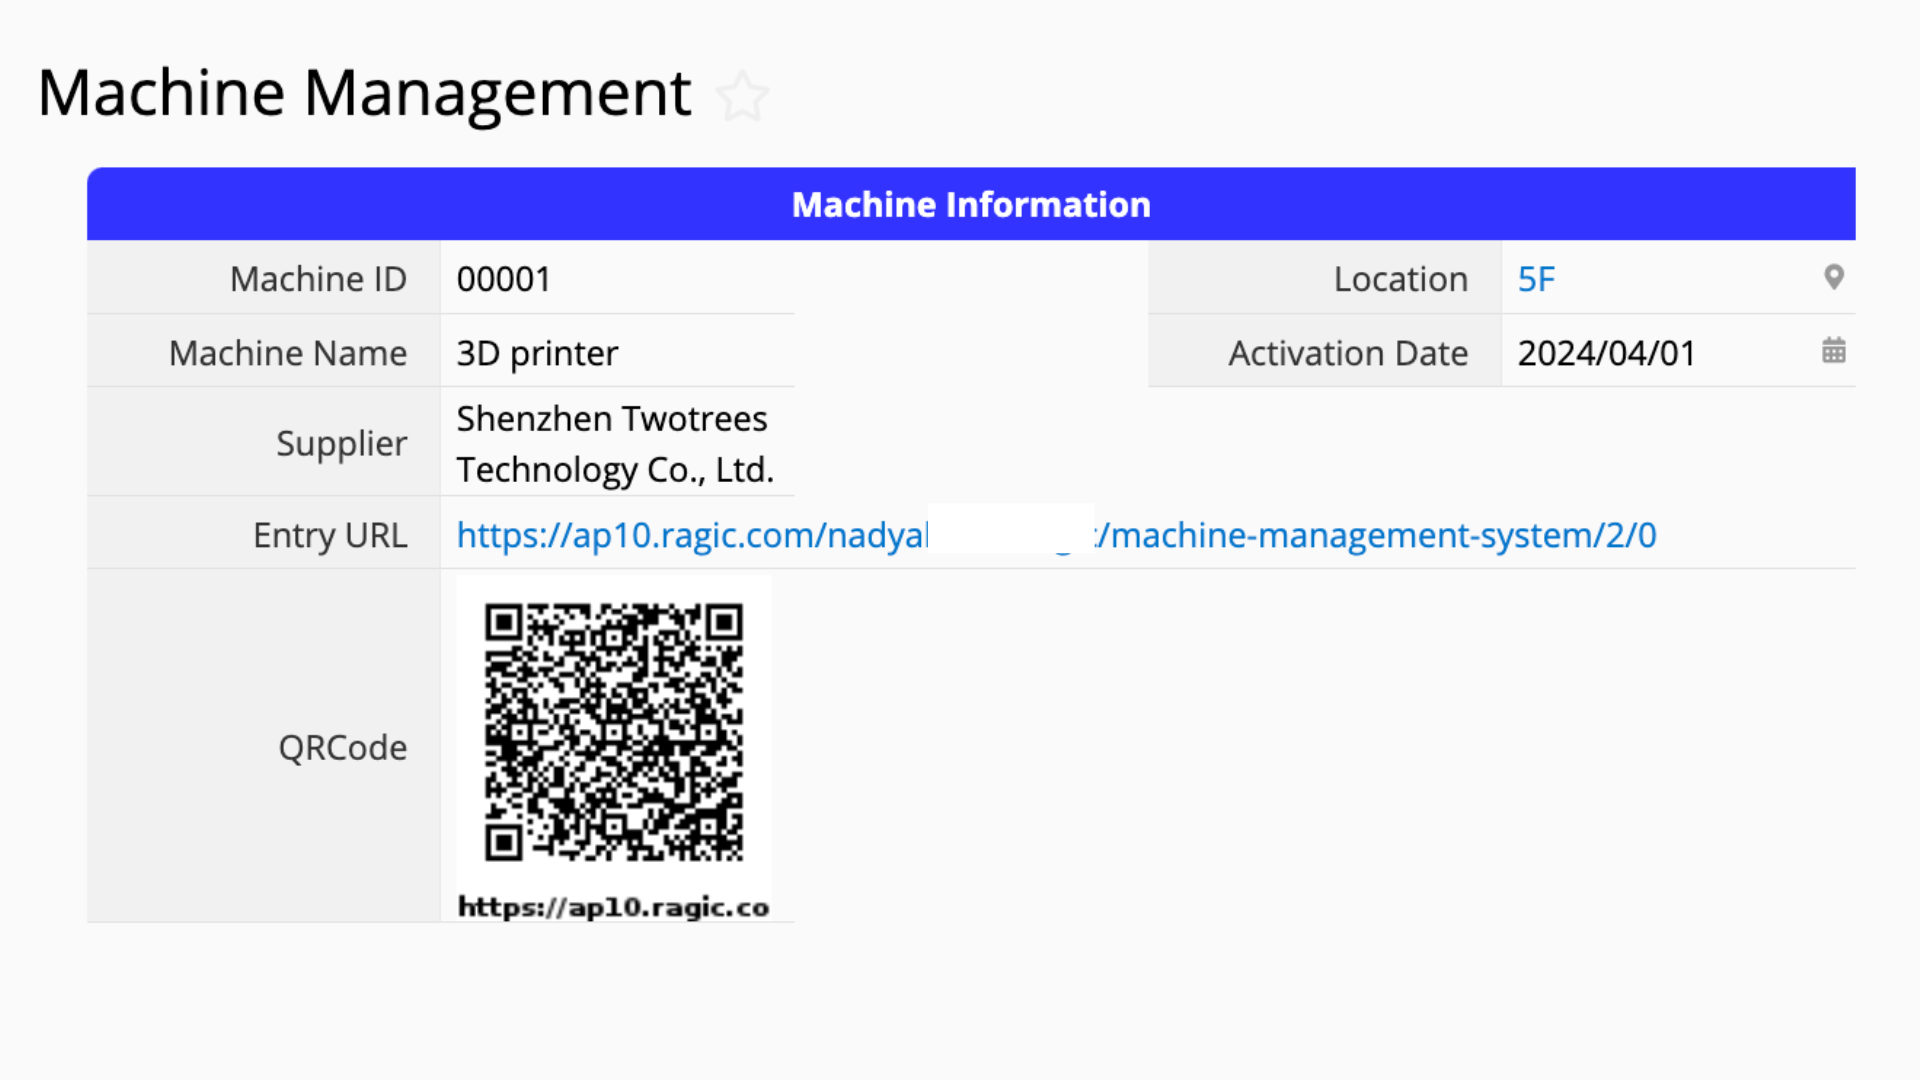
You can try scanning this QR code with your phone. Ideally, you will be directed straight to the sheet.
Configure the appropriate Access Rights for this sheet. For instance, if you want all users, including those without a Ragic account, to be able to scan the QR code and view this entry, grant the EVERYONE group Viewer rights. This scenario typically applies to sheets that can be accessed publicly, such as book records or product production records.
In the case when you are worried about data privacy and want specific groups, such as field staff, to be the only ones with access after scanning the QR code, you can learn more about how to set different levels of access rights in the above documentation.
After completing the above steps, you can use the Label Maker to print QR codes and attach them to the machines. When someone scans the QR code, they can easily access the relevant machine information.
The same concept can be applied to various applications. For instance, scanning the QR code of a book in the library can track its rental record, and scanning the QR code of a product at an exhibition can provide information about the product. While digitally handling workflows with sheets represents the initial step of digitalization, implementing advanced applications such as QR codes can significantly enhance efficiency and maximize the benefits of digitalization.
 Thank you for your valuable feedback!
