After entering a sheet from the homepage, the first screen displayed is the listing page. At the top, a frequently used toolbar is available for switching the display modes, and for filtering and sorting records. In the upper-right corner, the options menu offers more advanced features.
To add a new entry, simply tap the “+” icon in the bottom-right corner.
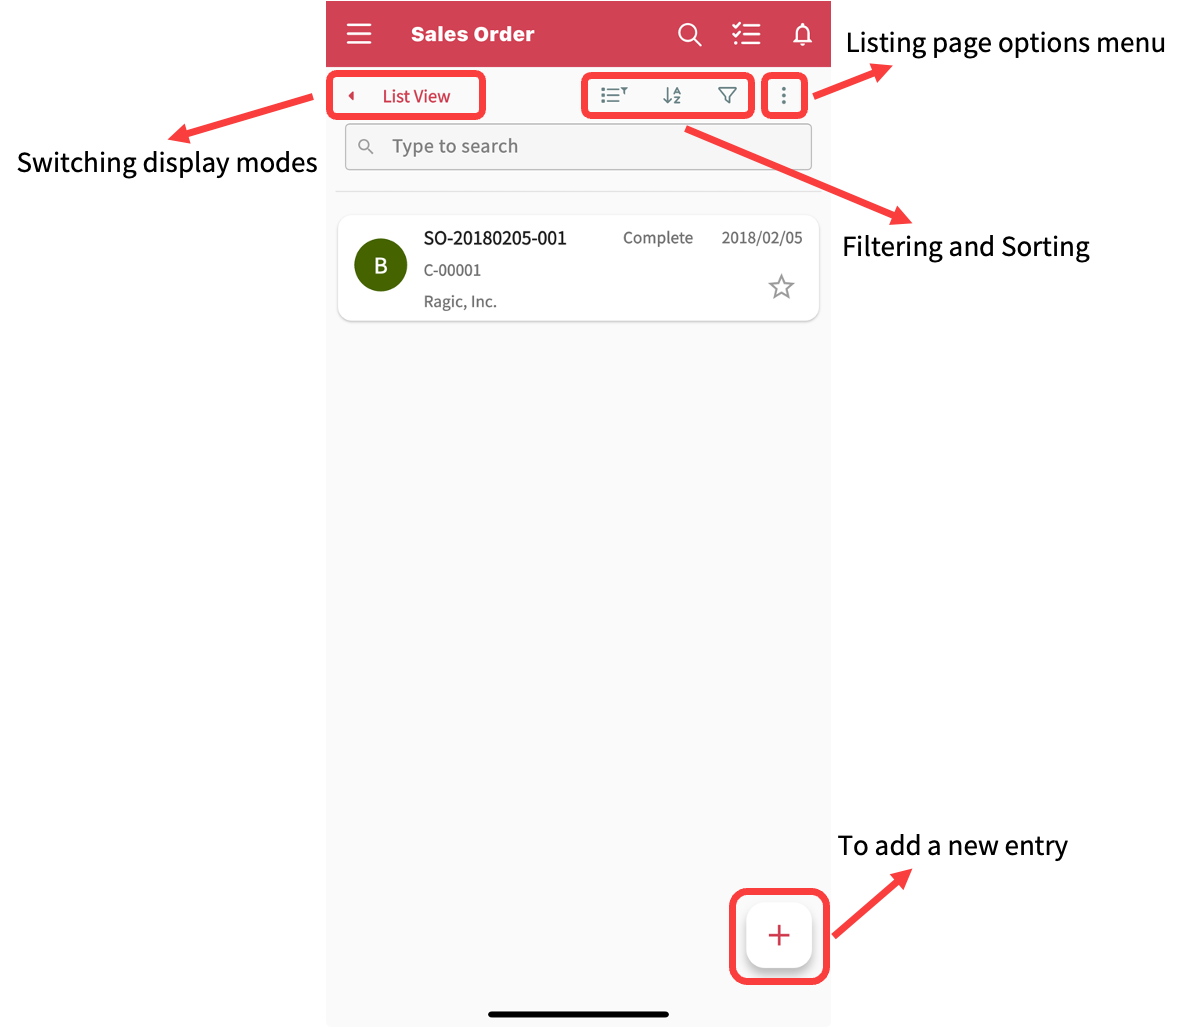
There are three available display modes for viewing data in the app: List View, Table View, and Grid View. You can switch between them using the icon in the top-left corner.
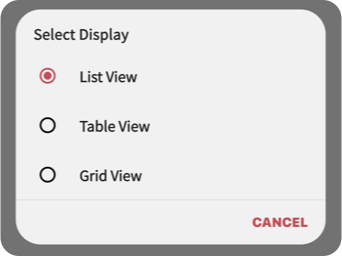
The default mode is List View. To change the default mode, go to the Options Menu in the top-right corner and select Change Design.
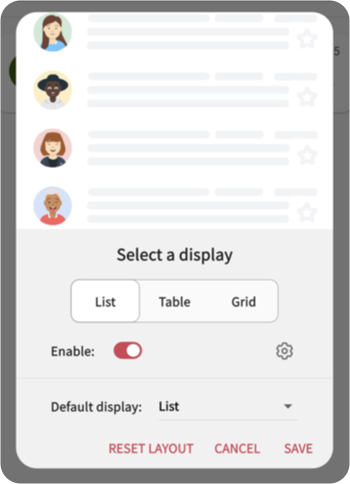
Please note: if Conditional Formatting is applied on the listing page, it will only be visible in Table View.
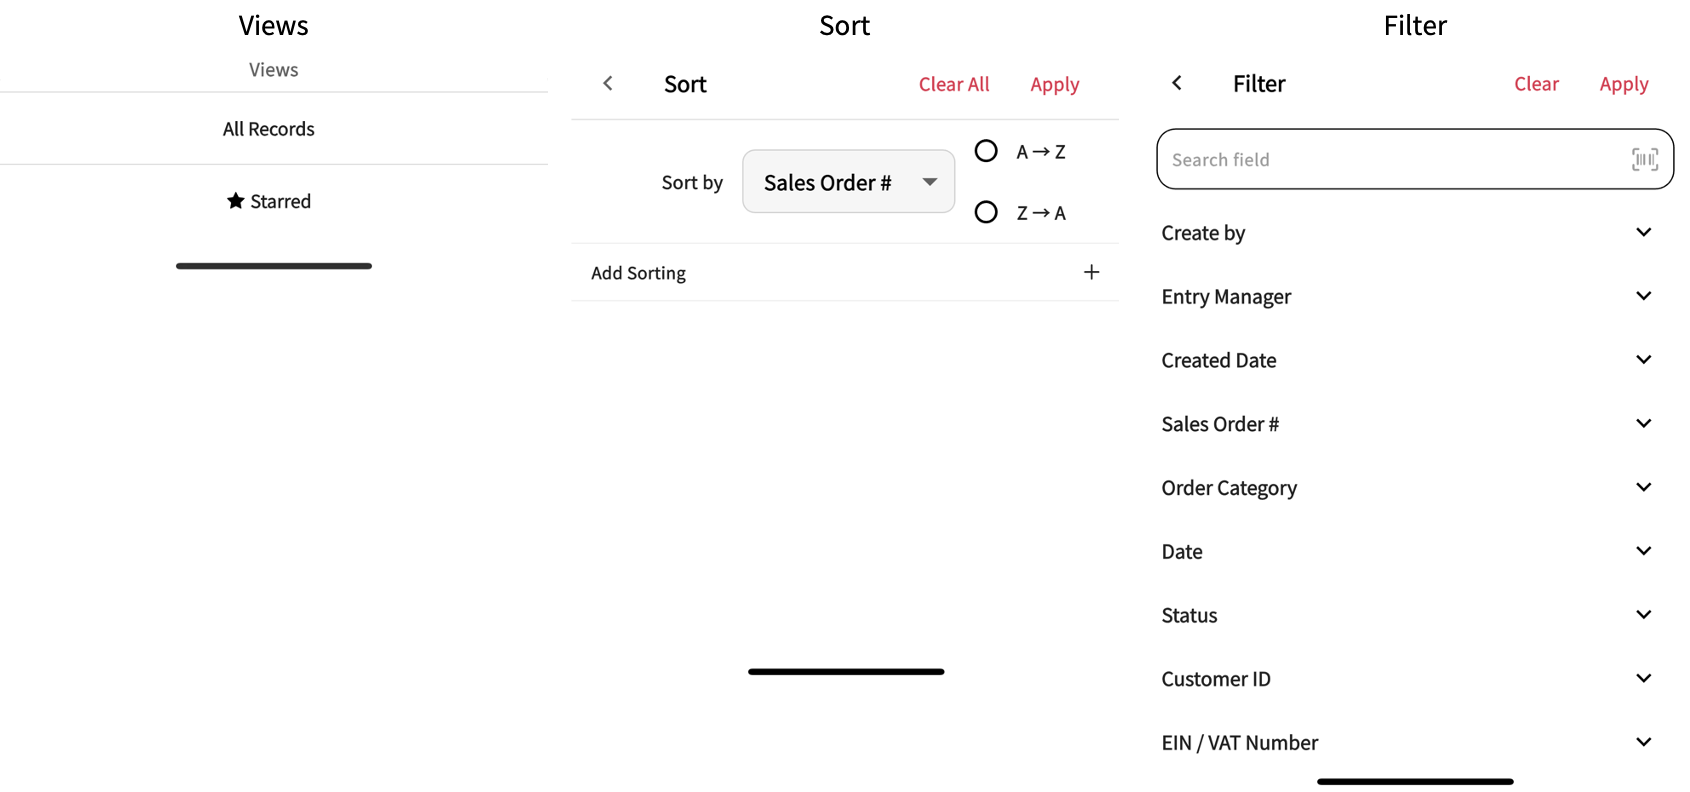
You can either apply pre-configured filters created in the web version, or set up custom filters and sort conditions directly within the app.
However, please note that any filter or sort settings configured in the app are temporary and cannot be saved for future use.
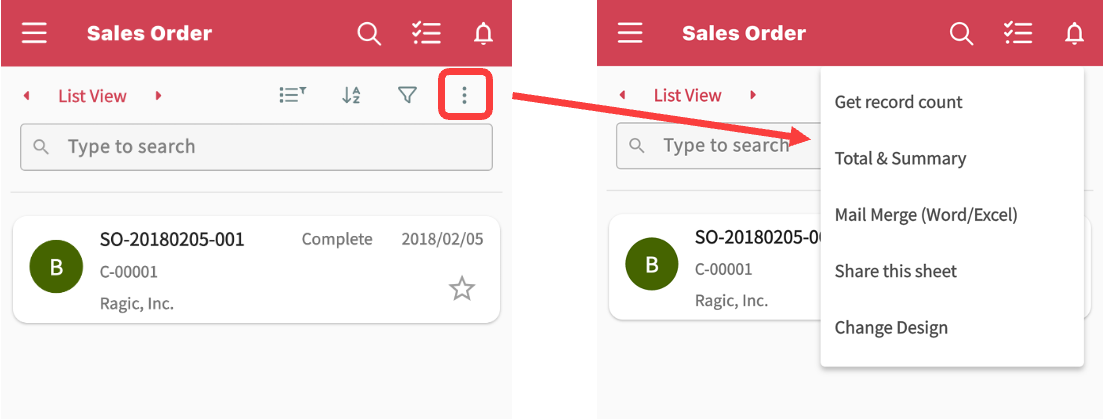
Tap the options menu in the top-right corner to access the following functions:
・Get record count
・Total & Summary
・Share this sheet
・Change Design
The Mail Merge feature requires prior configuration in the web version before it can be used in the app.
For Share this sheet, you can either generate a QR code to share, or copy the URL and send it to others—provided they have Access Rights to the sheet.