
Free Inventory System for Small Business: Track Stock In & Out, Low Stock Alert, No Coding, No VBA

Looking for a simple inventory system for your small business?
You’ve probably tried Excel. Maybe it worked at first. But now you want something more powerful. You want your inventory to update automatically when stock moves, without needing to write complex formulas or mess with VBA.
You’ve also looked at other software. But it’s either too expensive, too complicated, or packed with features you don’t really need.
You just want something simple. Something better than Excel, but still easy to use.
Because you know how important inventory management is. When done right, it can help you:
1. Avoid stockouts and overstocking
2. Control your inventory costs
3. Keep operations running smoothly
When your inventory is under control, everything else like sales, purchasing, even customer support also runs smoother.
If this looks like your ideal inventory management system:
1. Easy to build and maintain, with no coding
2. Reduces manual data entry
3. Lets you track SKUs and stock levels in real time
4. Alerts you when stock is running low
5. Supports barcode scanning (optional of course)
6. Generates useful reports (optional)
7. Scales with your business
You might wanna stick around. In this article, I’ll walk you through how to build a basic inventory management system using just three sheets in Ragic:
1. Inventory — shows your product details and current stock
2. Inbound— records new stock coming in
3. Outbound— logs products being sold or used
What is Ragic?
Ragic is a no-code database builder that works like a spreadsheet but with a lot more power. You can automate stock updates, pull related data from other sheets, and build exactly what you need using a familiar, spreadsheet style interface.
There’s a free version of Ragic to get you started. No credit card required.
Before we start the setup, here’s what your inventory system will look like once it’s built: https://ap14.ragic.com/Showcase/-3-/1.
Feel free to play around—add some entries, create inbound or outbound records, and get a feel for how it all works!
Now, let’s walk through the setup together.
Step 1: Design the Inventory Sheet
(If you’re new to Ragic, this quick guide (and the video inside) will help you get a feel for how building fields works. It’s simple, but a quick look at the interface might make things click faster.)
- ● Set up fields like:
1. 'Product ID': You can set this as an Auto Generated Field, with customized format as you want.
2. 'Product Name'
3. 'Category' (use Selection Field that will show up like a dropdown menu for faster input)
4. 'Image'
5. 'Current Quantity'
6. 'Minimum Stock'
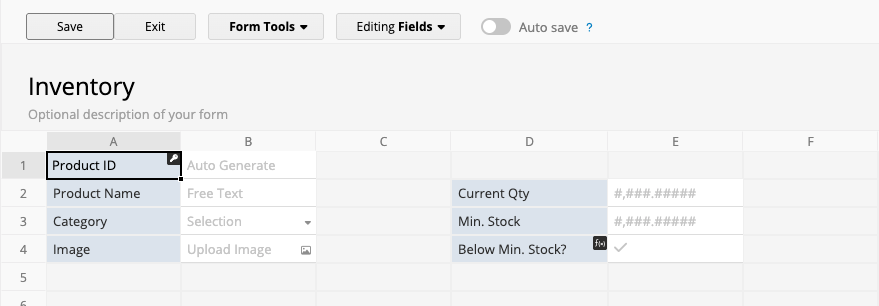
- ● Save the design.
Once your fields are set up, you can start adding your products through the form page—it’ll look something like this:
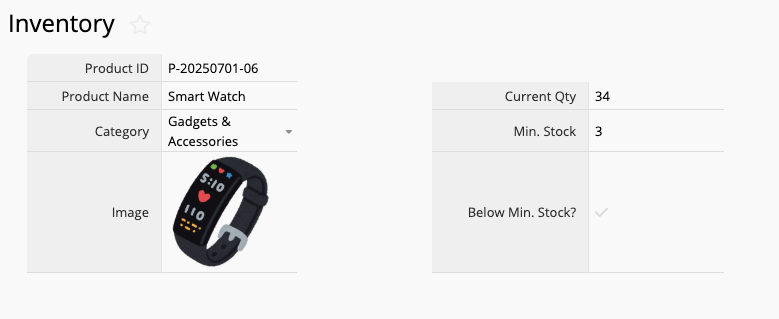
Already have a product list you can easily import? You can do so, no copy pasting required.
Here’s how your entries will show up on the listing page: one row per product, just like a spreadsheet.
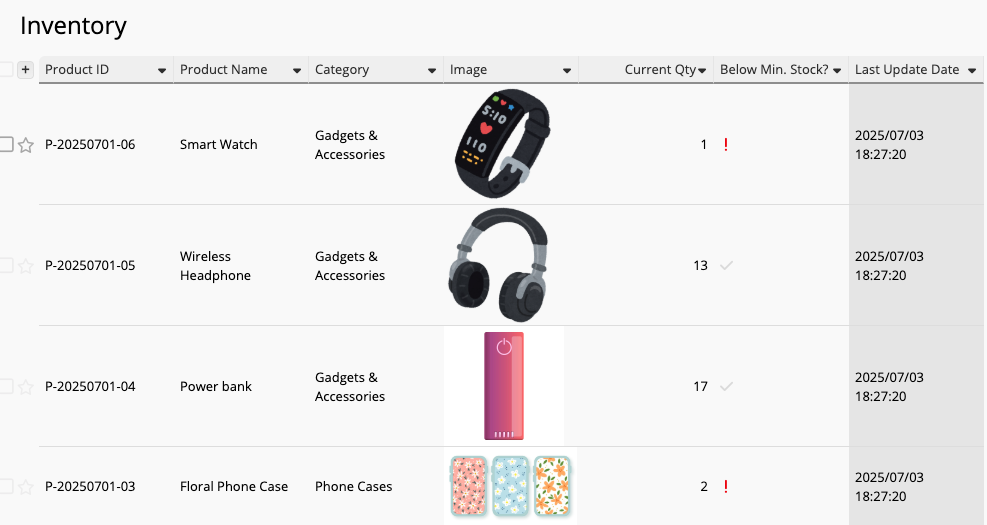
Click on any product to open the form page and view its full details.
Step 2: Build the Outbound and Inbound Sheets
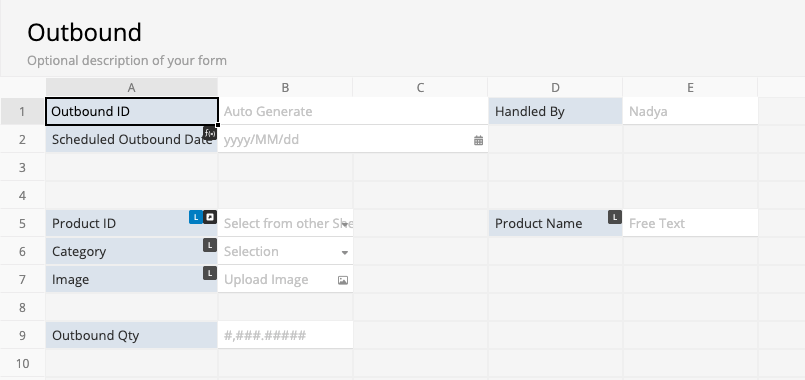
This relationship between two sheets setup is as easy as connecting dots between two fields, no VBA, no complex scripting.

You can repeat the same steps to build your Inbound sheet.
Step 3: Automate Stock Count Updates in One Click
To achieve that, we’ll add an action button in your Outbound sheet that automatically deducts stock from the Inventory sheet whenever you record a new outbound item.
Here’s how:
- ● In your Outbound sheet, Go to Form Tools and choose Update value on another sheet action button.
- ● Set the Inventory sheet as the target.
- ● Select 'Outbound Quantity' as the value to deduct.
- ● Set the operation to minus (-).
- ● Select 'Current Quantity' in the Inventory sheet as the field to update.
- ● Add a condition so that the stock is only deducted when 'Product ID' in the Outbound sheet matches 'Product ID' in the Inventory sheet.

Once done, name your action button (e.g. "Deduct Stock").
You’ll now see the 'Deduct Stock' button and a 'Reverse Deduct Stock' (You can rename the button if you want) button appear in the lower-right corner of your form.
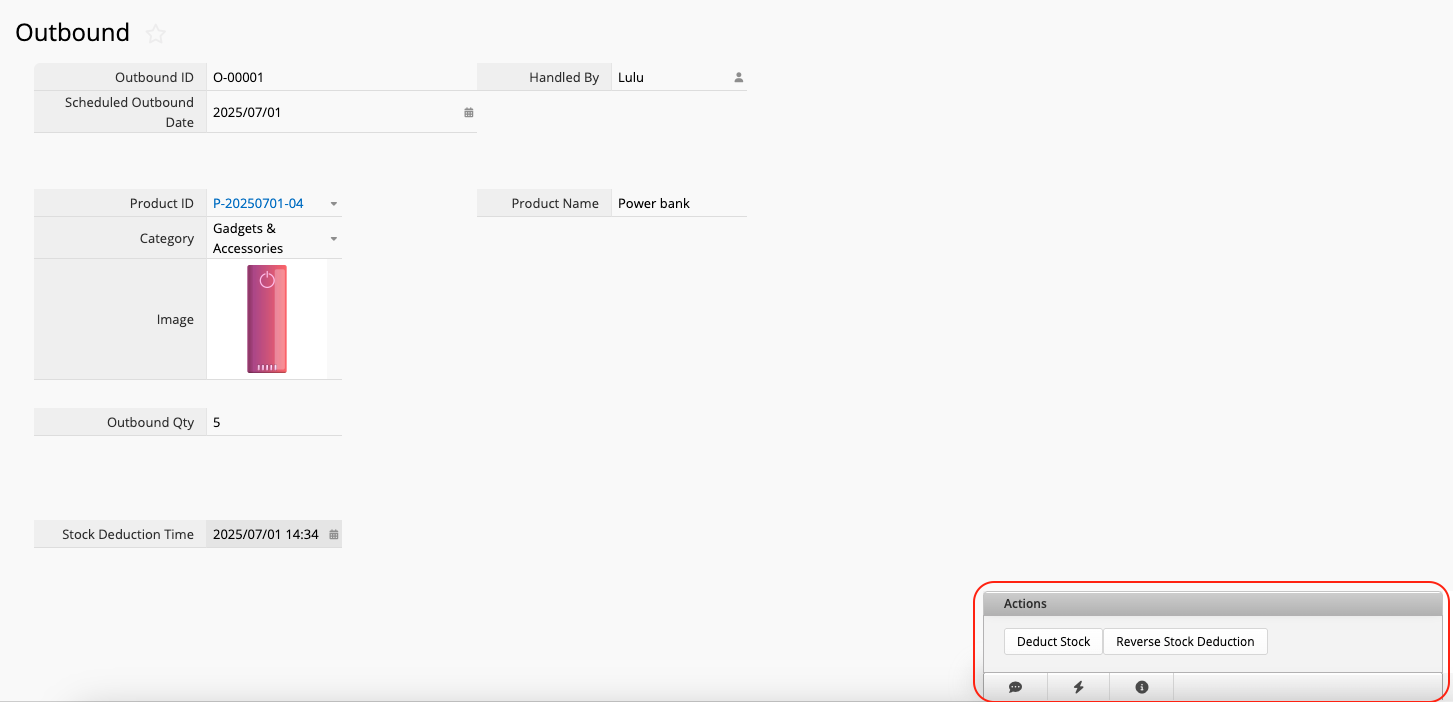
Let’s try it out to see how it works.
- ● Create a new outbound record.
- ● Select the product and quantity.
- ● Click Save.
- ● Hit the 'Deduct Stock' button.
Boom—stock updated.

The 'Stock Deduction Time' field will auto-fill with the exact time you clicked the button, and if you check your Inventory sheet, you’ll see that the quantity has been adjusted accordingly.
You can repeat the same step on the Inbound sheet to automate stock addition, just remember to change the operation to + instead of - !
Step 4: How to Track Stock In and Out For Every Product
Let’s make it easier to track stock movement by showing outbound and inbound records directly within each product in your Inventory sheet.
Since we already linked the Inventory and Outbound sheets, we can now create another relationship using the feature Show references from existing sheets.
Here’s how:
- ● Go to the Design Mode of Inventory sheet
- ● Choose Form Tools > Show references from existing sheet.
- ● Select the Outbound sheet and choose the fields you'd like to display—such as 'Outbound Date', 'Quantity', etc.
- ● Insert the subtable, then Save and Exit Design Mode.
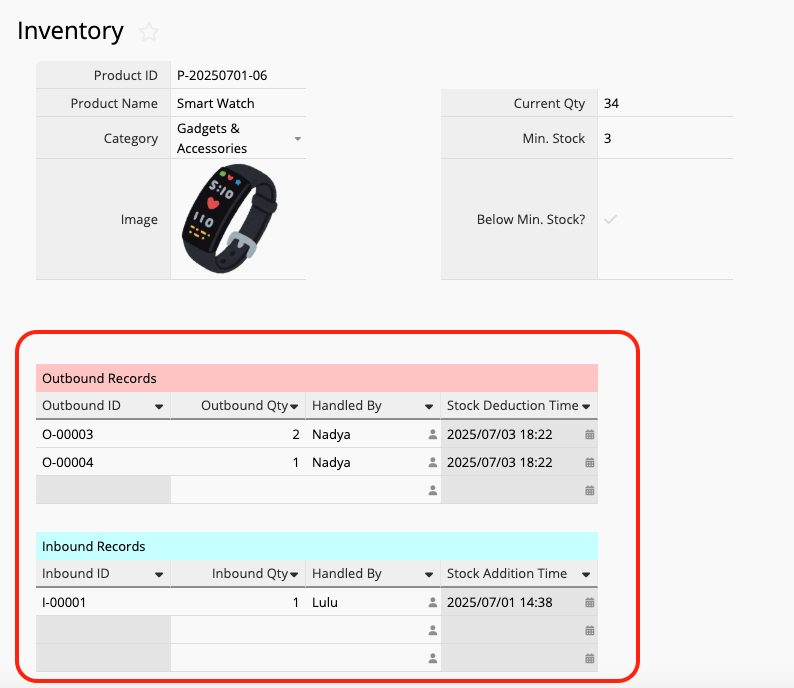
That’s it! Now, when you open a product record in the Inventory sheet, you’ll see a subtable listing all its outbound transactions right below the product details—giving you a clear overview of where your stock is going, and you can do the same for the inbound transactions.
Step 5: Set Up Low-Stock Alerts
Lastly, here's a quick tip if you want to visually flag low-stock items in your Inventory sheet.
You can do it with a simple IF formula.
- ● Add a new field—say, 'Below Min. Stock?'— and set the field type to Checkbox.
- ● Then use this formula: IF(D3 > D2, 'Important', 'No')
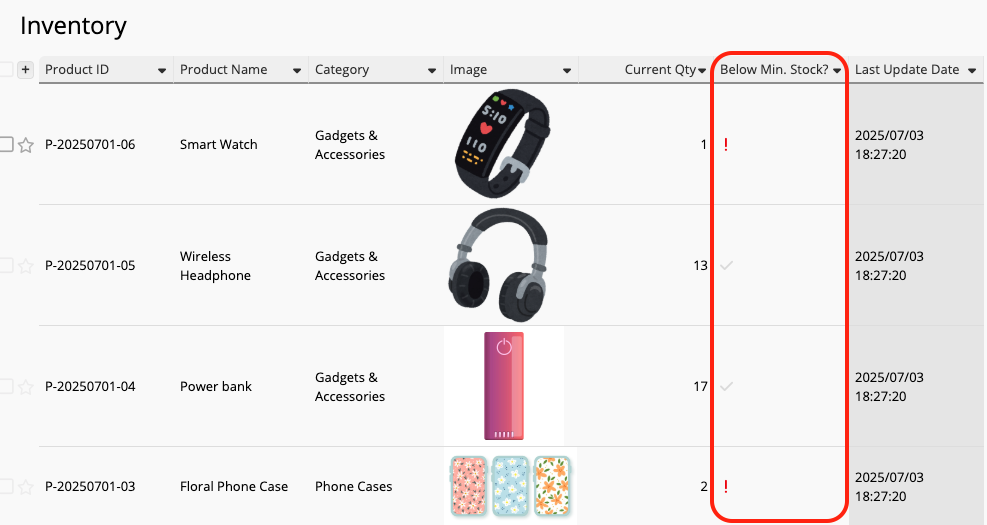
This means: if the 'Minimum Stock' (D3) is greater than the 'Current Stock' (D2), it’ll return “Important”, which triggers the warning icon. Otherwise, it returns “No.”
Save the design, hit Recalculate Formulas, and exit Design Mode.
Now, whenever a product is running low, you’ll be able to spot it right away.
If you want to take it a step further and have the system automatically remind you when an item is low on stock, check out our tutorial on: “Set Up Low Stock Alerts.”
Your Inventory Management Can Do More
Once you've finished the setup, you've got a solid inventory management system in place with Ragic! One that got automation, but wouldn’t break due to complex formula, wouldn’t show you #ERROR easily.
Want to take it a step further? Here are some helpful tutorials to expand your setup:
1. Inventory management with barcode
Use barcodes to track your products faster and more accurately:
Inventory template with barcode
How to manage products with barcode in Ragic
More about using barcodes in Ragic
2. Use it on the go with the Ragic Mobile App
Once you’ve finished designing your system, you can take it anywhere with the Ragic Mobile App (something that would be very painful to do on a spreadsheet ;) ).
Scan barcodes, tap 'Add Stock' or 'Deduct Stock', and update things on the spot, right from your phone.
This feature has been beneficial for many of our users, letting them make updates directly in the warehouse, instead of scribbling on paper in the warehouse and updating it later when you're finally back at the office.
3. Inventory reporting features
See stock trends, movement history, and more with built-in reports:
4. Prefer a ready-to-use template?
Skip the setup and start with our prebuilt template for managing inventory across multiple locations:
Not a fan of reading? Watch the tutorial here instead:
Category: Applications > Use Cases

